Disassembly and Assembly
| caution | When disassemble, always use the remover tool that is made of plastic to prevent damage to the parts. |
OUTSIDE SEAT CUSHION FINISHER OUTER (POWER SEAT)
DISASSEMBLY
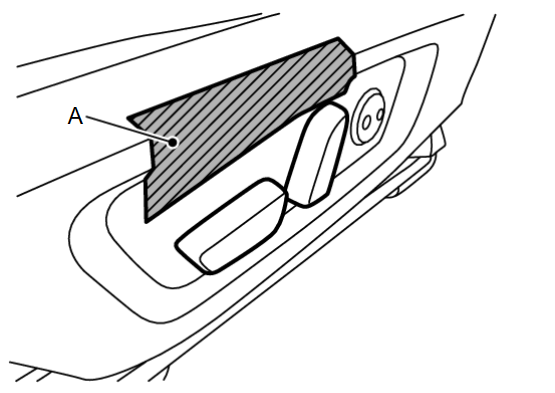
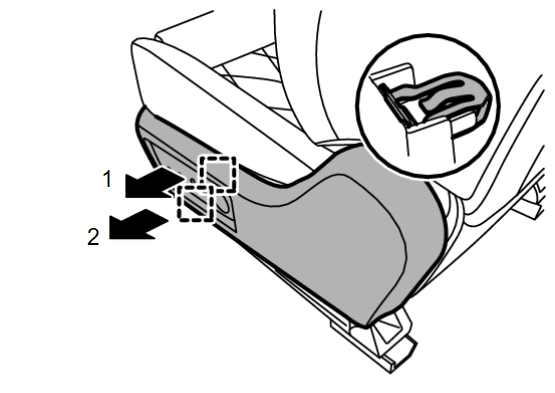
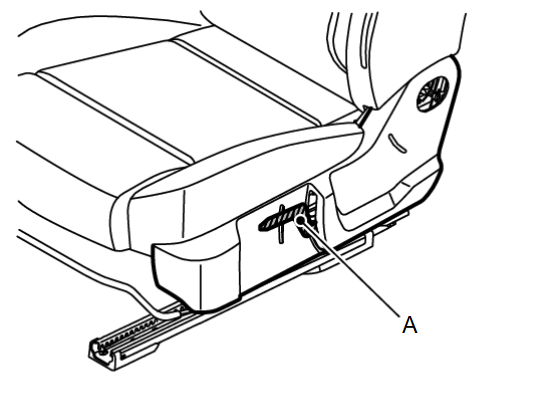
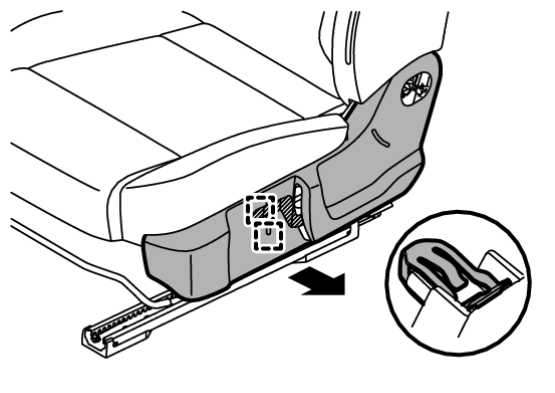
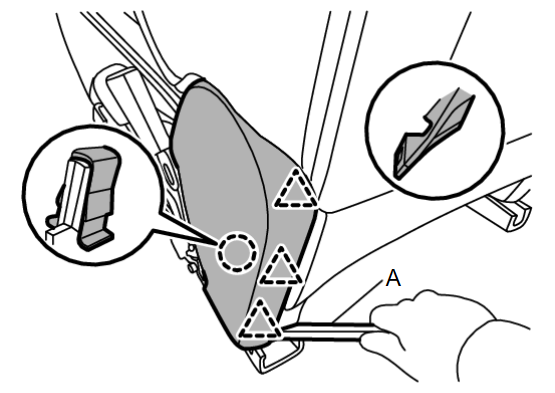
2. Disengage fixing pawls using a remover tool (A) according to numerical order 1→2 indicated by arrows, and then remove slide knob.
 | : Pawl |
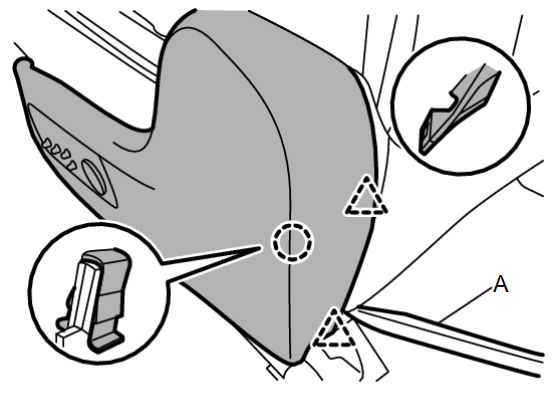
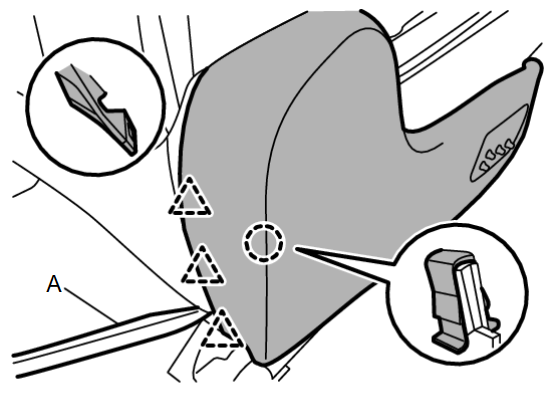
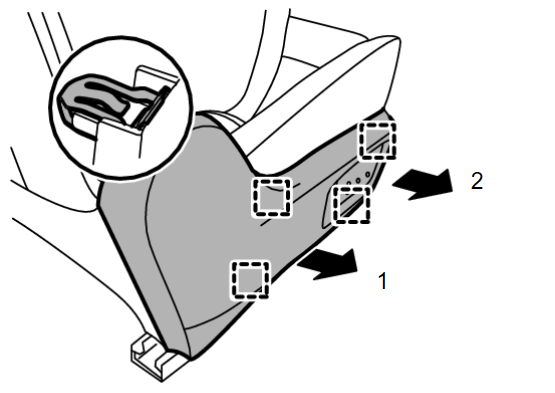
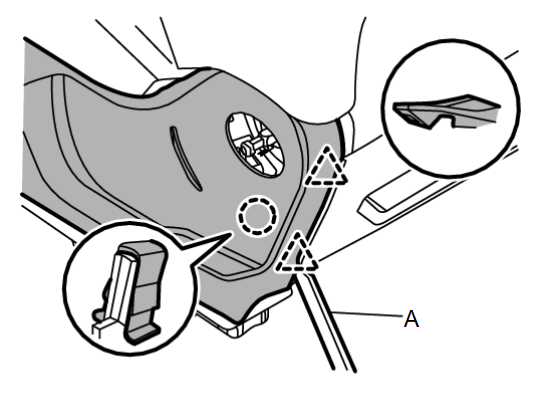
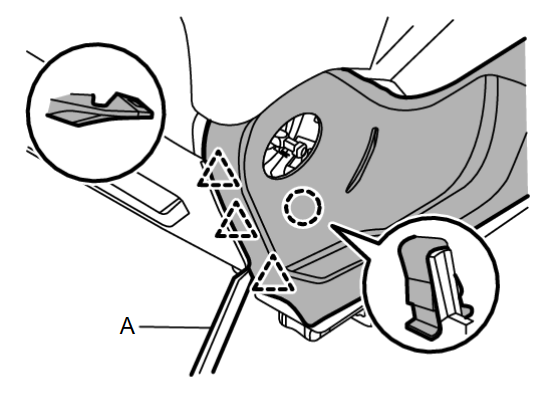
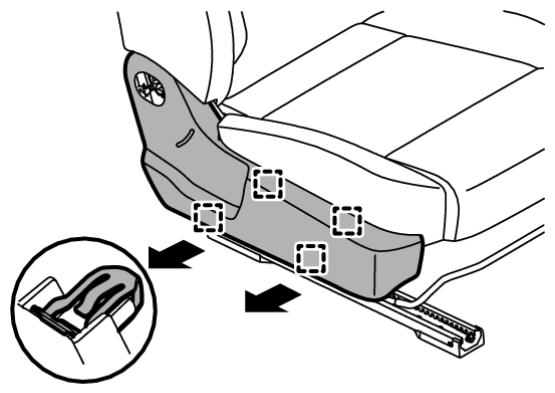
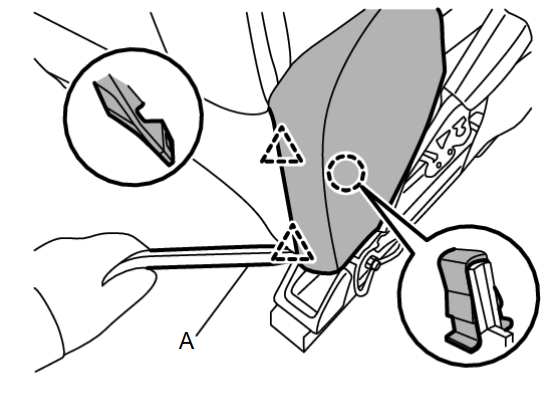
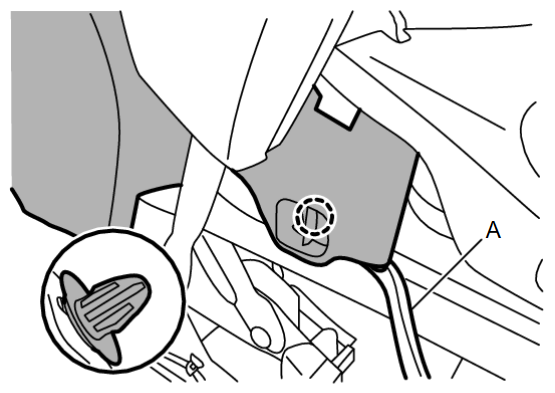
4. Disengage fixing pawls and clip of rear side using a remover tool (A).
6. Disengage fixing metal clips according to numerical order 1→2 indicated by arrow as shown in figure.
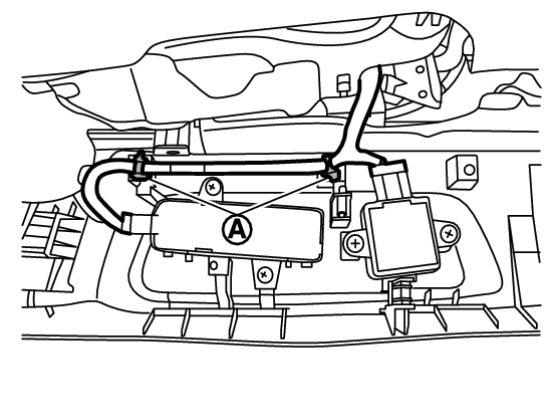
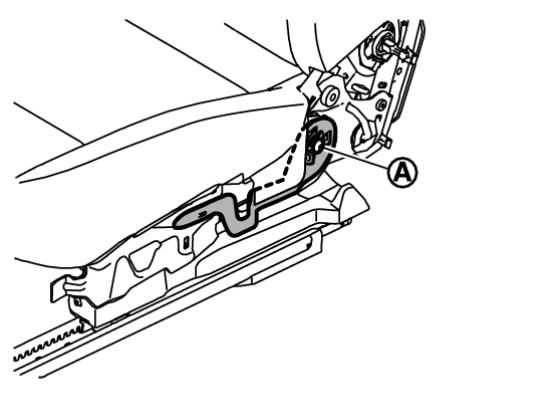
7. Disengage outside seat cushion finisher outer fixing guide  of seat cushion finisher bracket
  direction arrow as shown in figure (driver seat).
 of seat cushion finisher bracket
  direction arrow as shown in figure (driver seat).
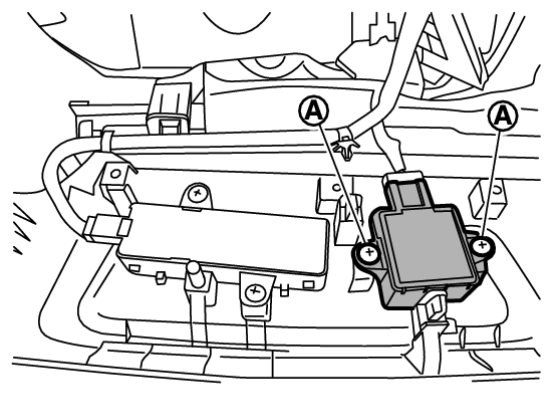
9. Remove fixing screws  , and then remove lumber support switch from outside seat cushion finisher outer (driver seat).
 , and then remove lumber support switch from outside seat cushion finisher outer (driver seat).
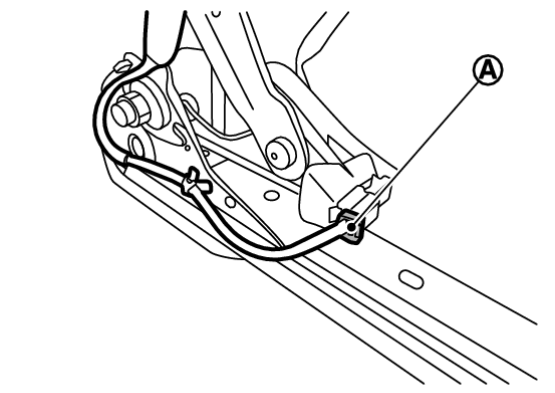
10. Disconnect harness connector, and then remove lumber support switch (driver seat).
11. Remove fixing screws  , and then remove power seat switch from outside seat cushion finisher outer.
 , and then remove power seat switch from outside seat cushion finisher outer.
12. Disconnect harness connector, and then remove power seat switch.
13. Remove outside seat cushion finisher outer.
14. Remove seat cushion silencer. Refer to Disassembly and Assembly .
.
 .
.OUTSIDE SEAT CUSHION FINISHER OUTER (MANUAL SEAT)
DISASSEMBLY
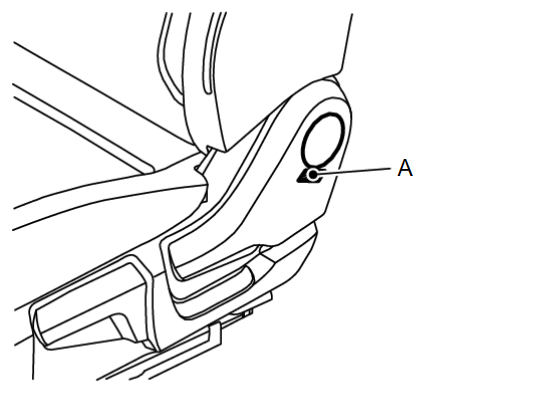
1. Remove reclining knob.
(2) Disengage fixing pawl using a remover tool (A) according to numerical order 1→2 indicated by arrows as shown in figure, and then remove reclining knob cap.
 | : Pawl |
2. Disengage fixing portion area  while pull up by a remover tool (A) according to numerical order 1→2 indicated by arrows as shown in figure, and then remove lifter knob (driver seat).
 while pull up by a remover tool (A) according to numerical order 1→2 indicated by arrows as shown in figure, and then remove lifter knob (driver seat).
3. Remove outside seat cushion finisher outer.
(2) Disengage fixing pawls and metal clip (driver seat) or clip (passenger seat) of rear side using a remover tool (A).
(4) Disengage fixing metal clips direction arrow as shown in figure.
(5) Remove outside seat cushion finisher outer (passenger seat).
5. Remove seat cushion silencer. Refer to Disassembly and Assembly .
.
 .
.OUTSIDE SEAT CUSHION FINISHER LOWER
DISASSEMBLY
1. Fully lift up seat cushion.
2. Remove fixing screws, and then remove outside seat cushion finisher lower.
ASSEMBLY
Assemble is reverse order of disassembly.
OUTSIDE SEAT CUSHION FINISHER INNER
DISASSEMBLY
1. Remove seatback pad and trim as a set. Refer to Disassembly and Assembly .
.
 .
.2. Remove seat cushion pad and trim as a set. Refer to Disassembly and Assembly .
.
 .
.3. Remove fixing screws, and then remove outside seat cushion finisher inner.
ASSEMBLY
Assemble is reverse order of disassemble.
INSIDE SEAT CUSHION FINISHER OUTER
DISASSEMBLY
1. Disengage seat cushion trim fixing clip (passenger seat) and retainer of inside seat cushion outer side. Refer to Disassembly and Assembly .
.
 .
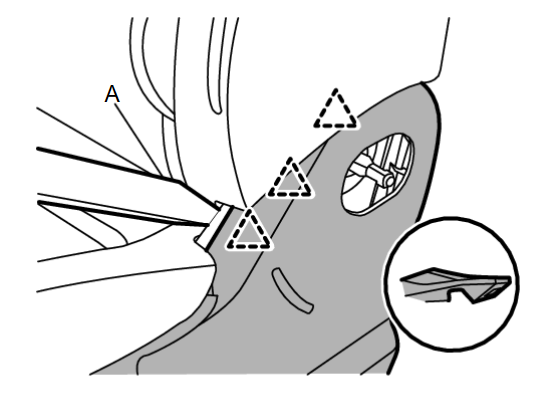
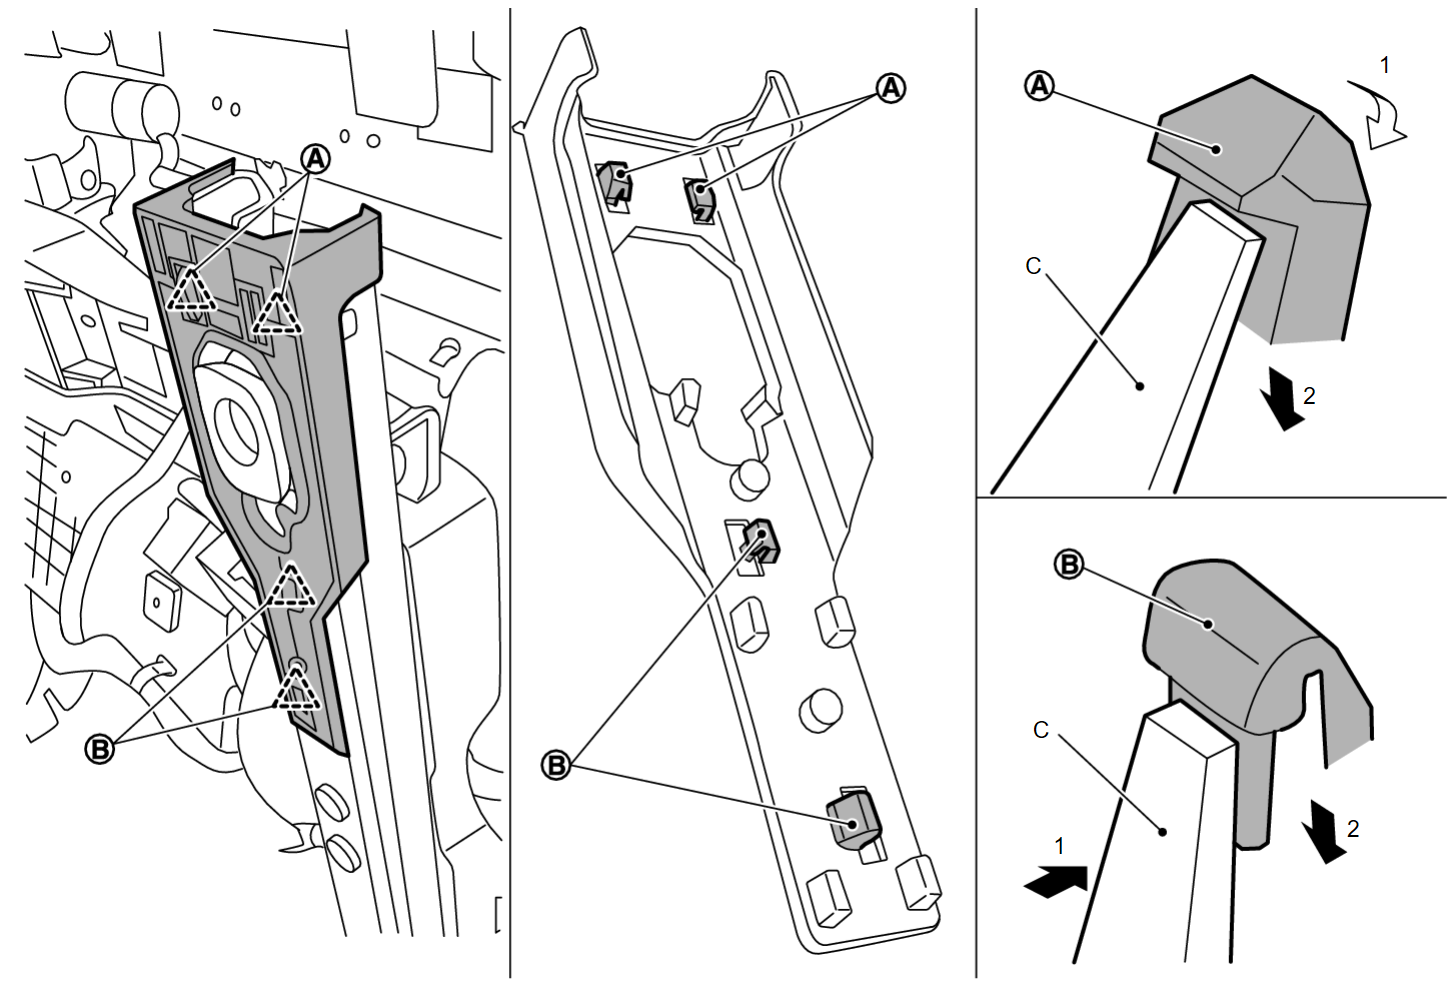
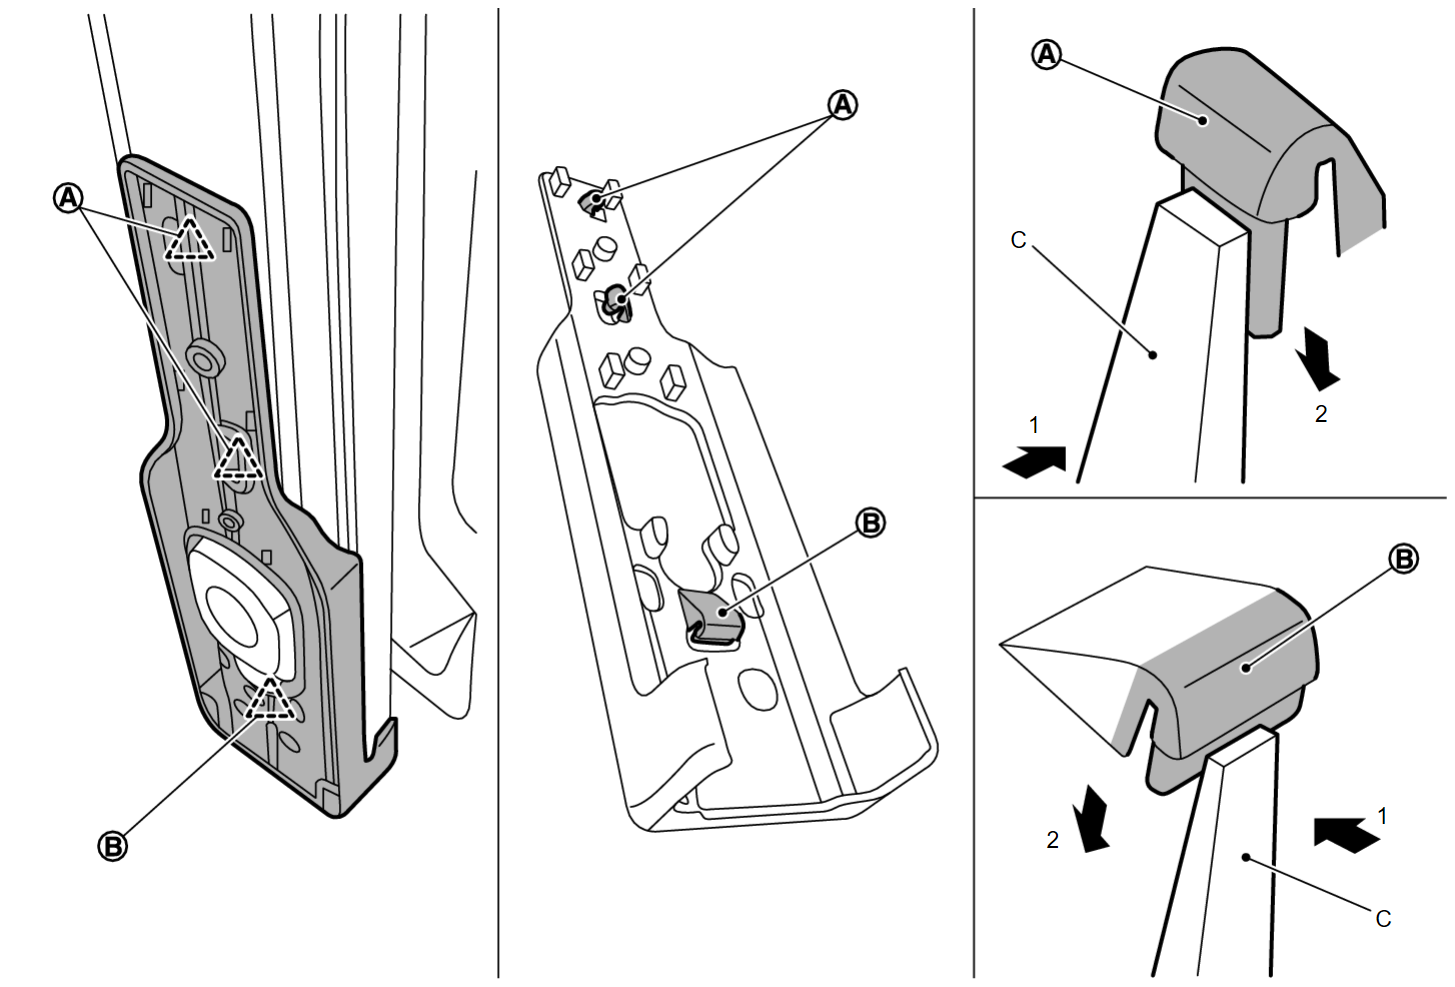
.2. Disengage inside seat cushion finisher outer fixing clip and pawls of rear side using a remover tool (A).
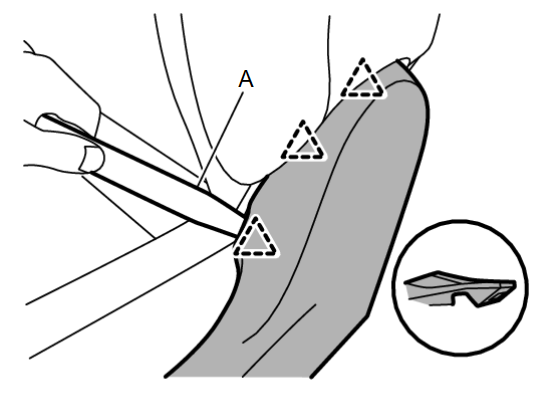
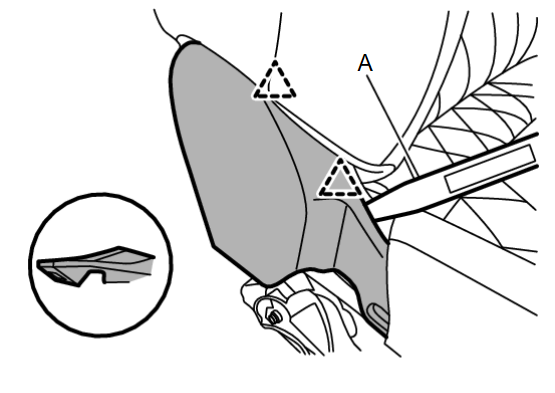
3. Disengage inside seat cushion finisher outer fixing pawls of upper side using a remover tool (A).
 | : Pawl |
ASSEMBLY
Assemble is reverse order of disassemble.
INSIDE SEAT CUSHION FINISHER INNER
DISASSEMBLY
1. Remove seatback trim and pad as a set. Refer to Disassembly and Assembly .
.
 .
.2. Remove seat cushion trim and pad as a set. Refer to Disassembly and Assembly .
.
 .
.3. Remove fixing screws, and then remove inside seat cushion finisher inner.
ASSEMBLY
Assemble is reverse order of disassemble.
INSIDE SEAT CUSHION FINISHER LOWER
DISASSEMBLY
ASSEMBLY
Assemble is reverse order of disassemble.
BRACKET (DRIVE SEAT)
DISASSEMBLY
1. Remove fixing screws, and then remove outside seat cushion finisher lower.
2. Disconnect driver seat control unit harness connector.
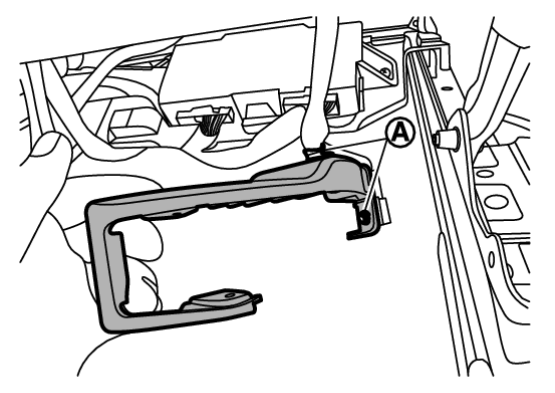
3. Disengage harness and harness connector fixing clips on bracket.
| note | Before perform disengage procedure, check the assembly position. |
4. Remove fixing screws, and then remove bracket.
5. Remove fixing screws, and then remove driver seat control unit (driver seat memory models).
ASSEMBLY
Assemble is reverse order of disassemble.
BRACKET (PASSENGER SEAT)
DISASSEMBLY
1. Remove seat cushion silencer. Refer to Disassembly and Assembly .
.
 .
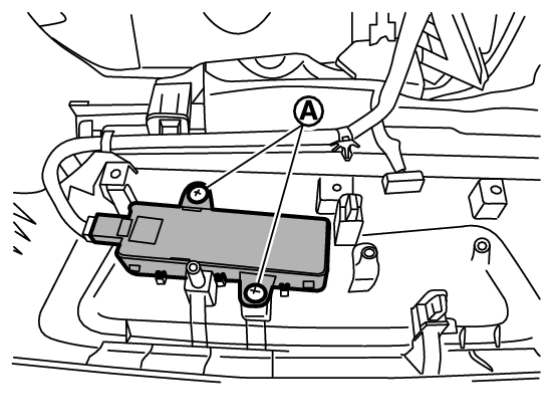
.2. Disconnect occupant detection system control unit harness connector.
3. Disengage harness and harness connectors fixing clips on bracket.
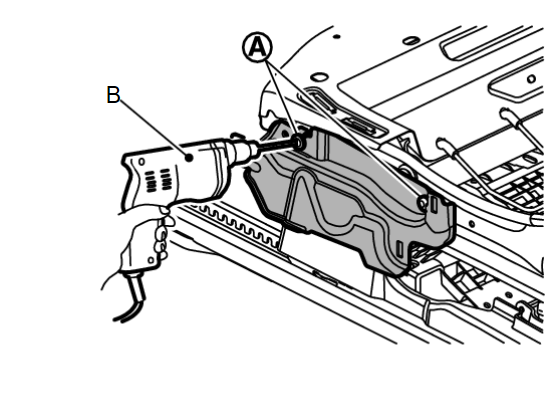
4. Remove bracket mounting screws.
5. Disengage fixing metal clip.
6. Disengage fixing hook, and then remove bracket.
7. Remove fixing screws, and then remove occupant detection system control unit.
ASSEMBLY
Assemble is reverse order of disassemble.
![[Previous]](../../../buttons/fprev.png)
![[Next]](../../../buttons/fnext.png)
