Removal and Installation
REMOVAL
| warning | Never remove the radiator cap when the engine is hot. Serious burns could occur from high pressure engine coolant escaping from the radiator. Wrap a thick cloth around the cap. Slowly turn it a quarter turn to allow built-up pressure to escape. Carefully remove the cap by turning it all the way. |
| caution |
|
| note | When removing components such as hoses, tubes/lines, etc., cap or plug openings to prevent fluid from spilling. |
1. Remove the engine and transaxle assembly. Refer to Removal and Installation .
.
 .
.2. Using paint, put matching marks on the drive plate and torque converter when removing the torque converter and drive plate fixing nuts.
INSTALLATION
Note the following, and install in the reverse order of removal.
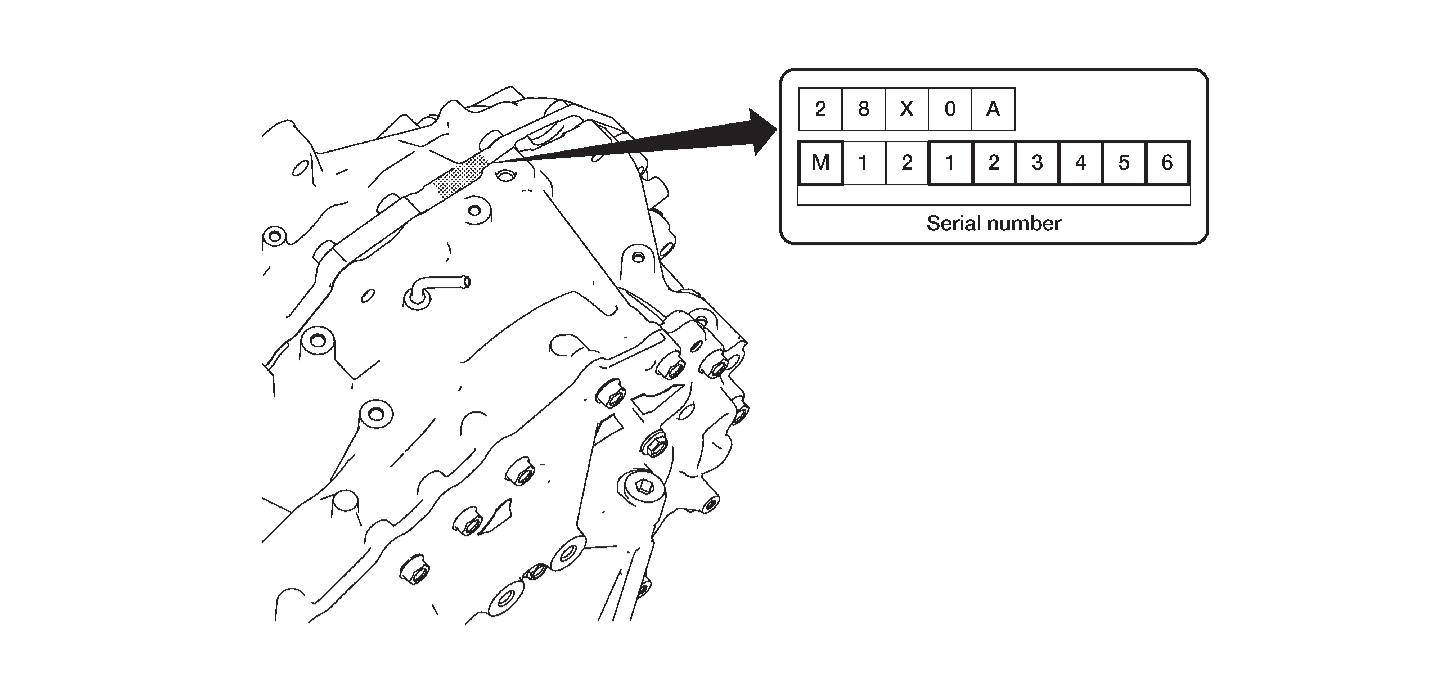
| note | Write down the serial number of the new transaxle assembly. |
| caution |
|
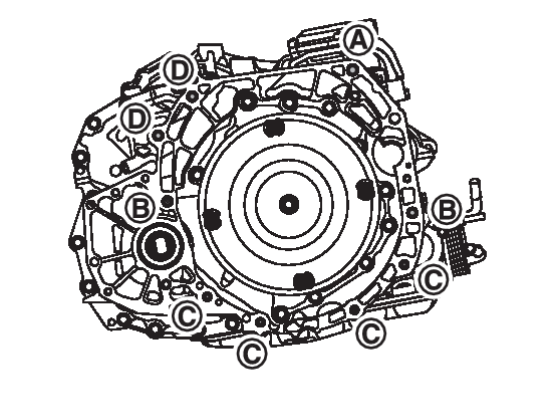
When installing CVT assembly to the engine assembly, tighten the nut and bolts in the sequence shown.
| Bolt No. |  |  |  |  |
| Insertion direction | Transaxle to engine | Engine to transaxle | ||
| Number of bolts | 1 | 2 | 4 | 2 |
| Bolt length mm (in) | 45 (1.77) | 45 (1.77) | 35 (1.38) | 80 (3.15) |
| Tightening torque N·m (kg-m, ft-lb) | 62 (6.3, 46) | 62 (6.3, 46) | 44 (4.5, 32) | 62 (6.3, 46) |
| caution | Never reuse bolt  . . |
- When installing the drive plate to torque converter nuts, tighten them temporarily, then tighten the nuts to the specified torque.
- Perform "ADDITIONAL SERVICE WHEN REPLACING TRANSAXLE ASSEMBLY". Refer to Description
 .
.
![[Previous]](../../../buttons/fprev.png)
![[Next]](../../../buttons/fnext.png)

