DISASSEMBLY AND ASSEMBLY
Required Special Tool:
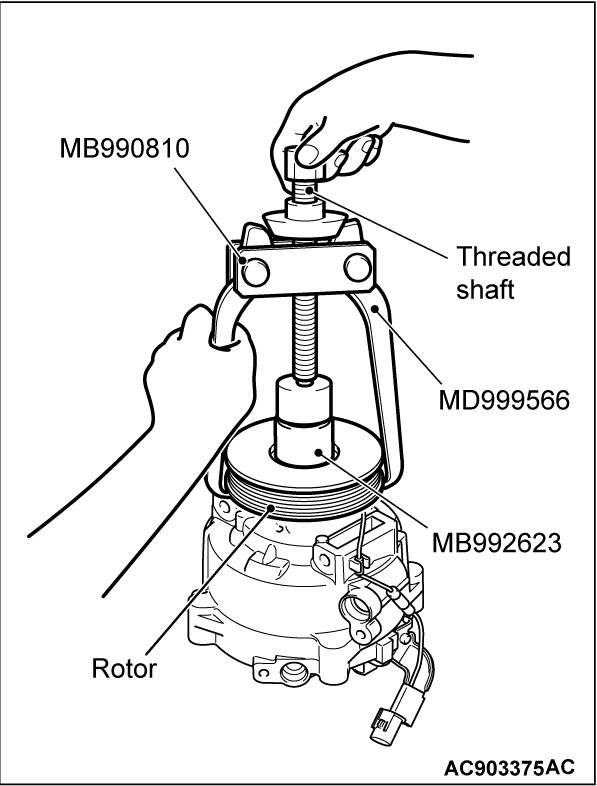
- MB990810: Side bearing puller
- MB992623: Guide
- MB992624: Pusher
- MD999566: Claw
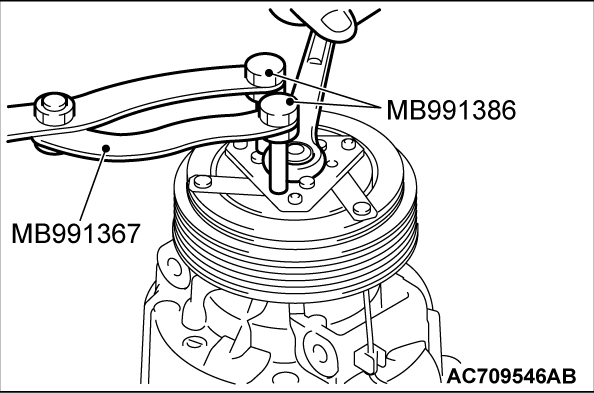
- MB991367: Special spanner
- MB991386: Pin
DISASSEMBLY SERVICE POINTS
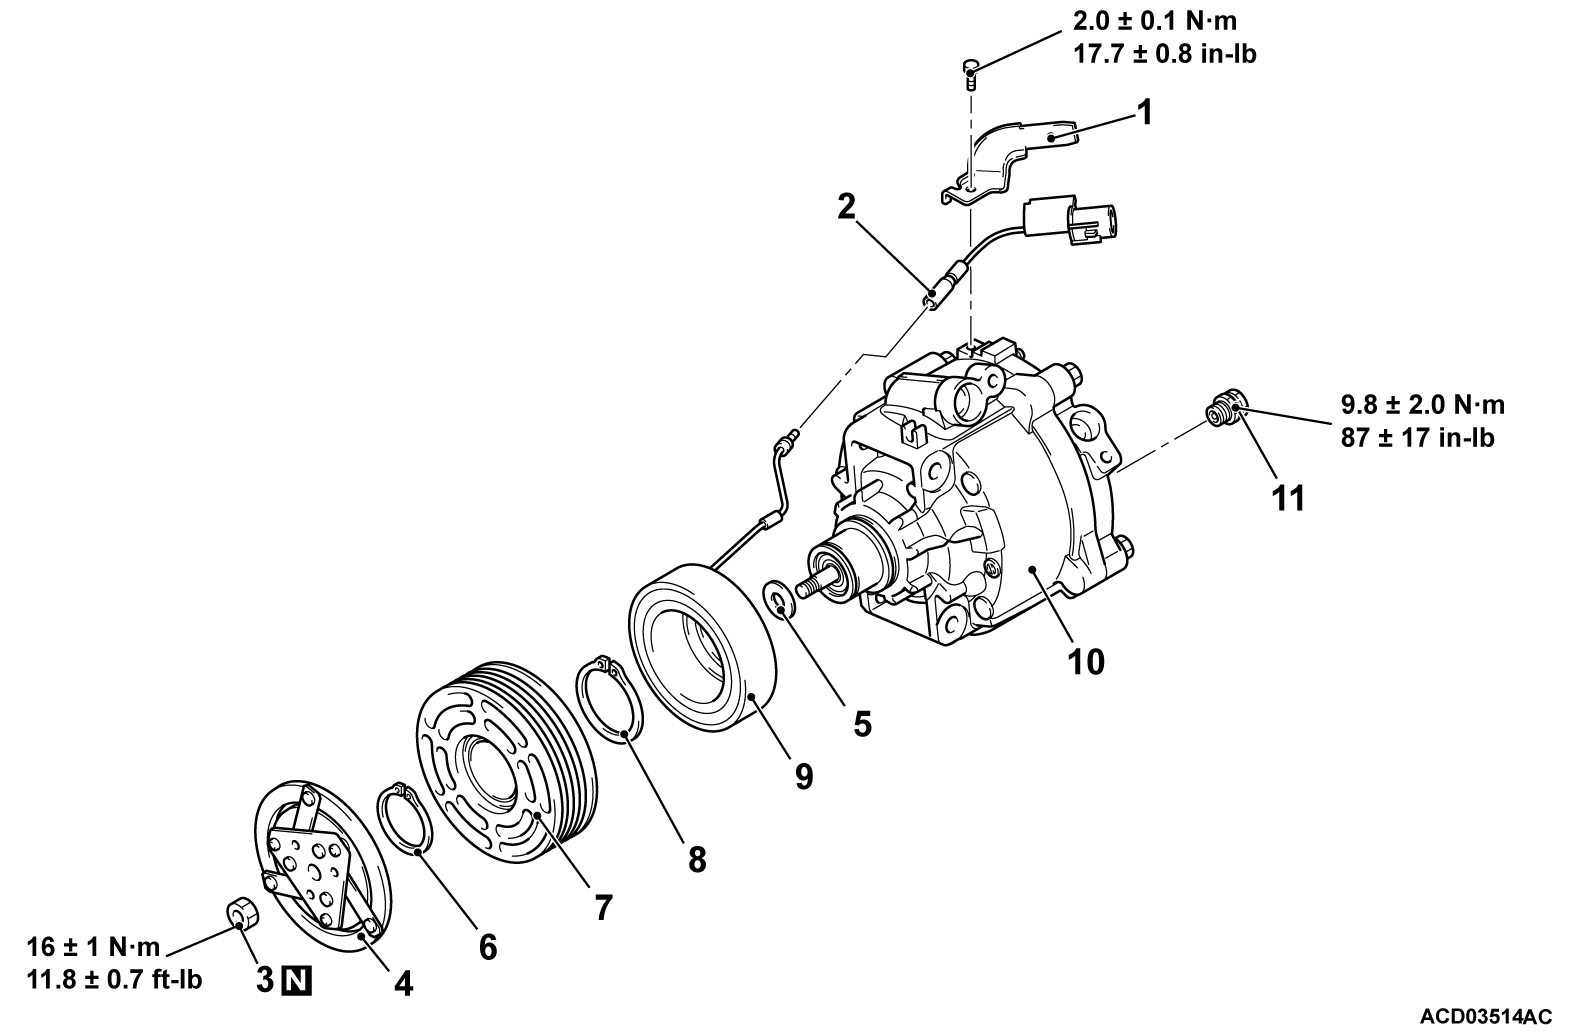
<<B>> ROTOR REMOVAL
| caution |
|
Rotor can be removed by hand, but if it is difficult to remove it, use the guide (MB992623) and the side bearing puller (MB990810) as shown.
REASSEMBLY SERVICE POINTS
>>A<< A/C COMPRESSOR HIGH PRESSURE RELIEF VALVE INSTALLATION
| caution | Be careful not to damage the O-ring when installing the high-pressure relief valve. Apply the specified refrigerating machine oil the high-pressure relief valve mounting hole before installation |
Check that O-ring is installed to the high-pressure relief and use the adjust torque wrench to install the high-pressure relief valve to the main body of the compressor.
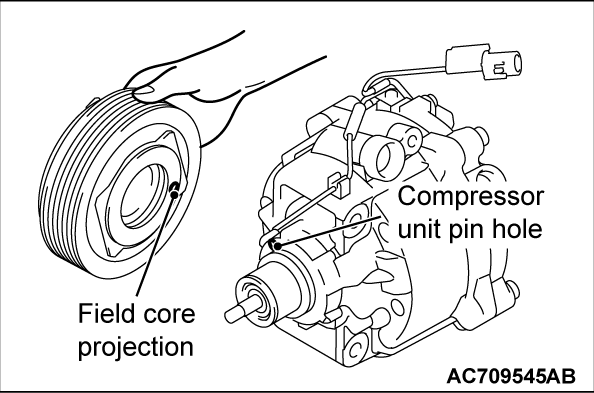
>>B<< FIELD CORE ATTACHMENT
Line up the pin hole on the compressor unit with the field core projection and attach.
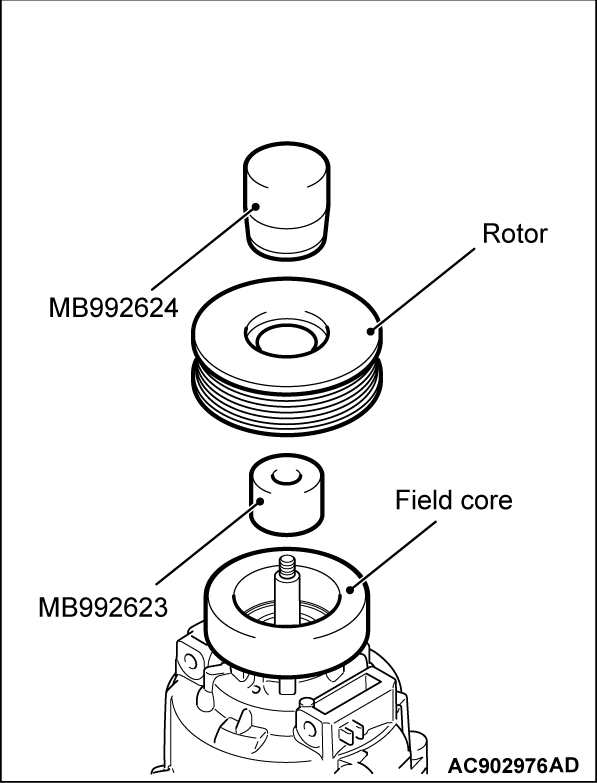
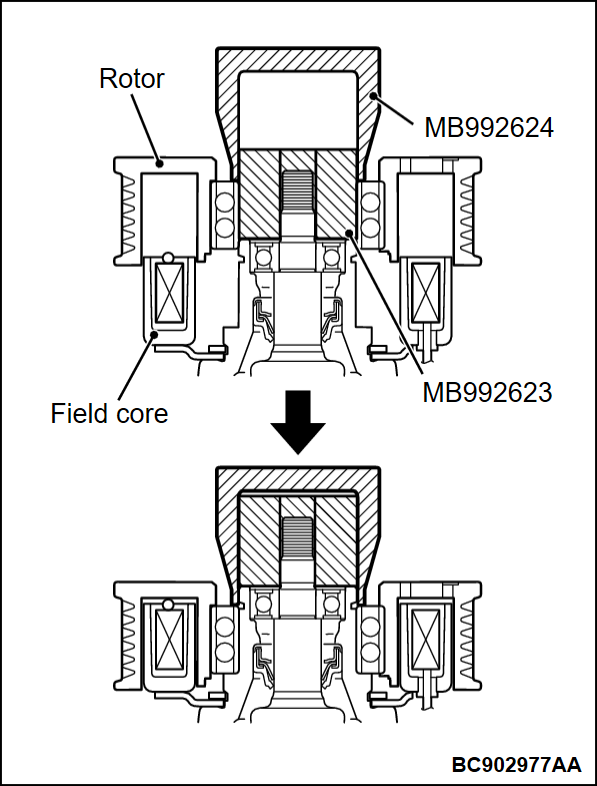
>>C<< ROTOR INSTALLATION
| caution | If the outer wheel side of rotor is pushed, an abnormal noise can be generated because the inside of rotor is damaged, therefore, always push the inner wheel side. |
Install the rotor while pushing the inner wheel side slowly using the pusher (MB992624) and guide (MB992623).
| note | Insert the rotor in a direction perpendicular to the A/C compressor. |
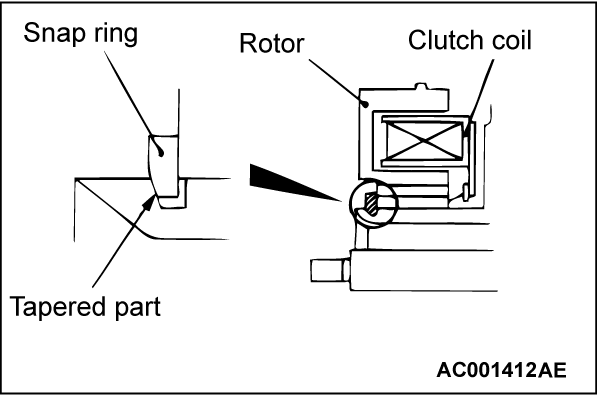
>>D<< SNAP RING INSTALLATION
Using snap ring pliers, fit the snap ring so that the snap ring's tapered part is on the outside.
>>E<< SELF-LOCKING NUT INSTALLATION
Using a special tool, as when removing the nut, secure the armature and tighten the self-locking nut.
![[Previous]](../../../buttons/fprev.png)
![[Next]](../../../buttons/fnext.png)
