[Previous][Next]
REMOVAL AND INSTALLATION
 
 
Pre-removal and post-installation Operation
  • Rear Combination Light Removal and Installation (Refer to GROUP 54A - Rear Combination Light .)
  • Rear Wheelhouse Splash Shield Mounting Clips Removal and Installation (Refer to GROUP 42A - Splash Shield .)
  • Rear Bumper Harness Connector Disconnection and connection
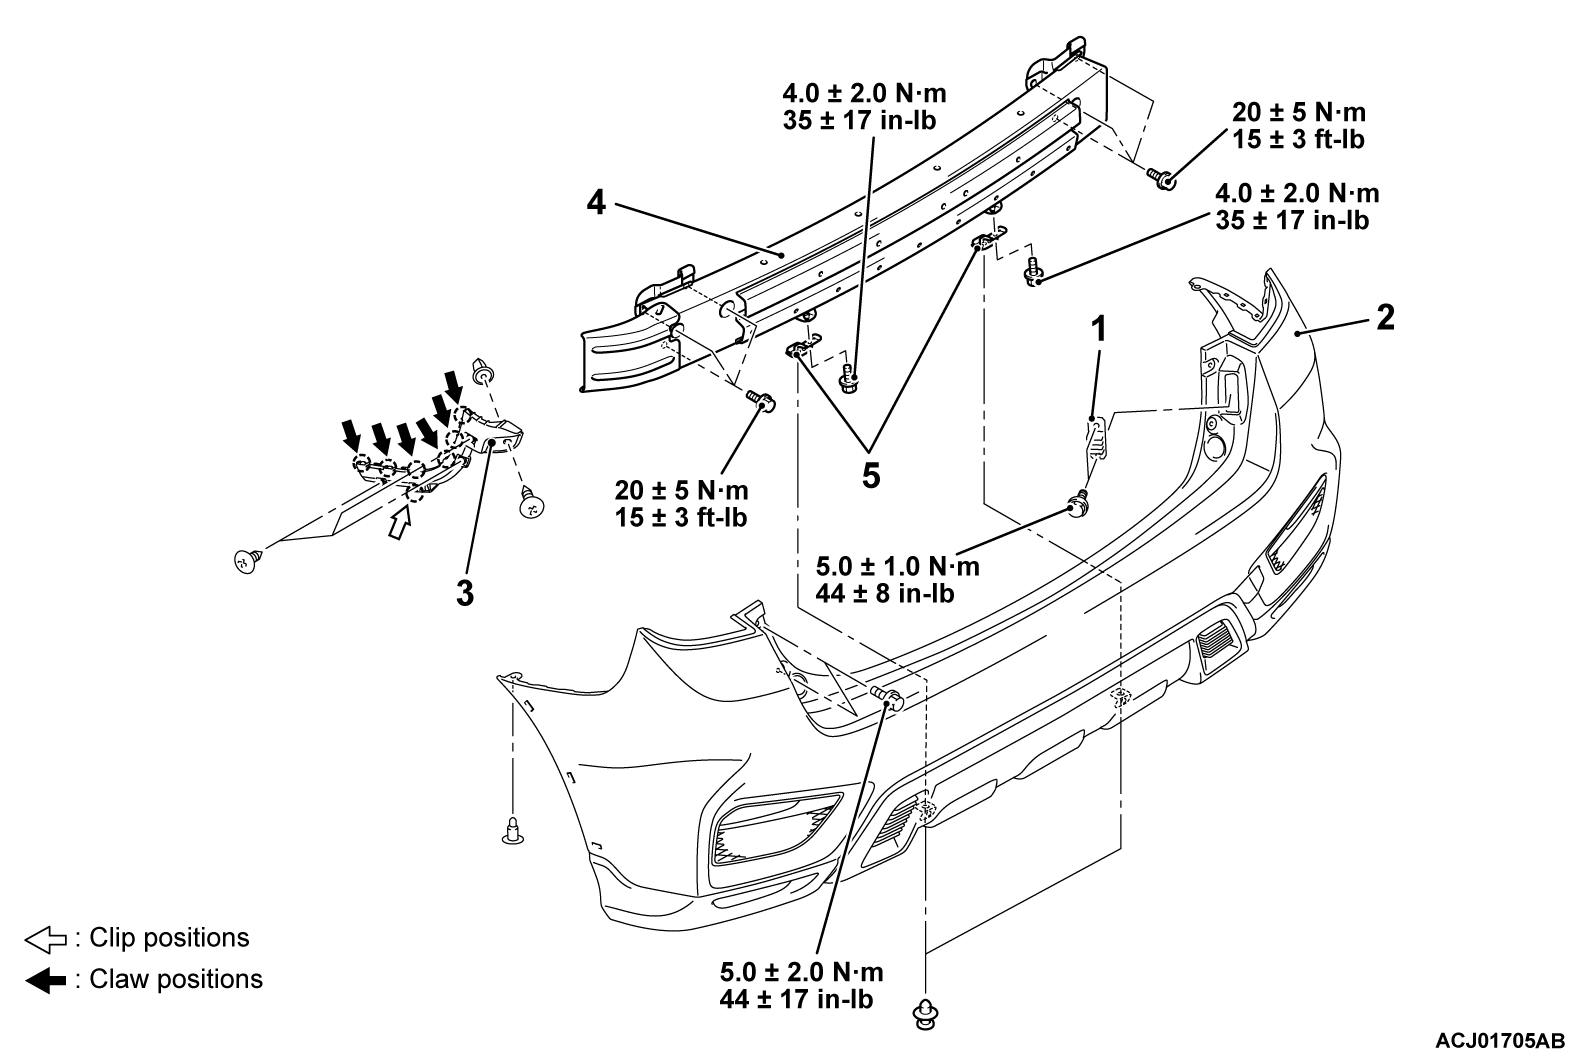
Removal steps
1.Liftgate damper
<<A>>>>B<<2.Rear bumper assembly
3.Rear bumper face support bracket
>>A<<4.Rear bumper reinforcement
>>A<<5.Rear bumper bracket
 
 
REMOVAL SERVICE POINT
 
 
<<A>> REAR BUMPER ASSEMBLY REMOVAL
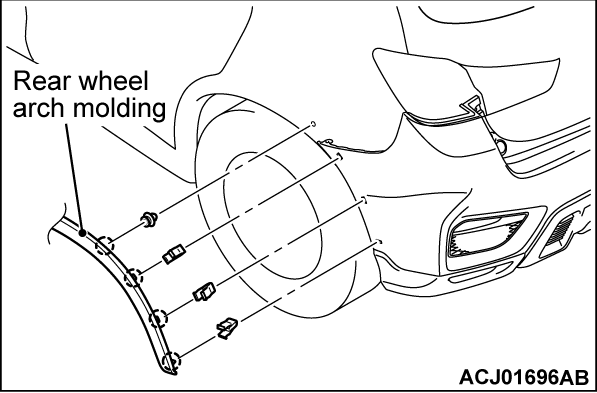
cautionTo prevent the rear wheel arch molding from damage, pull it gradually and do not over-pull it.
Before removing the rear bumper assembly, release the rear part of the rear wheel arch molding by pulling and unclipping it outwards. This makes the bumper removal possible without removing the entire rear wheel arch molding (Refer to ).


INSTALLATION SERVICE POINTS
 
 
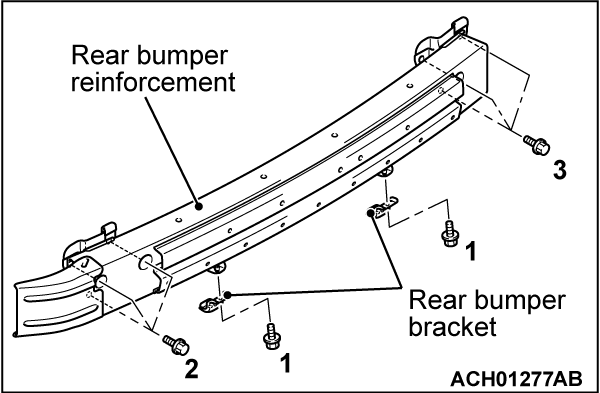
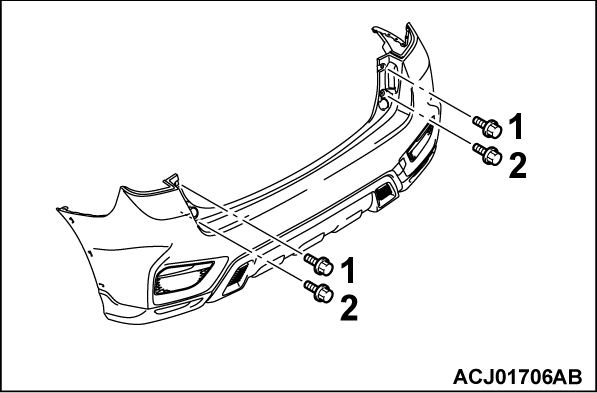
>>A<< REAR BUMPER BRACKET/REAR BUMPER REINFORCEMENT INSTALLATION
Install the bolts in the order shown.


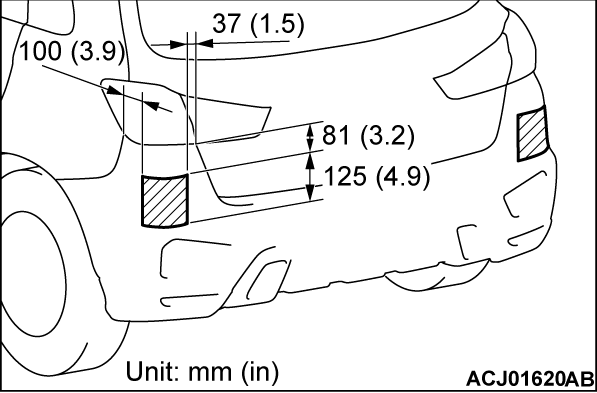
>>B<< REAR BUMPER ASSEMBLY INSTALLATION
caution
  • Do not apply any sticker, paint or putty to the radar electric wave penetration area (shaded portion). However, only for Mitsubishi motors genuine color, paint can be repaired.
  • Avoid any shocks or scratches.
The electric wave penetration areas are symmetrical on left and right. <Vehicles with BSW (with LCA)/RCTA>
Install the bolts in the order shown.