HYDRAULIC UNIT CHECK
Required Special Tools:
- MB991958: Scan tool Sub Assembly
- MB991824: Vehicle Communication Interface (V.C.I.)
- MB991827: Scan tool USB Cable
- MB991910: Scan tool Main Harness A (Vehicles with CAN communication system)
1. Raise the vehicle using a jack and support the specified points with a rigid rack.
2.
| caution | Before connecting or disconnecting scan tool, always turn the ignition switch to the LOCK (OFF) position. |
Before setting scan tool, turn the ignition key to the LOCK (OFF) position.
3. Confirm that the selector lever is in the "N" position, and then start the engine.
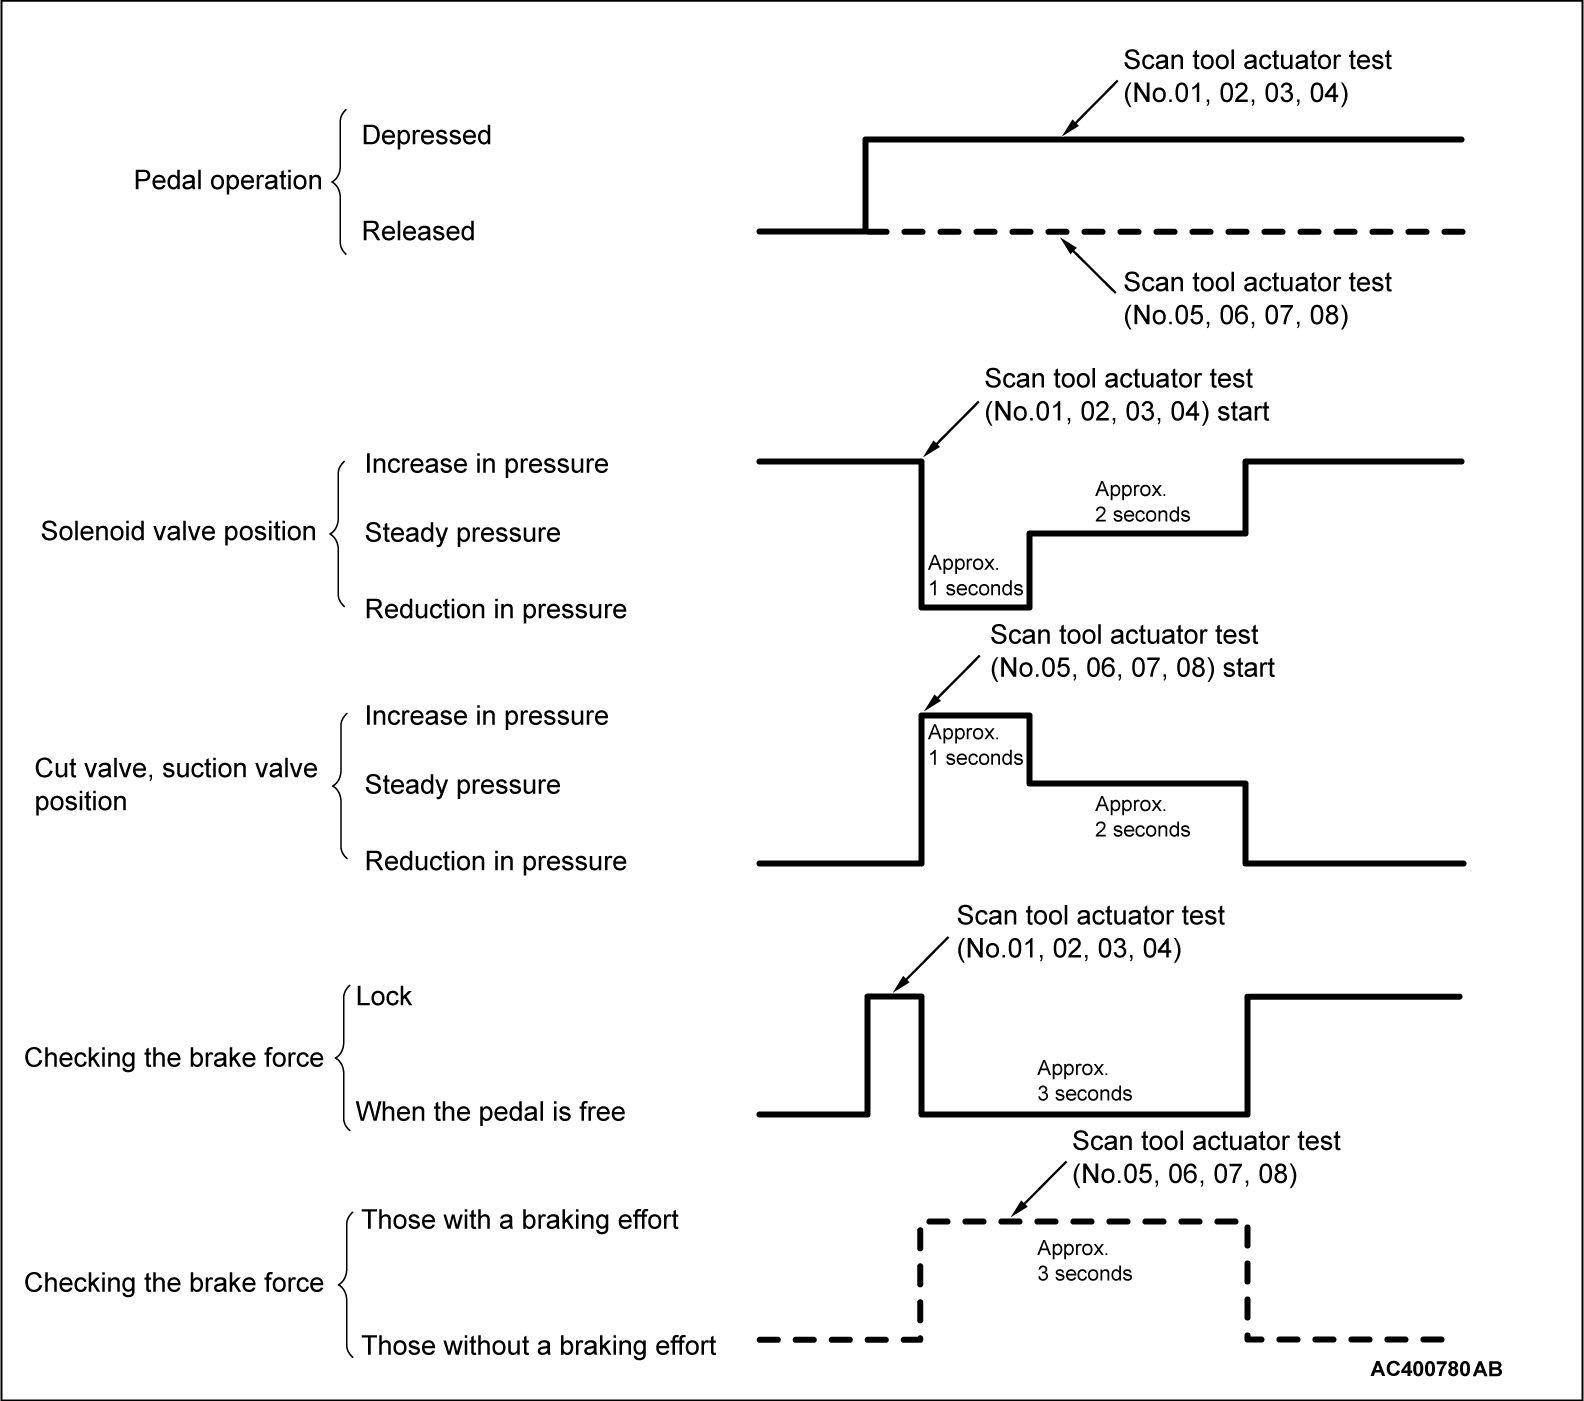
4. When carrying out the actuator tests No.01 to 04, perform the actuator tests using scan tool while depressing the brake pedal. When carrying out the actuator tests No.05 to 08, perform the actuator tests using scan tool without depressing the brake pedal. When carrying out the actuator tests, rotate the wheel by hands to confirm that the braking force changes.
| note |
|
6. When any malfunction has been found, take a necessary action according to the "Judgment Table."
Judgment Table
| Display on scan tool | Operation | Test result | Judgment | Cause | Measure |
| 01 FR wheel ABS drive 02 FL wheel ABS drive 03 RR wheel ABS drive 04 RL wheel ABS drive |
| Braking force decreases for 3 seconds from the lock status. | Normal | - | - |
| The wheel does not lock even if the brake pedal is depressed. | Error | Clogged brake line other than hydraulic unit | Check and clean the brake line. | ||
| Clogged hydraulic circuit in the hydraulic unit | Replace the hydraulic unit assembly. | ||||
| Braking force does not decrease. | Faulty routing of hydraulic unit brake tube | Route the brake tube correctly. | |||
| Malfunction of hydraulic unit solenoid valve operation | Replace the hydraulic unit assembly. | ||||
| 05 FR wheel TCL drive 06 FL wheel TCL drive 07 RR wheel TCL drive 08 RL wheel TCL drive |
| Lock condition occurs for 3 seconds from the status without braking force. | Normal | - | - |
| The wheel does not lock. | Error |
| Check and clean the brake line. | ||
| Clogged hydraulic circuit in the hydraulic unit | Replace the hydraulic unit assembly. |
7. After the inspection, turn the ignition switch to the LOCK (OFF) position, and then disconnect scan tool.
HYDRAULIC UNIT INSTALLATION ADJUSTMENT
1. Operate the pre-removal steps for the hydraulic unit.
2. Remove all brake tubes.
3. Remove the protector.
4. Loosen the mounting bolt and nut of the hydraulic unit bracket.
5. Install all brake tubes temporarily.
6. Shake hydraulic unit to all directions with both hands to make the hydraulic unit bracket insulator fit with the unit.
7. Install the hydraulic unit bracket with mounting bolt and nut not to load the brake tube.
8. Install the protector.
9. Install all brake tubes securely.
| note | Install the flare nut taking care not to let the brake tube turn together. |
10. Operate the post-installation steps of the hydraulic unit.
![[Previous]](../../../buttons/fprev.png)
![[Next]](../../../buttons/fnext.png)

