

|
SUBJECT: DRIVE BELT AUTO TENSIONER - SAFETY RECALL CAMPAIGN |
No: SR-18-001 |
||||||||||||||||||
|
DATE: March 2018 |
|||||||||||||||||||
|
MODEL: See Below |
|||||||||||||||||||
|
CIRCULATE TO: |
[ X ] GENERAL MANAGER |
[ X ] PARTS MANAGER |
[ X ] TECHNICIAN |
||||||||||||||||
|
[ X ] SERVICE ADVISOR |
[ X ] SERVICE MANAGER |
[ X ] WARRANTY PROCESSOR |
[ X ] SALES MANAGER |
||||||||||||||||
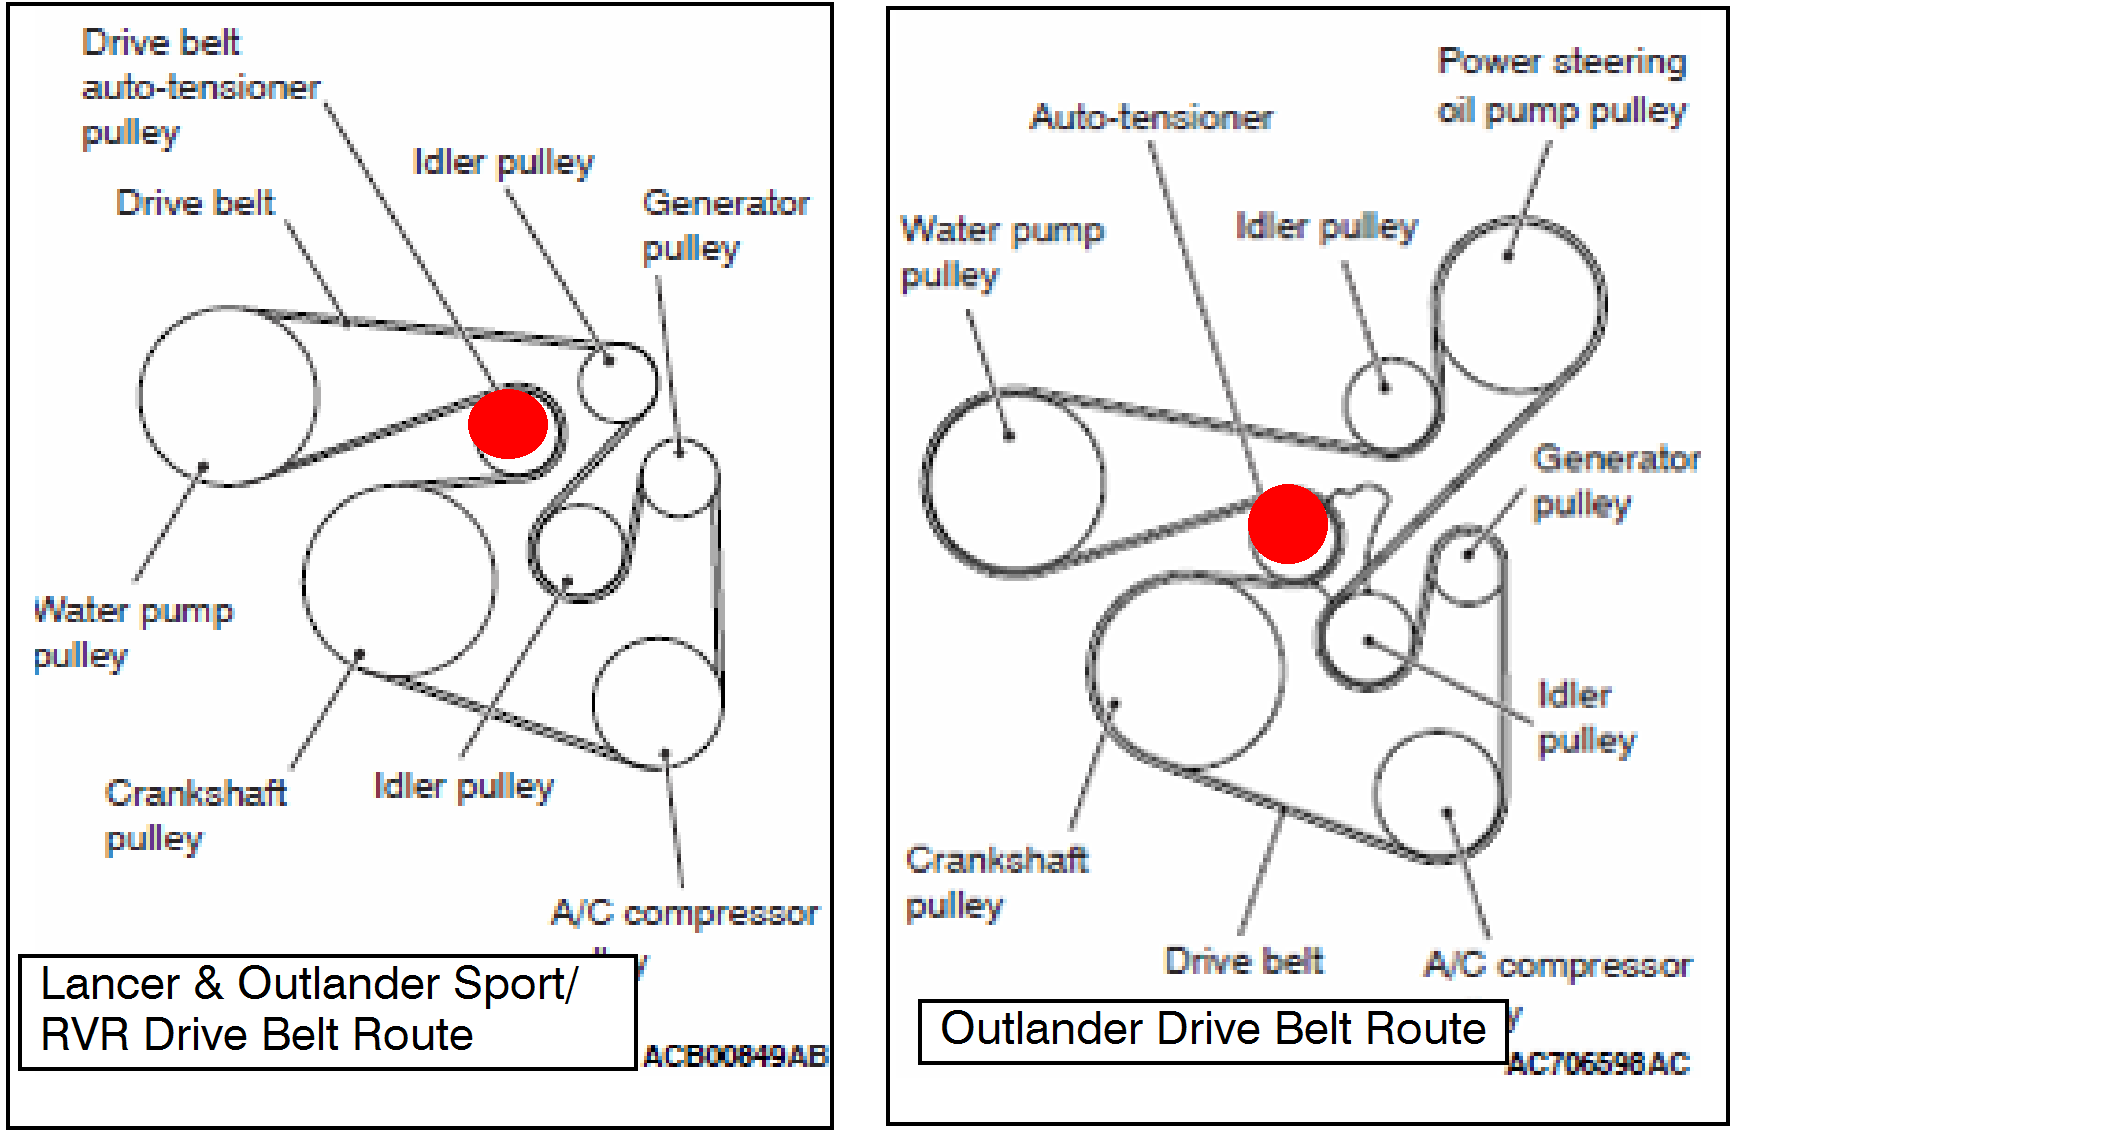
This campaign bulletin instructs dealers to inspect and, if necessary, replace the drive belt auto tensioner with a countermeasure part.
Due to repetition of high load operations, the flange of the drive belt automatic tensioner may crack, causing detachment of the drive belt. If the drive belt detaches, the alternator will not charge the battery, causing an engine stall and/or the power steering assist will be disabled, increasing the risk of a crash.
Letters will be sent to all owners of affected vehicles requesting them to bring their vehicle to a local
Authorized Mitsubishi dealer to have their vehicle remedied. Copies of the customer notification letters
appear at the end of this bulletin.
Before starting this campaign procedure, CHECK THE WARRANTY SUPERSCREEN to verify if the
vehicle is an affected VIN for this campaign and that this campaign procedure has not already been completed.
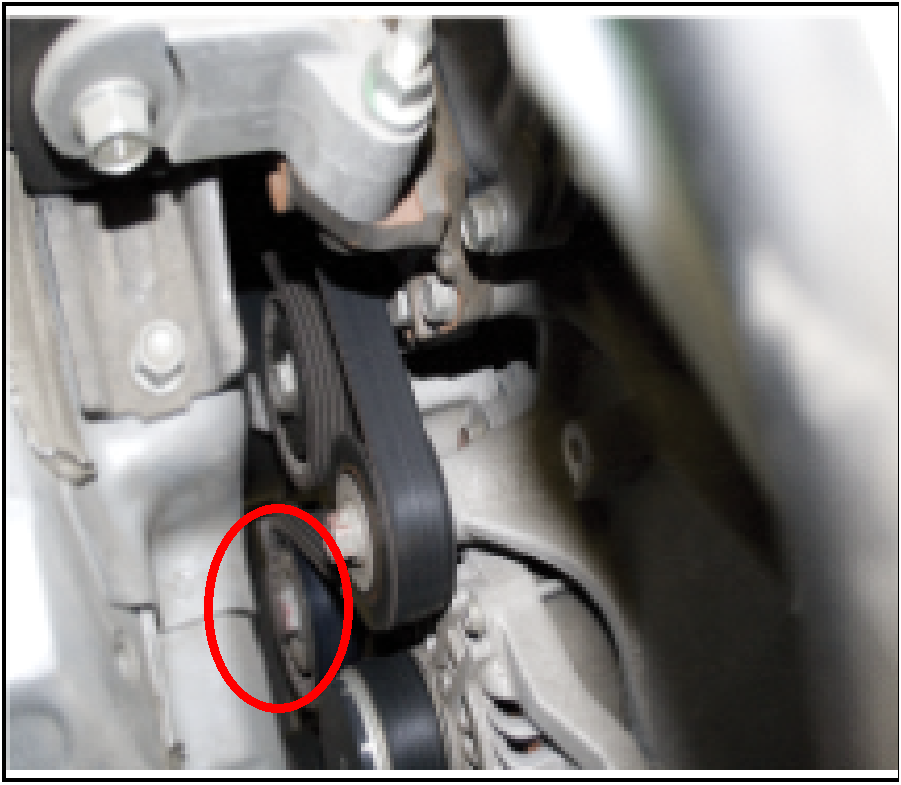
Inspect the front bumper and fenders for presence of any damages or scratches. If damages or scratches are found, notify the customer before proceeding.
 Vehicle and engine components may be hot.
 Panel edges inside the engine compartment may be sharp.
 |
|
 |
|
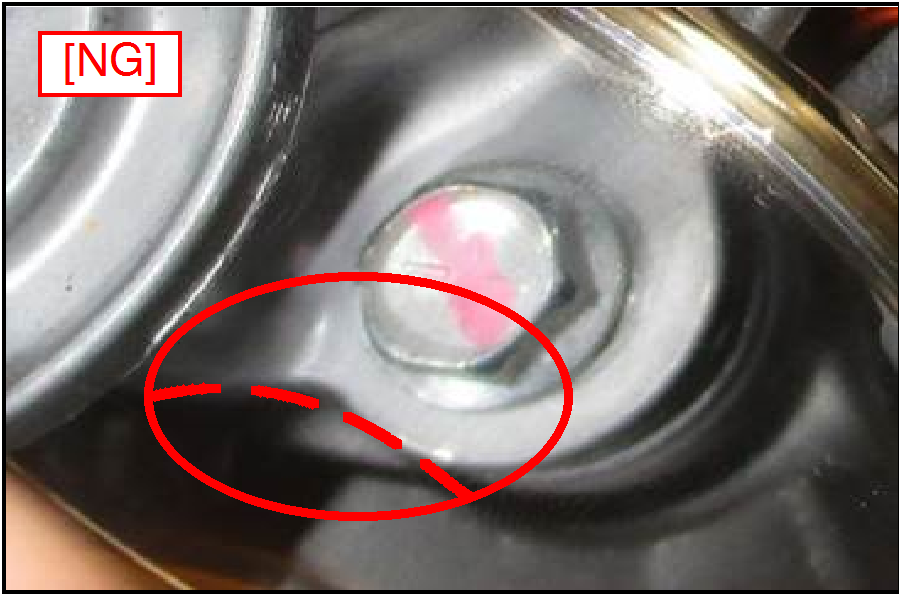 |
If the flange is concave, proceed with the repair. |
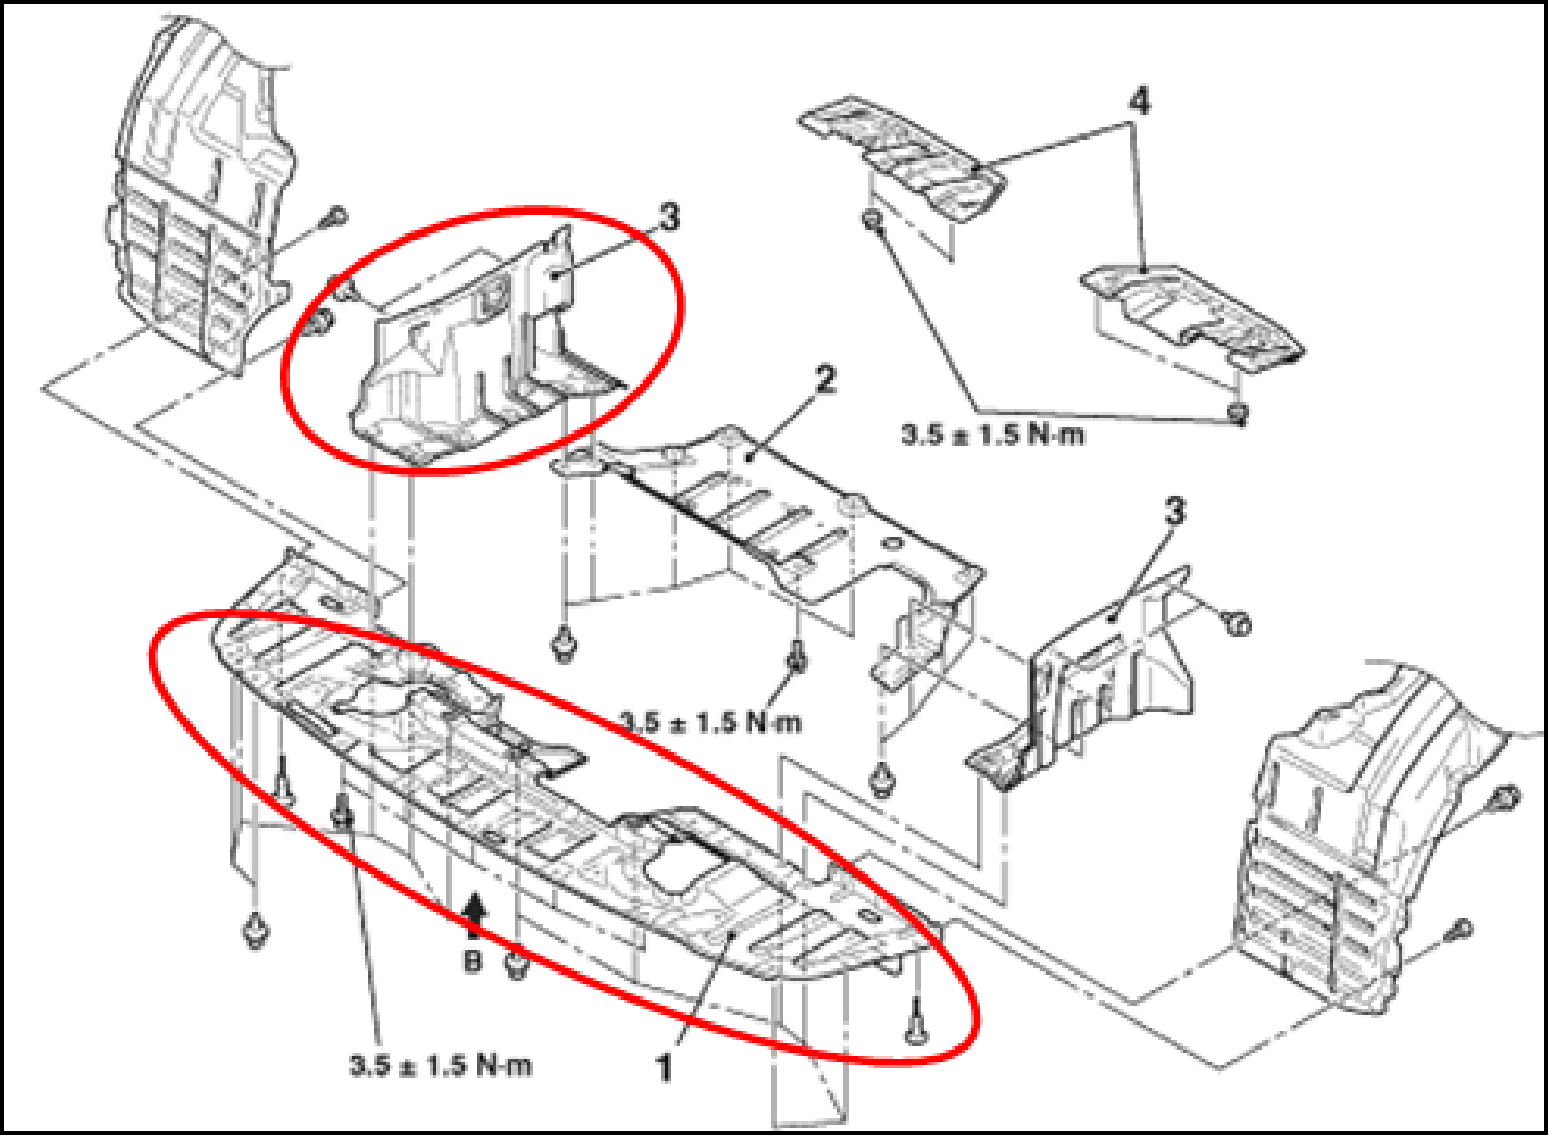

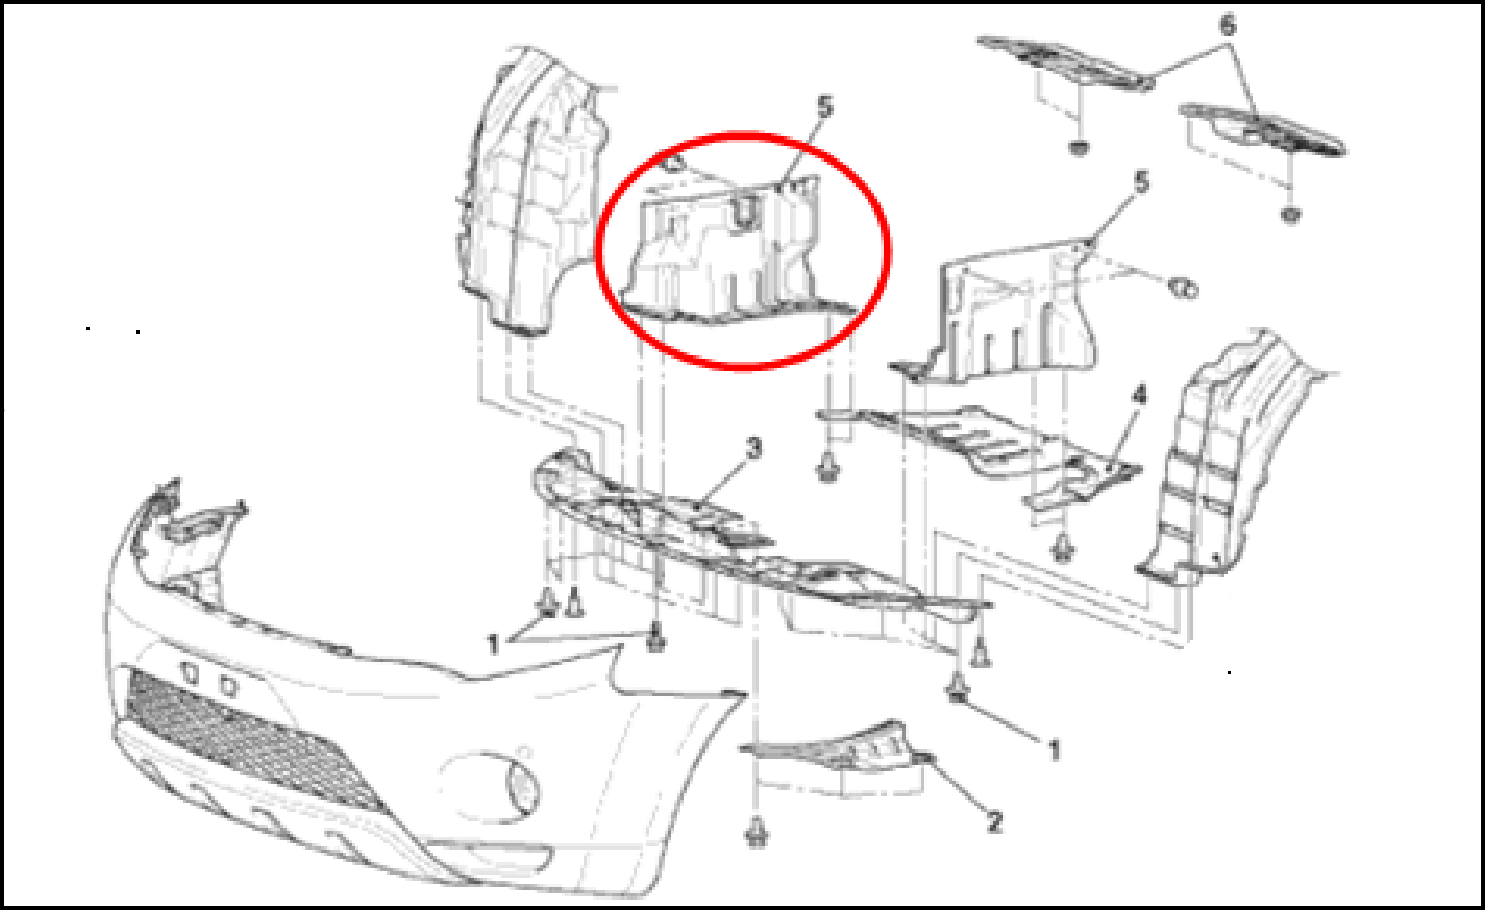
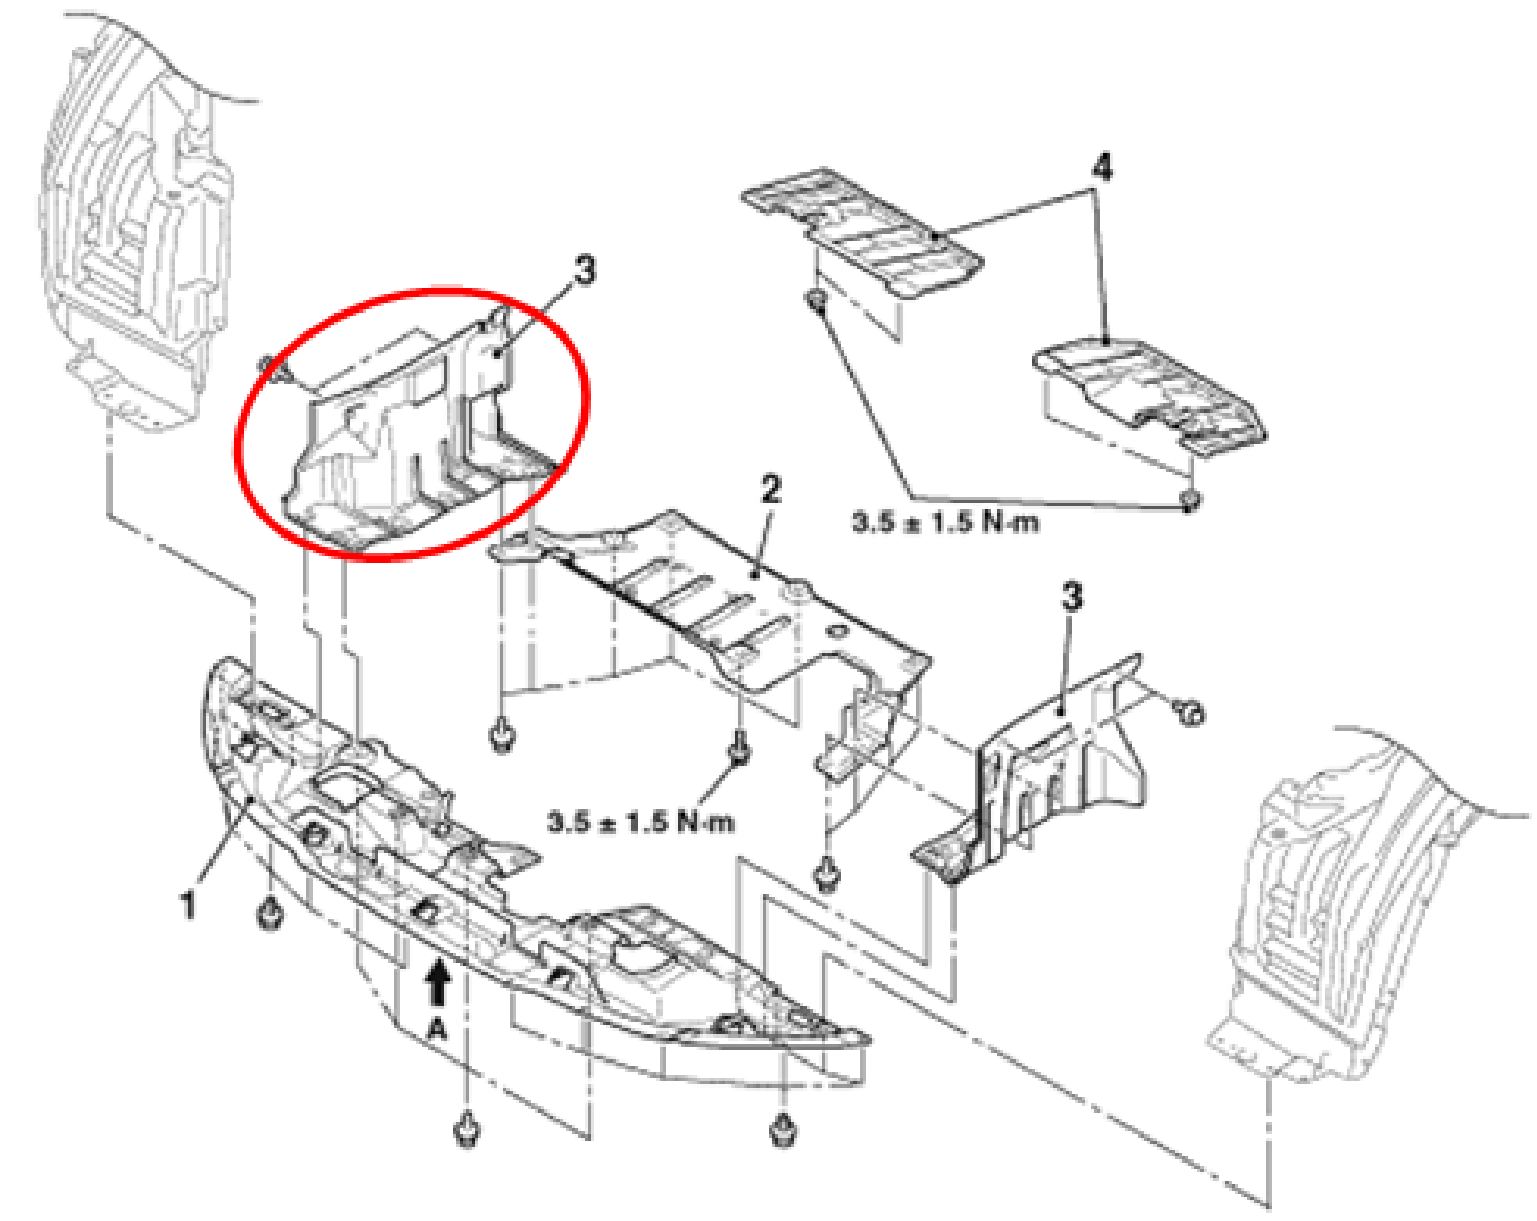
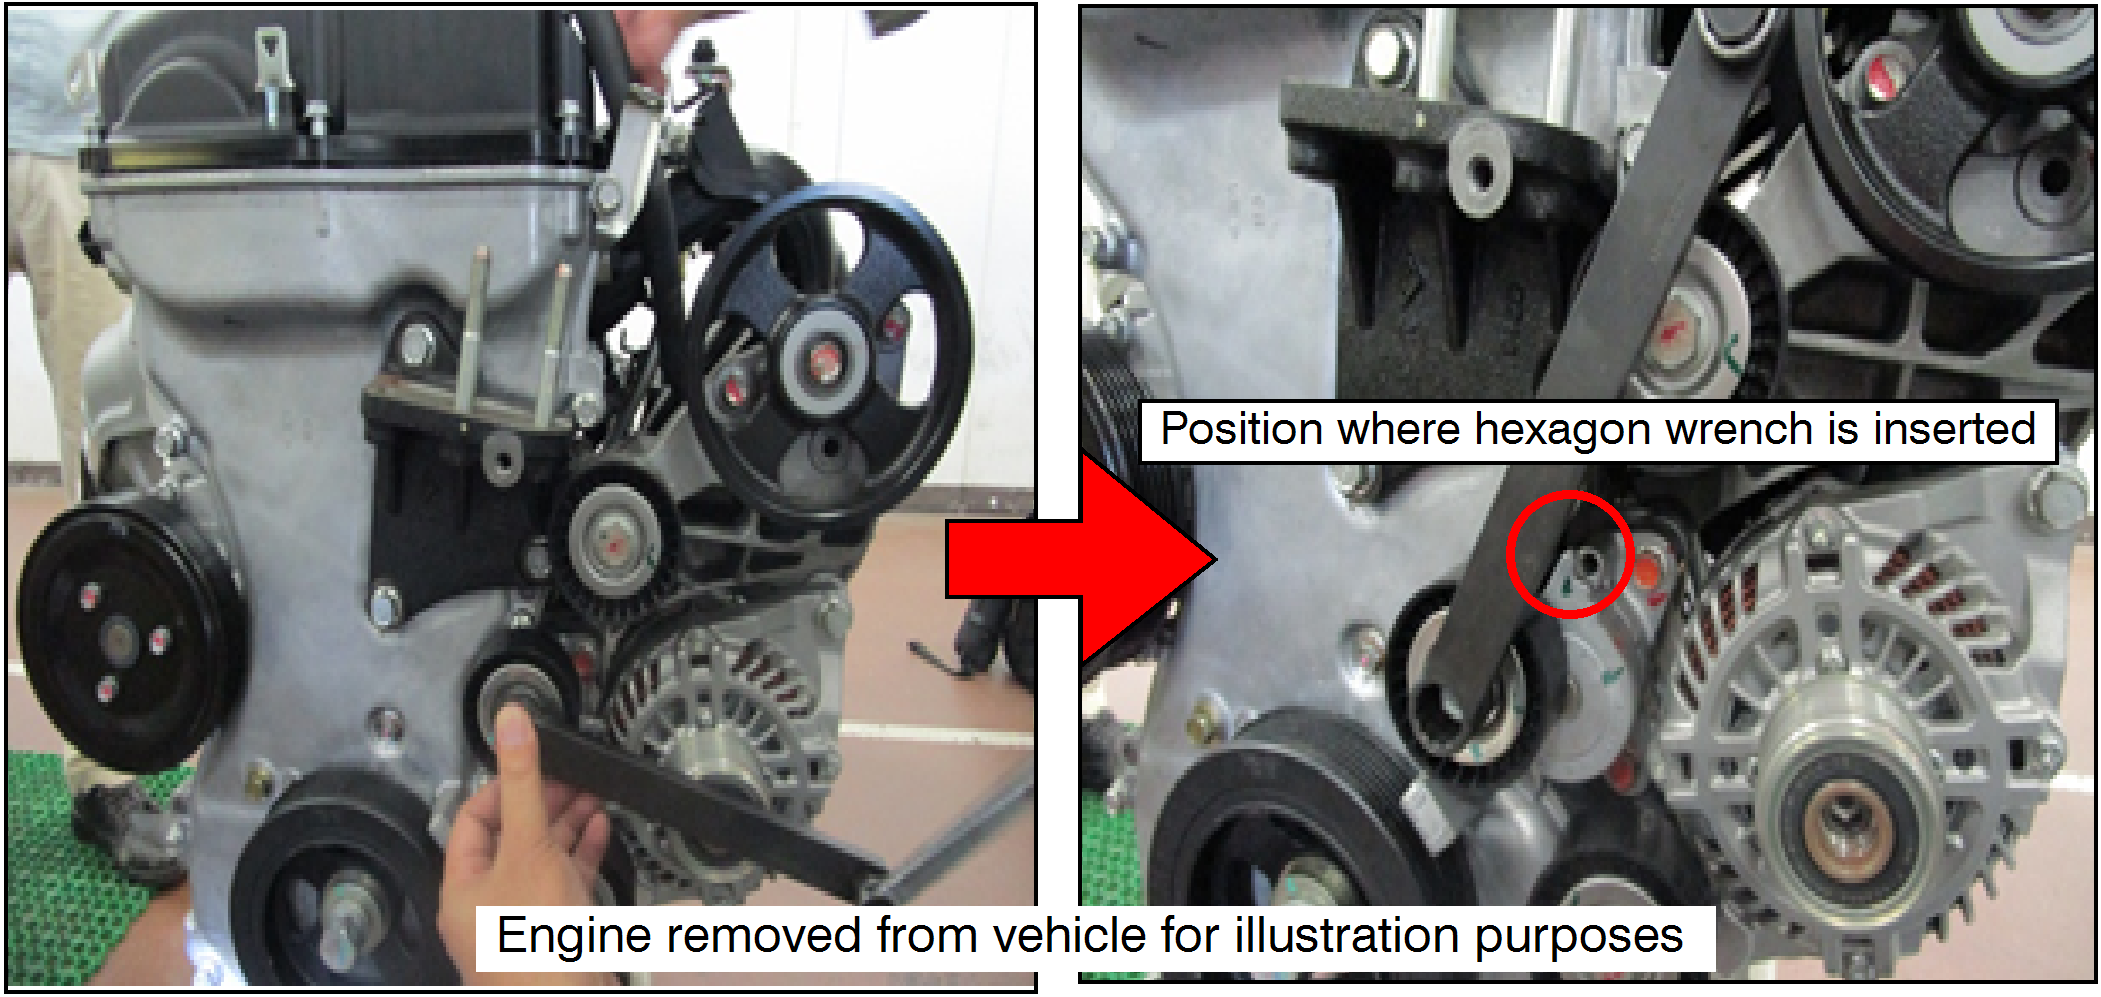
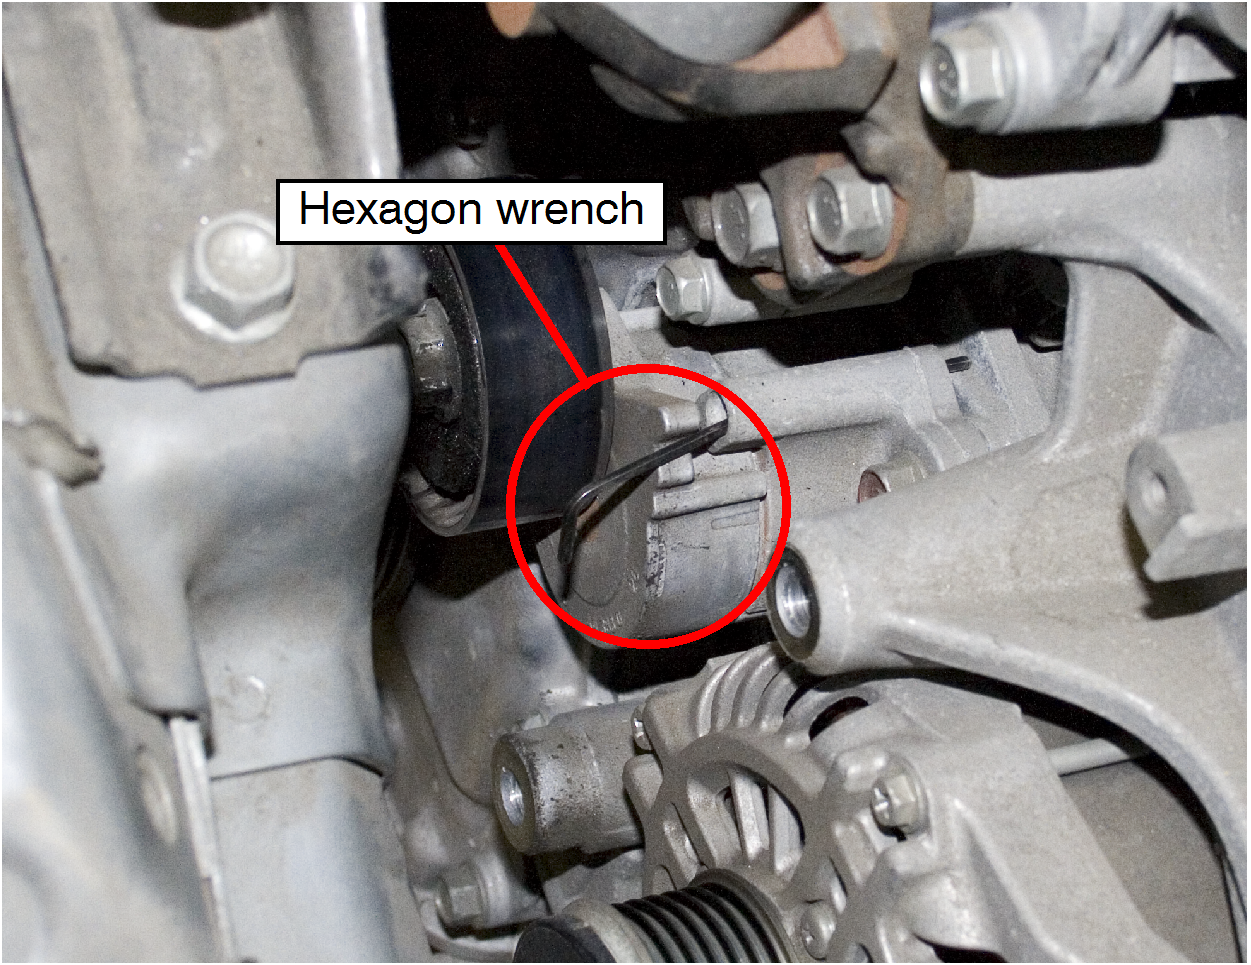
 Release the auto tensioner tension from the top of the engine compartment. DO NOT perform the work from underneath the vehicle because work posture becomes unstable and there is a risk of tool detachment.
 For a box-end wrench combined with the special tool, select the most appropriate one so that the work can be performed at the easiest angle.
 As the tension of the auto tensioner is high, make sure to set the hex wrench to each hexagonal socket to prevent the tool from being detached.
 |
 |
|
 |
 New flange bolts (MW400221 [contains 2 pieces]) must be used with the new auto tensioner.
Enter all claims as claim type 'C' - Recall/Campaign Claims
Please follow the campaign instructions when entering each claim. See the example below.
Certain 2008-2012 Outlander, 2011-2012 Outlander Sport, 2009-2012 Lancer and 2010-2012 Lancer Sportback models only.
After entering the required customer data, vehicle information, select the applicable campaign operation number and the one replacement scenario that was actually performed. Then, by hitting the “Save and Continue” button, the system will automatically fill-in several other fields.
There are up to 4 possible repair scenarios for this campaign - follow the charts provided to select the appropriate labor operation that applies to the vehicle.
There are multiple repair scenarios for this campaign.
Outlander
|
# |
Campaign Operations |
Repair |
Labor Time |
Replace Flange Bolts |
Replace |
Flange |
Tensioner Part |
|
|
1 |
C1801R01 |
Inspect - then Replace Tensioner & Flange Bolts |
0.8 hrs |
X |
X |
MW400221 |
MW400244 |
|
|
2 |
C1801R02 |
Inspect Tensioner & Flange Bolts only |
0.3 hrs |
|
|
|
|
|
|
3 |
C1801R03 |
Inspect then Replace Tensioner & Flange Bolts W/C1804R |
0.7 hrs |
X |
X |
MW400221 |
MW400244 |
|
|
4 |
C1801R04 |
Inspect Tensioner & Flange Bolts Only W/C1804R |
0.2 hrs |
|
|
|
|
|
Lancer and Lancer Sportback
|
# |
Campaign Operations |
Repair |
Labor Time |
Replace Flange Bolts |
Replace |
Flange |
Tensioner Part |
|
|
1 |
C1801R01 |
Inspect - then Replace Tensioner & Flange Bolts |
0.7 hrs |
X |
X |
MW400221 |
MW400244 |
|
|
2 |
C1801R02 |
Inspect Tensioner & Flange Bolts only |
0.3 hrs |
|
|
|
|
|
|
3 |
C1801R03 |
Inspect then Replace Tensioner & Flange Bolts W/C1804R |
0.6 hrs |
X |
X |
MW400221 |
MW400244 |
|
|
4 |
C1801R04 |
Inspect Tensioner & Flange Bolts Only W/C1804R |
0.2 hrs |
|
|
|
|
|
Outlander Sport/RVR
|
# |
Campaign Operations |
Repair |
Labor Time |
Replace Flange Bolts |
Replace |
Flange |
Tensioner Part |
|
|
1 |
C1801R01 |
Inspect - then Replace Tensioner & Flange Bolts |
0.7 hrs |
X |
X |
MW400221 |
MW400244 |
|
|
2 |
C1801R02 |
Inspect Tensioner & Flange Bolts only |
0.3 hrs |
|
|
|
|
|
If there is a need to provide the owner with a rental car, claim the applicable charges in this section of the recall claim on the lower portion of the labor entry screen.
NOTE: Rental Cars applicable in the US and Puerto Rico only.
Copyright 2018, Mitsubishi Motors North America, Inc.