|
SUBJECT:
INCORRECT DTC P0317 STORED ON TCM (6B31)
|
No: TSB-17-23-001
|
|
DATE: February, 2017
|
|
MODEL: 2017 Outlander
|
|
CIRCULATE TO:
|
[ ] GENERAL MANAGER
|
[ X ] PARTS MANAGER
|
[ X ] TECHNICIAN
|
|
[ X ] SERVICE ADVISOR
|
[ X ] SERVICE MANAGER
|
[ X ] WARRANTY PROCESSOR
|
[ ] SALES MANAGER
|
PURPOSE
Due to improper programming of the Transaxle Control Module (TCM), DTC P0317 may be stored incorrectly in the TCM. This may happen when CAN data communication fails between the Electric Parking Brake (EPB) ECU and the TCM, such as when the EPB connector is disconnected. The correct DTC that should be recorded in this case is U0317, CAN time-out error (EPB).
This TSB instructs dealers to reprogram the TCM with updated software to correct the issue.
AFFECTED VEHICLES
Certain 2017 Outlander vehicles equipped with 6B31 engines, built before the following dates and VINs:
- U.S & Puerto Rico.: JA4JZ4AX7HZ005940 (September 9, 2016)
- Canada: JA4JZ4AX0HZ601732 (September 12, 2016)
REQUIRED OPERATIONS
- Confirm your MUT-III is updated with the latest reprogramming database.
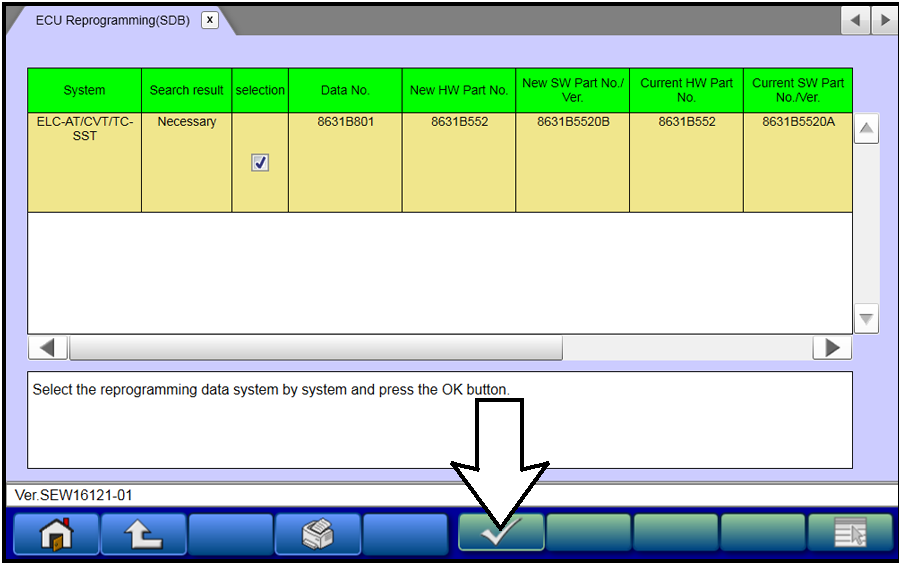
- Reprogram the TCM with the new software. Refer to the TCM Reprogramming Chart for new software information.
IMPORTANT: If an affected vehicle has a Malfunction Indicator Lamp (MIL) illuminated before reprogramming, and DTCs are listed in the TCM memory, diagnose and repair those DTCs per the service manual before reprogramming. DO NOT reprogram the TCM until the reason(s) for other DTCs being set is corrected.
EQUIPMENT
The following equipment is needed to reprogram the TCM.
- VCI (Vehicle Communication Interface) or VCI Lite - MB991824 or MB992744.
- MEDIC Laptop/Tablet with A/C power adapter - 520924, or FZG1MK2.
- MUT-III main harness 'A' (blue connector at the DLC end) - MB991910 or MB992745.
- USB 2.0 cable - MB991827 or MB992747.
- MEDIC 3.5/4 update at 445 or higher.
- For Standalone MUT-III units, MUT3-SE Reprogramming Database N170101 or higher.
TCM REPROGRAMMING CHART
|
Model
|
ECU Part Number
|
Data No.
|
Software Part Number
|
|
Previous
|
New
|
|
2017 Outlander (6B31)
(GF0W, W6AJA)
|
8631B552
|
8631B801
|
8631B552 0A
|
8631B552 0B
|
REPAIR PROCEDURE
SOFTWARE/MEDIC VERSION VERIFICATION
- Verify that the TCM has not already been updated to the latest S/W number in the table above.
If the TCM is at the latest level, reprogramming is not necessary.
|
NOTE: Reprogramming the TCM with the latest database (e.g., N170101) includes all past and current reprogramming for TSBs of affected vehicles. It is not necessary to reprogram the TCM for each previous TSB.
|
 |
For MEDIC 3.5/4 users only: (MUT-III STV users go to step 5)
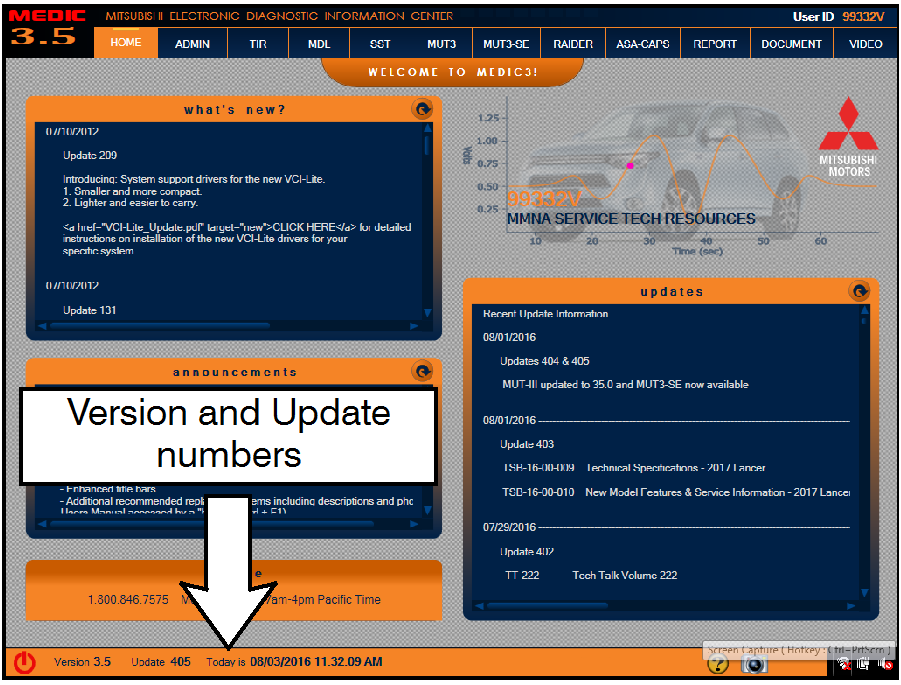
- Verify the MEDIC 3.5/4 is at version 3.5 and at update 445 or higher.
If your MEDIC 3.5/4 update is at least 445, continue with the Reprogramming Procedure.
If your MEDIC 3.5/4 update is below 445, update your MEDIC as follows.
|
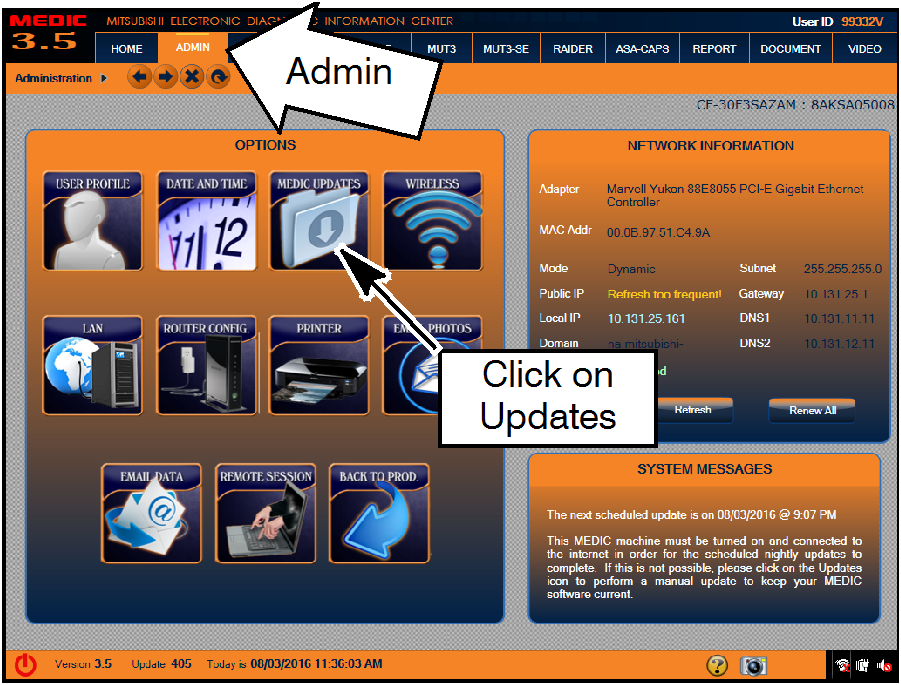 |
- Select the MEDIC 3.5/4 Admin tab and click on “Updates.”
|
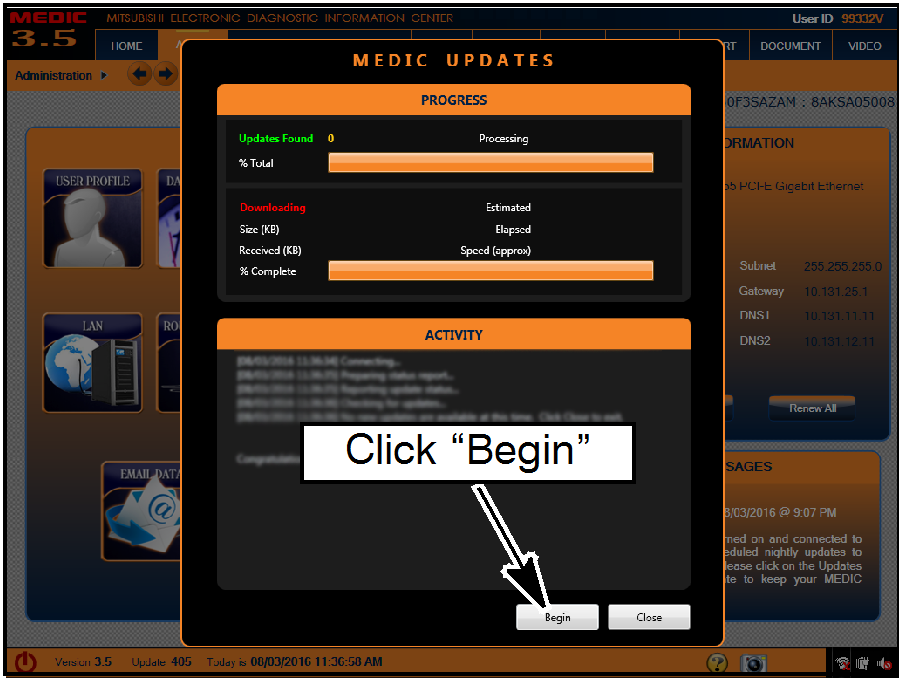 |
- IF the MEDIC update screen advises updates are available, click the “Begin” button. After all updates are complete, GO TO THE REPROGRAMMING PROCEDURE.
|
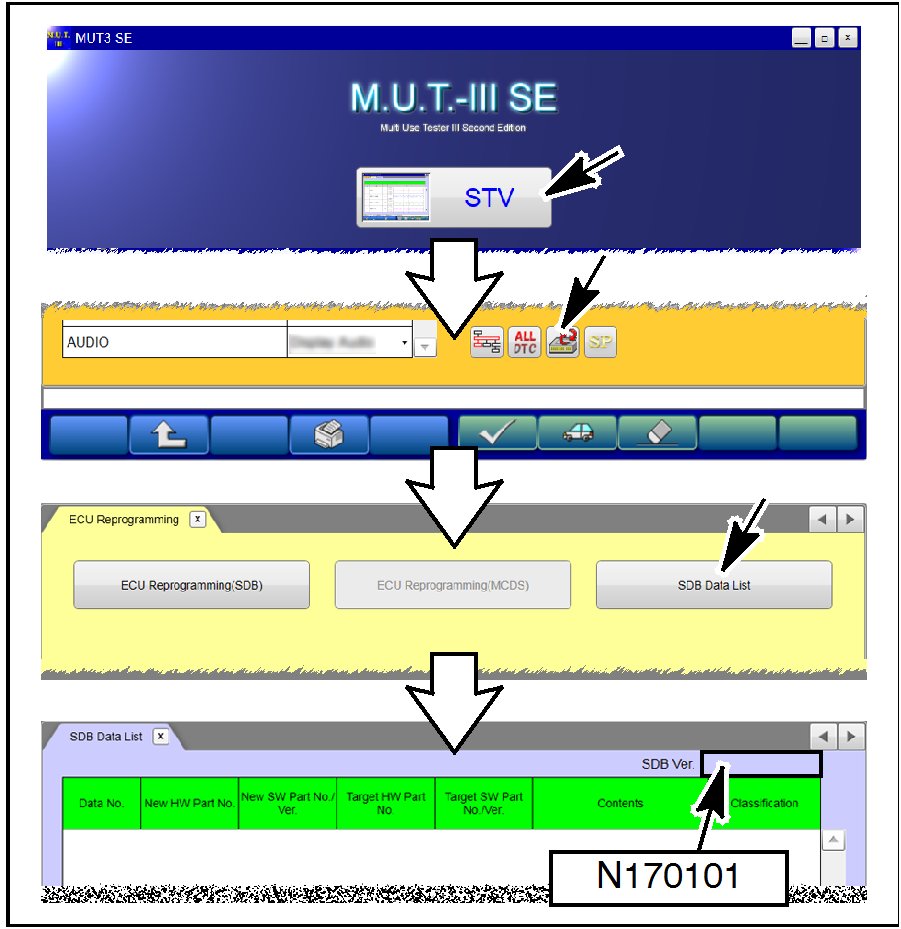 |
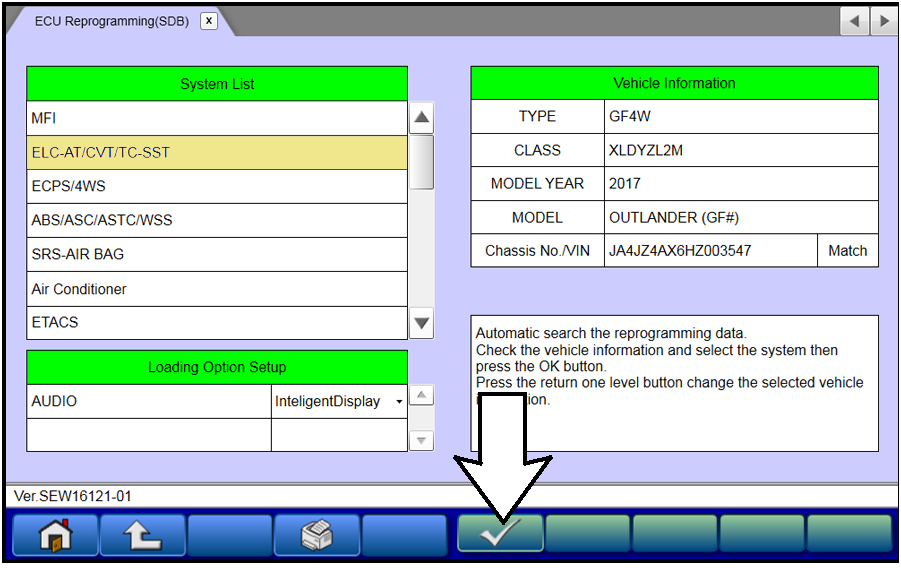
- STANDALONE MUT-III SCAN TOOL VIEWER (STV) ONLY: (MEDIC 3.5 USERS GO TO THE REPROGRAMMING PROCEDURE). Verify that your MUT3-SE has the most current version of the reprogramming database:
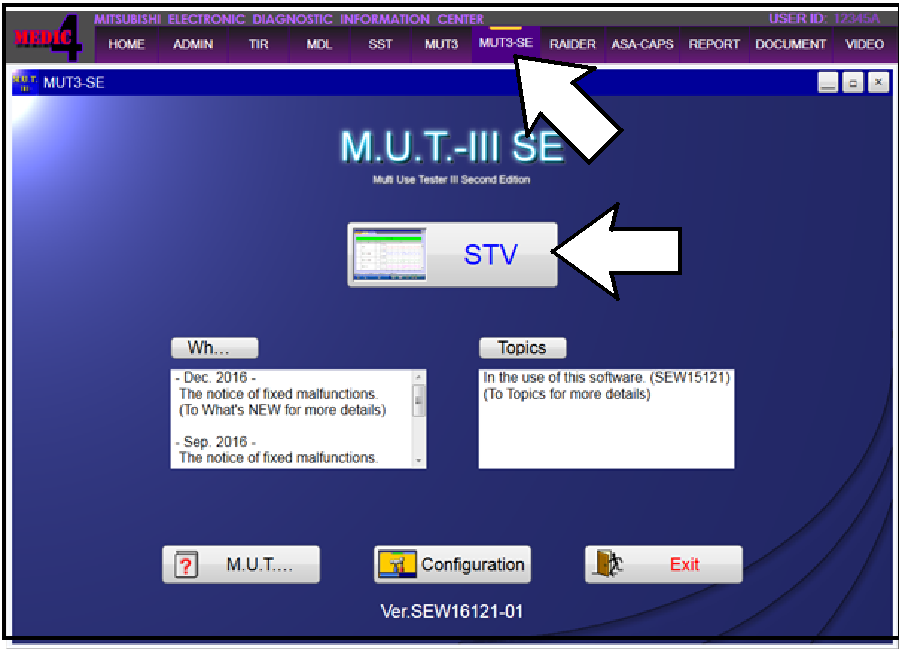
From the MUT3-SE Main Page:
● Click “STV”
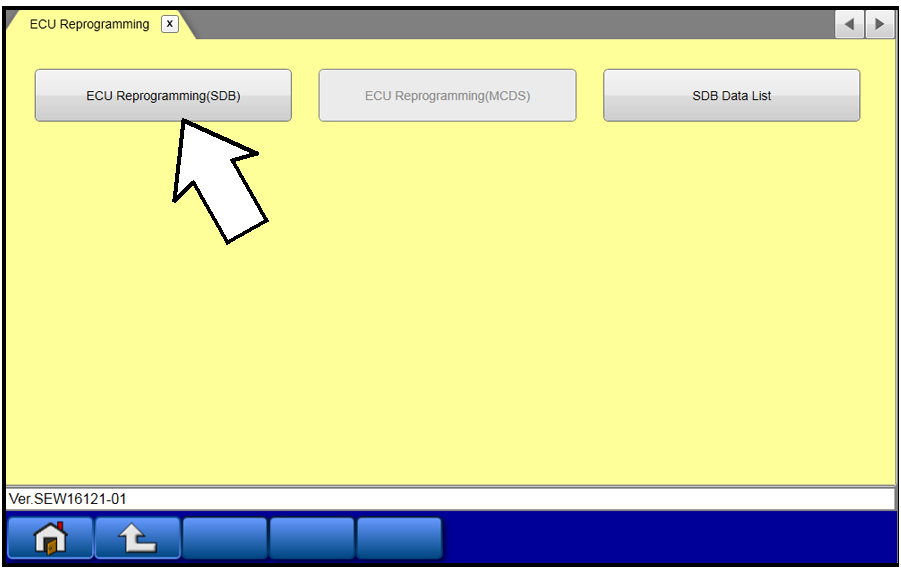
● Click the “ECU Reprogramming” button
● Click “SDB Data List”
● Confirm that the database number displayed in the upper right above the chart is N170101 or higher
- If the database number displayed on your MUT3-SE is N170101 or greater, continue to the Reprogramming Procedure.
- If the reprogramming database number displayed on your MUT3-SE is lower than N170101, then the MUT3-SE database needs to be updated.
|
REPROGRAMMING PROCEDURE
 To ensure that the vehicle battery maintains 12V during the procedure, hook-up a battery charger to the vehicle during the procedure.
|
NOTE: VCI Stand-alone reprogramming is not available for this procedure.
The laptop/tablet and the VCI must remain connected for the entire procedure.
|
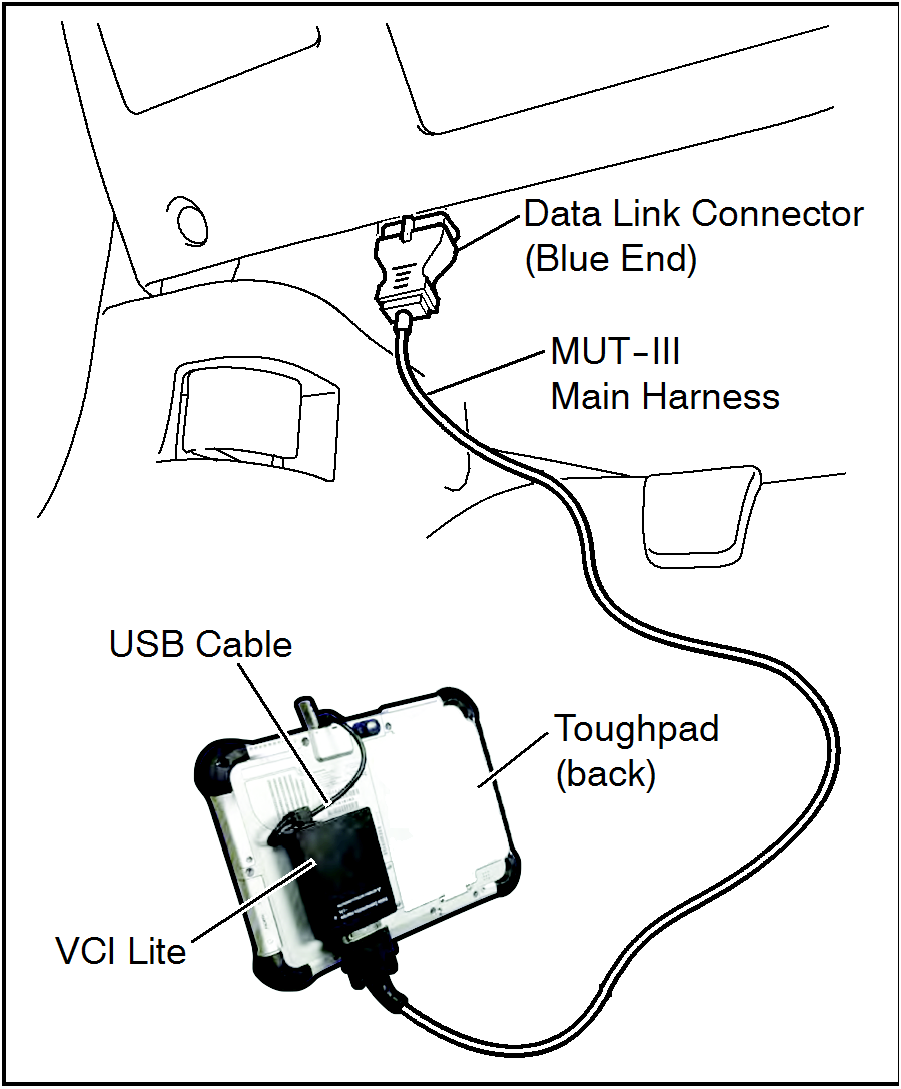
- Connect the equipment as follows:
NOTE: VCI Lite and MEDIC 4.0 Toughpad shown for illustration purposes only.
 |
- Turn the MEDIC PC/tablet on. If the battery indicator in the lower right hand corner of the screen does not show a full charge, it is recommended that either the battery be charged prior to beginning, or be used with the A/C power adaptor connected.
- Connect the USB cable to the VCI/VCI Lite.
- When the laptop/tablet displays the MUT-III main screen, connect the USB cable to the device.
- Connect the MUT-III main harness with the blue DLC connection to the VCI/VCI Lite.
- Connect the blue connection of the MUT-III main harness to the vehicle's data link connector.
- Turn the VCI power switch ON. Verify that the indicator lamp in the upper right corner of the screen is green.
|
|
DO NOT DISTURB THE HARNESS CABLES OR CONNECTIONS DURING THE CODING PROCESS AS IT COULD CAUSE THE CONTROL UNIT TO LOSE DATA. IF THE USB CABLE IS DISCONNECTED DURING THIS PROCEDURE, A WARNING MESSAGE WILL DISPLAY.
|
- Turn the ignition switch to the “ON” position.
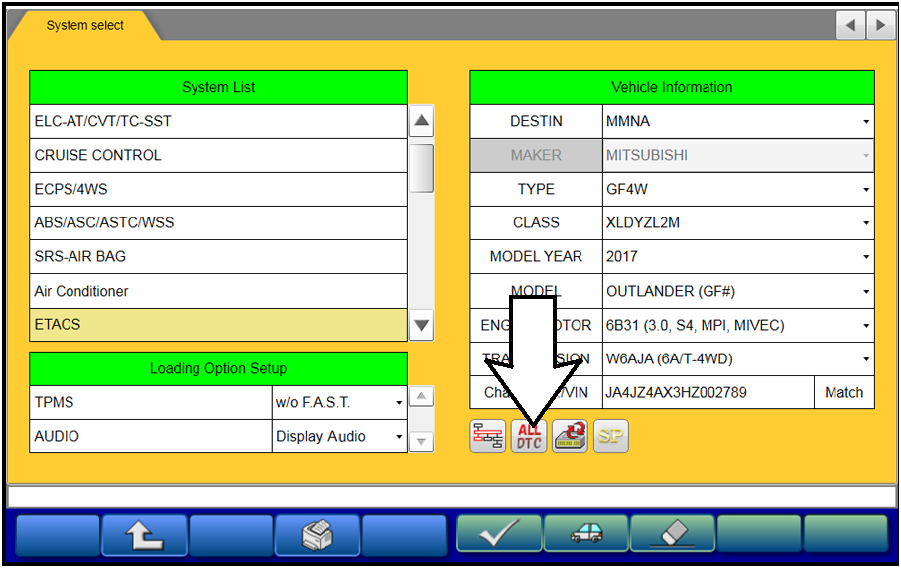 |
- Perform an Erase and Read All DTCs.
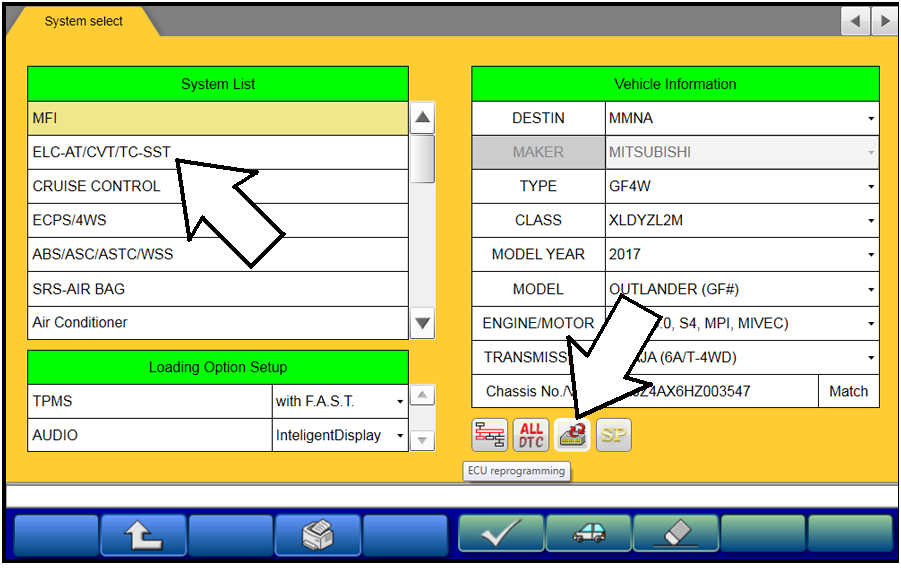
- Click the home button to go back to the System Select menu.
Click the “ALL DTC” button.
|
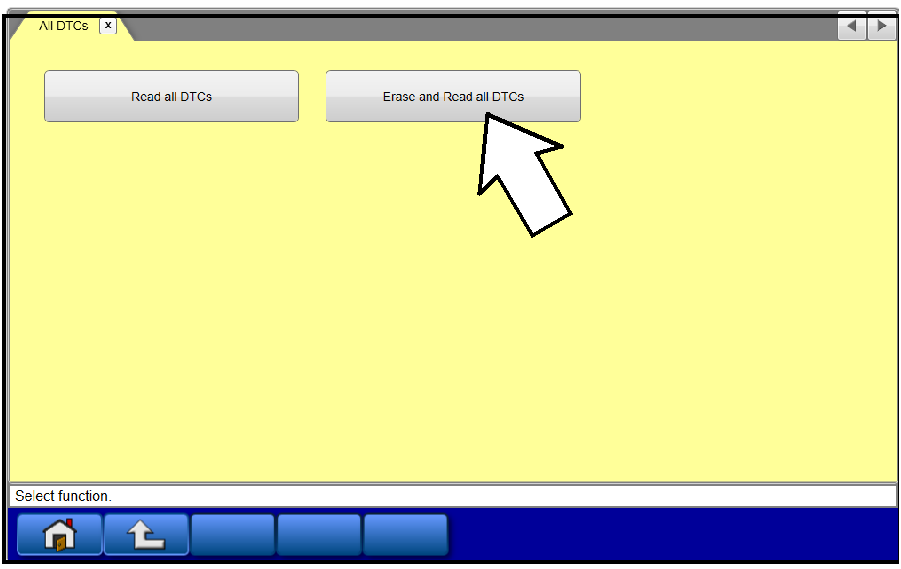 |
- Select “Erase and Read All DTCs.”
|
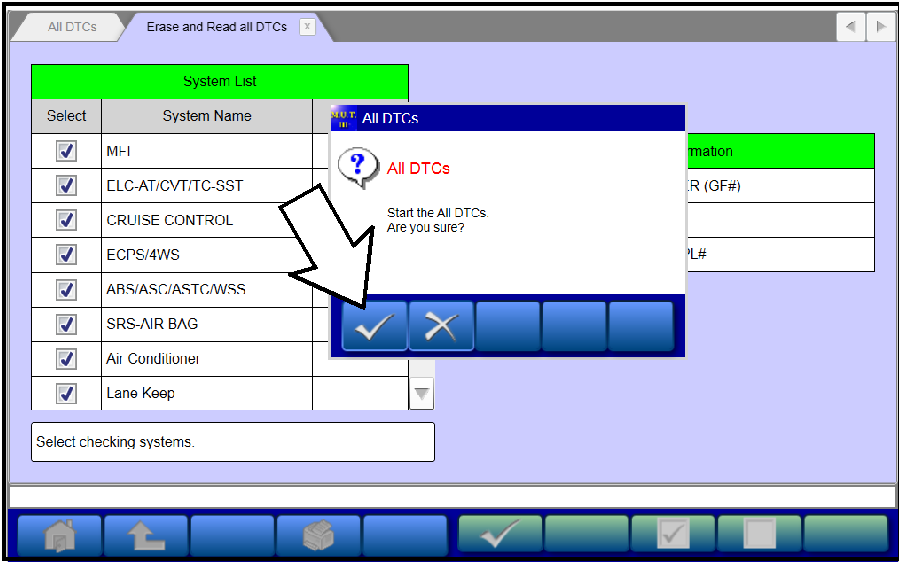 |
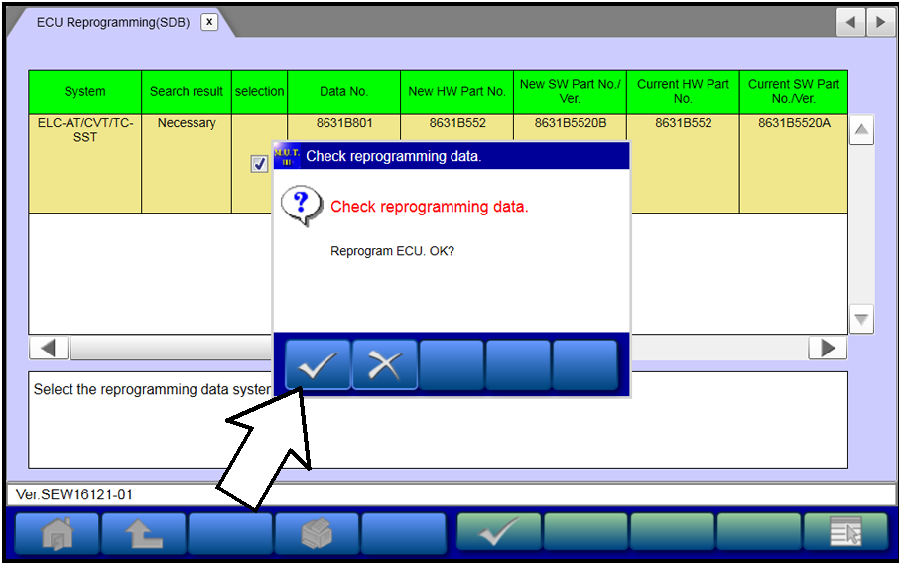
- A window will pop up asking you to confirm DTC erasing. Click the check mark for DTC erasing and reading to begin.
|
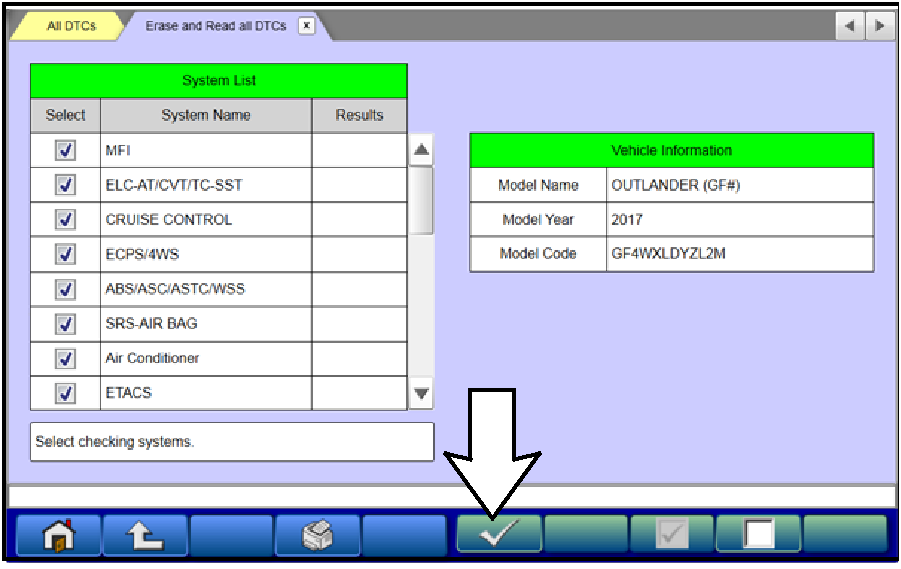 |
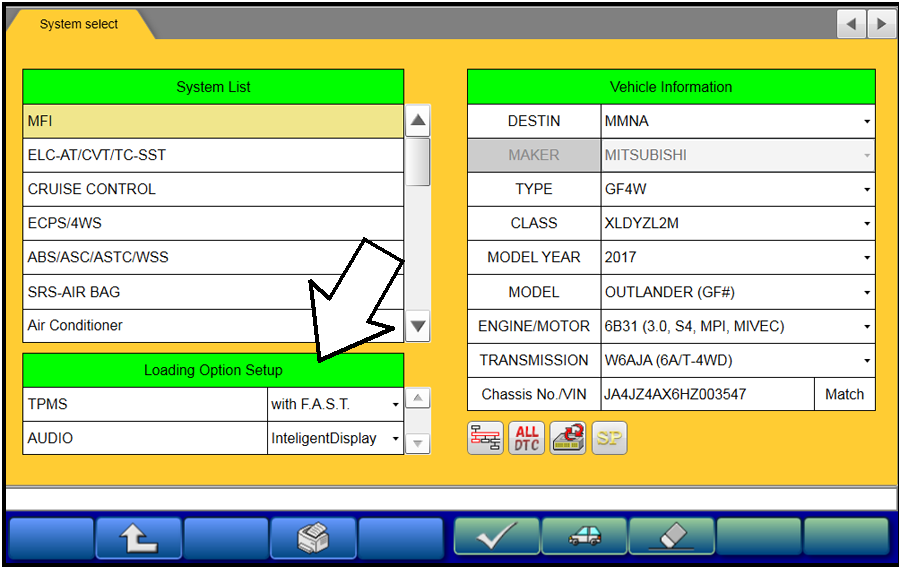
- The “System List” on the left side of the screen will have all selections checked. Do not change these selections. DTCs may be set if the vehicle is equipped with options that are unchecked.
- Click the check mark to continue.
|
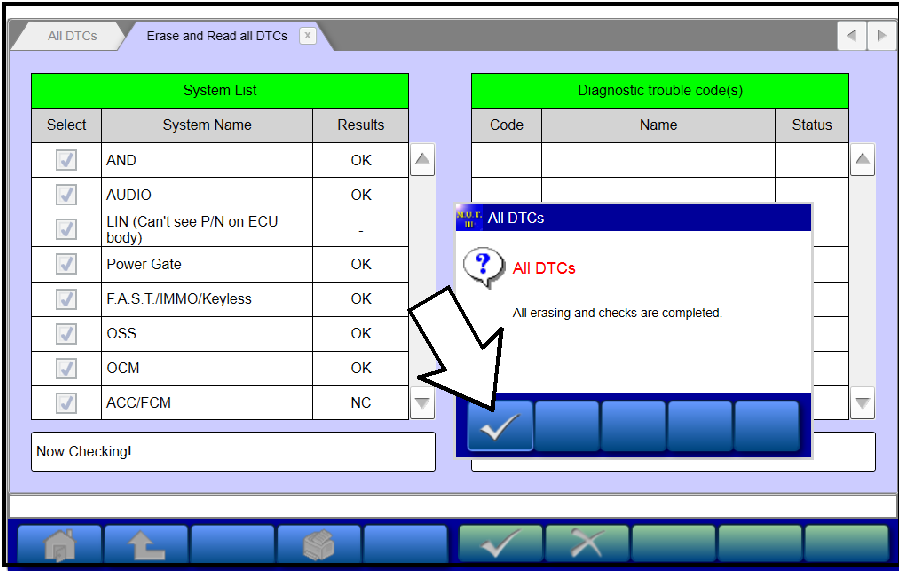 |
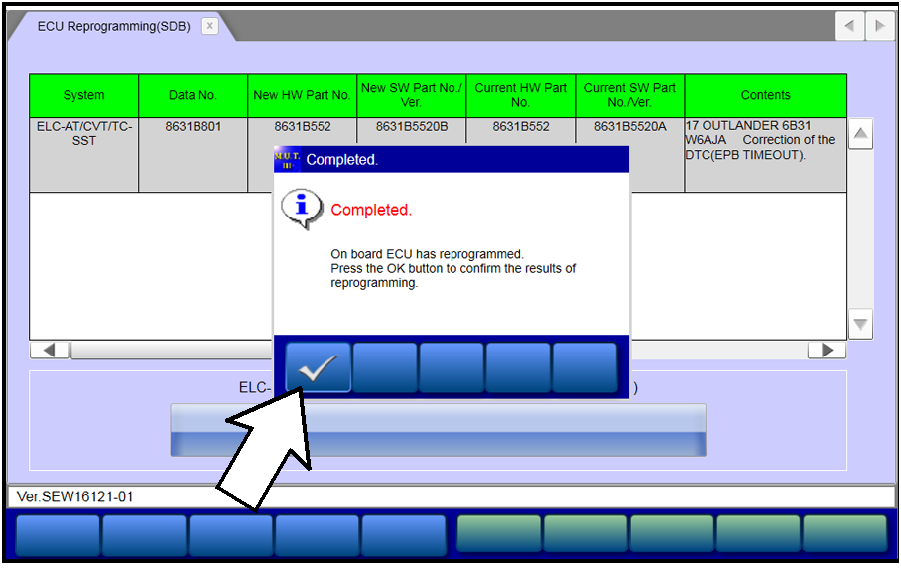
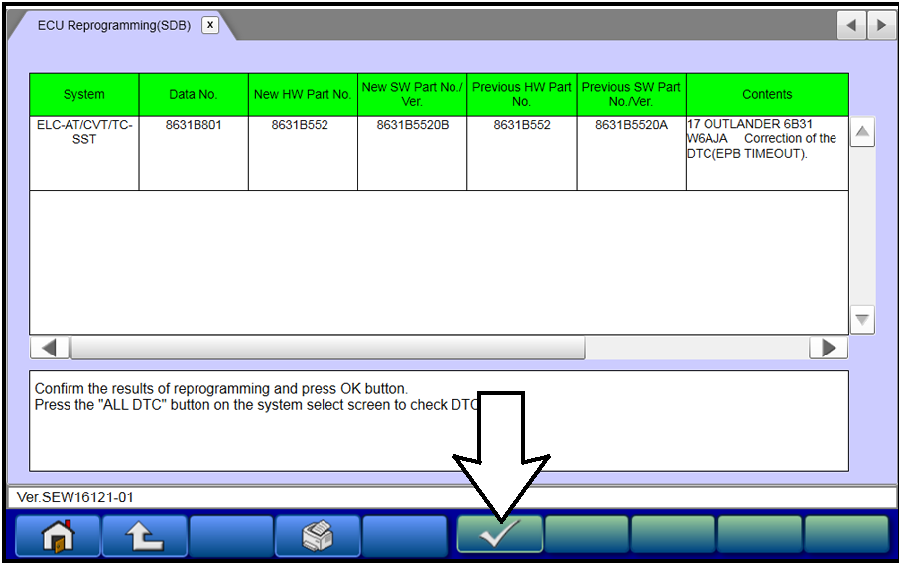
- When DTC erasing is completed, click the check mark in the pop-up message that reads “All erasing and checks are completed.”
a. If DTCs return after reprogramming, click the check mark to clear the window. Diagnose and repair per the Service Manual.
|
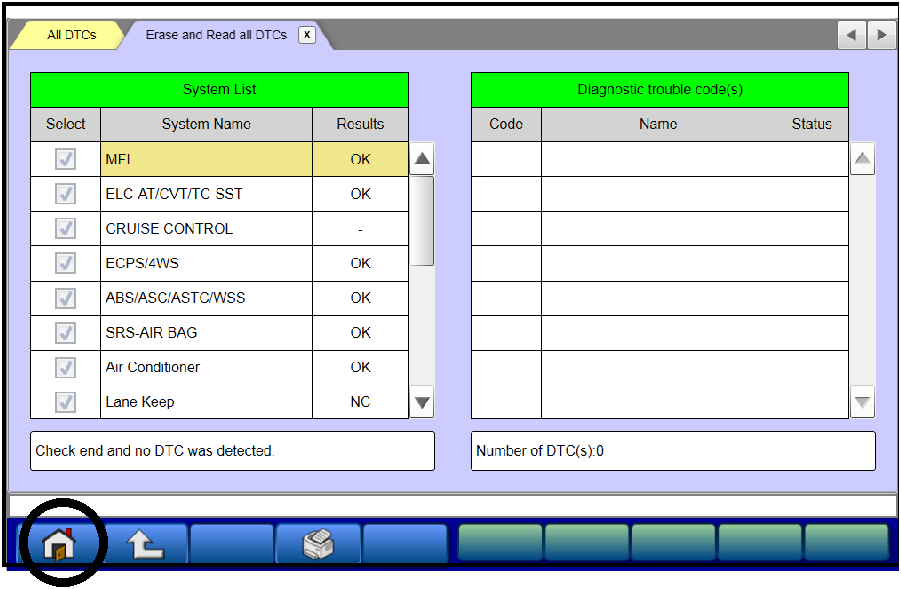 |
b. If DTCs do not return, click the check mark to clear the window, then click the Home icon at the lower left of the screen to return to the main menu.
|
- Turn off the ignition switch and disconnect the MUT-III. Turn off and disconnect the battery charger.
- Test drive the vehicle to confirm proper operation and the MIL does not illuminate.
WARRANTY INFORMATION
This bulletin is supplied as technical information only and is not an authorization to repair. If an affected vehicle is reported with the described condition, diagnose the condition, repair as described in this bulletin and submit a normal warranty claim using the following information.
|
Operation
|
Labor Operation Code
|
Nature Code
|
Cause Code
|
Time Allowance
|
|
Reprogram TCM
|
238502PK
|
59D
|
490
|
0.3 hrs.
|
Warranty Coverage: 8 years / 80,000 miles
Copyright 2017, Mitsubishi Motors North America, Inc.
| The information contained in this bulletin is subject to change. For the latest version of this document, go to the Mitsubishi Dealer Link, MEDIC, or the Mitsubishi Service Information website (www.mitsubishitechinfo.com).
|