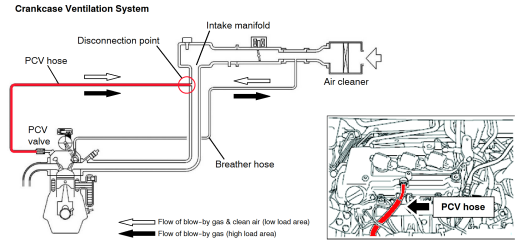
This bulletin supercedes TSB-15-13-001REV, issued July, 2015, to add a more detailed illustration
of PCV hose connection, and update Warranty labor time. Revisions are italicized and indicated
by
![]() .
.

|
SUBJECT: ENGINE STALL/PCV HOSE DISCONNECTION (LOW ENGINE SPEED, HIGH AMBIENT TEMPERATURE) |
No: TSB-15-13-001REVII |
||||||||||||||||||
|
DATE: August, 2015 |
|||||||||||||||||||
|
MODEL: 2014-15 Mirage |
|||||||||||||||||||
|
CIRCULATE TO: |
[ ] GENERAL MANAGER |
[ ] PARTS MANAGER |
[ X ] TECHNICIAN |
||||||||||||||||
|
[ X ] SERVICE ADVISOR |
[ X ] SERVICE MANAGER |
[ X ] WARRANTY PROCESSOR |
[ ] SALES MANAGER |
||||||||||||||||
|
This bulletin supercedes TSB-15-13-001REV, issued July, 2015, to add a more detailed illustration
of PCV hose connection, and update Warranty labor time. Revisions are italicized and indicated
by
|
Due to a rich air fuel ratio, affected vehicles may experience engine stalling at low engine speed, just prior to stopping or during idling, when operated in high ambient temperature conditions, which may lead to PCV hose disconnection. If this condition were to occur, a stalled engine can immediately be restarted.
This TSB instructs dealers to reprogram the ECM with new software that optimizes the air fuel ratio.
2014 - 2015 Mirage vehicles equipped with a CVT and built before January 19, 2015
IMPORTANT: If an affected vehicle has a Malfunction Indicator Lamp (MIL) illuminated before reprogramming, and DTCs are listed in the ECM memory, diagnose and repair those DTCs per the service manual before reprogramming. DO NOT reprogram the ECM until the reason(s) for other DTCs being set is corrected.
The following equipment is needed to reprogram the ECM.
|
MODEL |
CURRENT PART NO. |
DATA NO. |
DISPLAY ON MUT-III AFTER REPROGRAMMING |
|
|
New Part No. |
New S/W Part # |
|||
|
2014 - 2015 Mirage w/CVT built |
1860C142 |
1862C033 |
1860C142 |
1860C14202 |
|
NOTE: Reprogramming the ECM with the latest database (i.e. N15021) includes all past and current reprogramming for TSBs of affected vehicles. It is not necessary to reprogram the ECM for each previous TSB. |
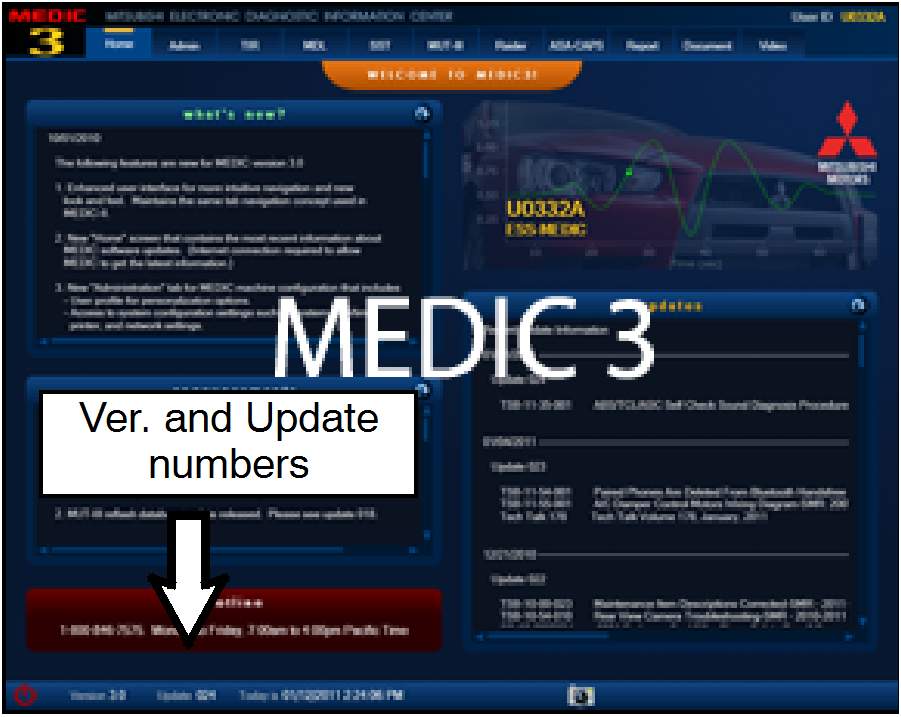 |
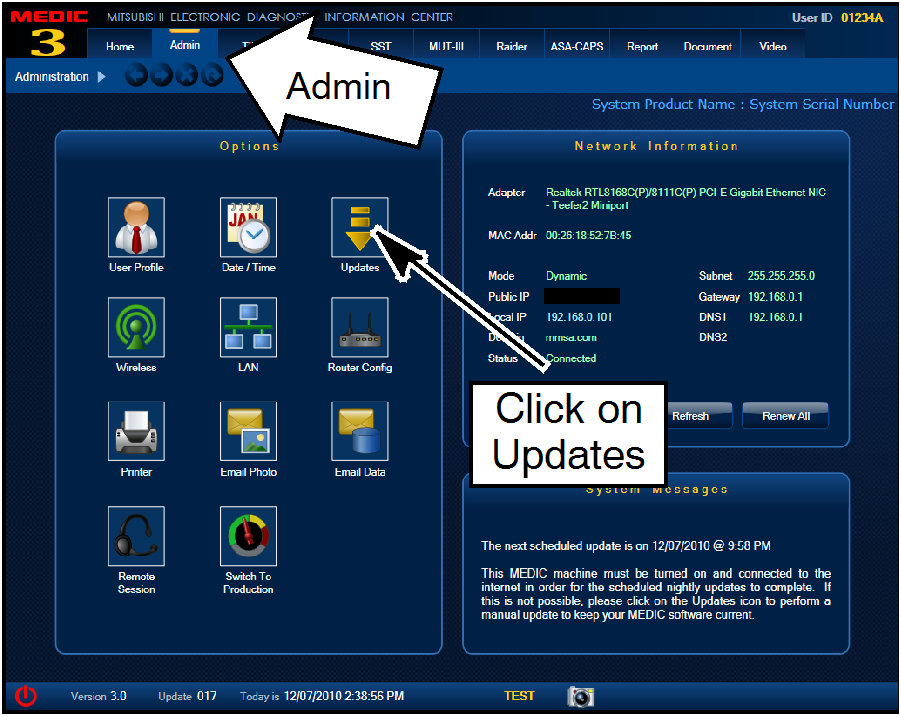
For MEDIC 3/4 users only: (MUT-III users go to step 5)
|
 |
|
 |
|
 |
- Select “Special Function” - Select “ECU Reprogramming” - Select :Database File Display-CAN” - Confirm the database number displayed at the top right of the chart is N15021 or higher
|

|
CONNECT A BATTERY CHARGER TO THE VEHICLE'S BATTERY DURING THE REPROGRAMMING PROCEDURE. DO NOT ALLOW THE BATTERY CHARGER TO TIME OUT. BATTERY VOLTAGE (AS MEASURED AT THE BATTERY POSTS WITHOUT ELECTRICAL LOAD) MUST BE KEPT AT 12.4V OR HIGHER IN ORDER TO REPROGRAM THE ECM. MEASURE THE BATTERY VOLTAGE AND CHARGE AS NECESSARY. |
|
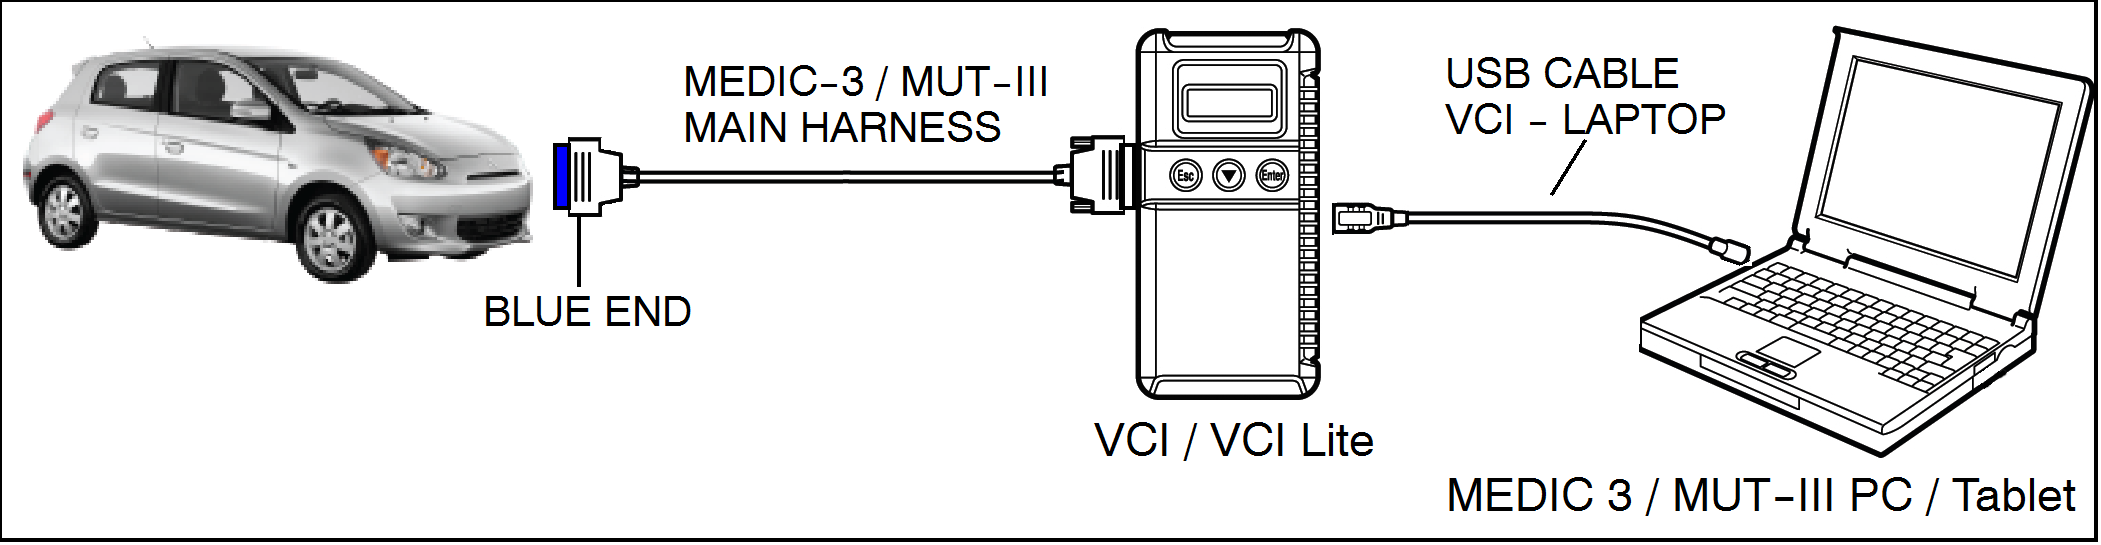
NOTE: VCI Stand-alone reprogramming is not available for this procedure. The laptop and the VCI must remain connected for the entire procedure. |
Connect the equipment as follows:
NOTE: VCI and MEDIC 3 Laptop shown for illustration purposes only
|
DO NOT DISTURB THE HARNESS CABLES OR CONNECTIONS DURING THE REPROGRAMMING PROCESS AS IT COULD CAUSE THE CONTROL UNIT TO LOSE DATA OR PREVENT FUTURE REPROGRAMMING. IF THE USB CABLE IS DISCONNECTED DURING THIS PROCEDURE, A WARNING MESSAGE WILL DISPLAY. |
 |
a. Turn the ignition switch to the ON position. If the
vehicle is equipped with the F.A.S.T. System, the
transmitter must remain in the vehicle for the entire
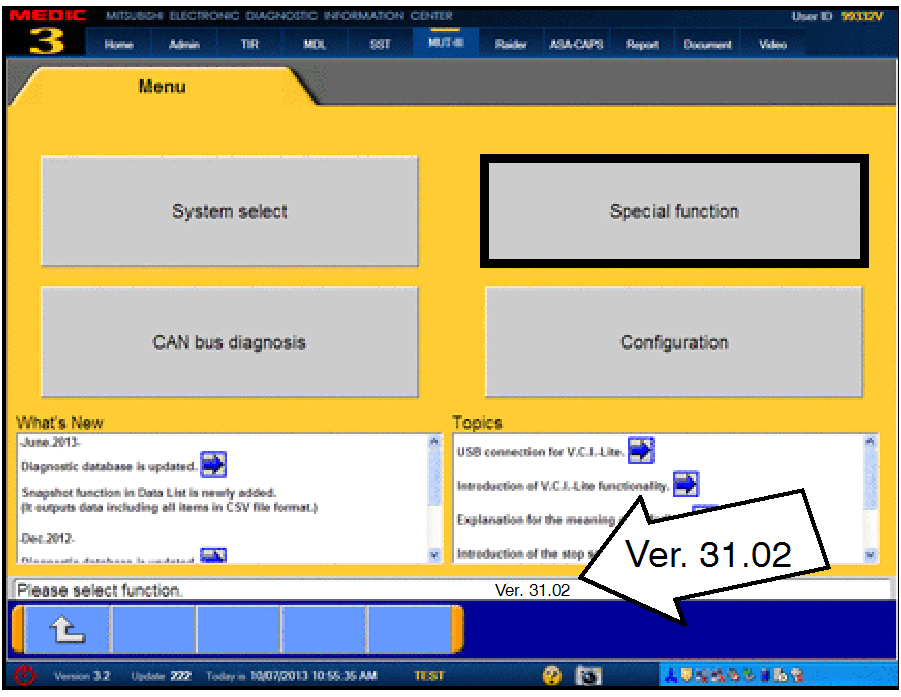
procedure. b. If using MEDIC, from the main page, click the MUT-III STV icon at the top center of the screen to open MUT-III. c. From the MUT-III Main Menu, select “Special Function.” |
|
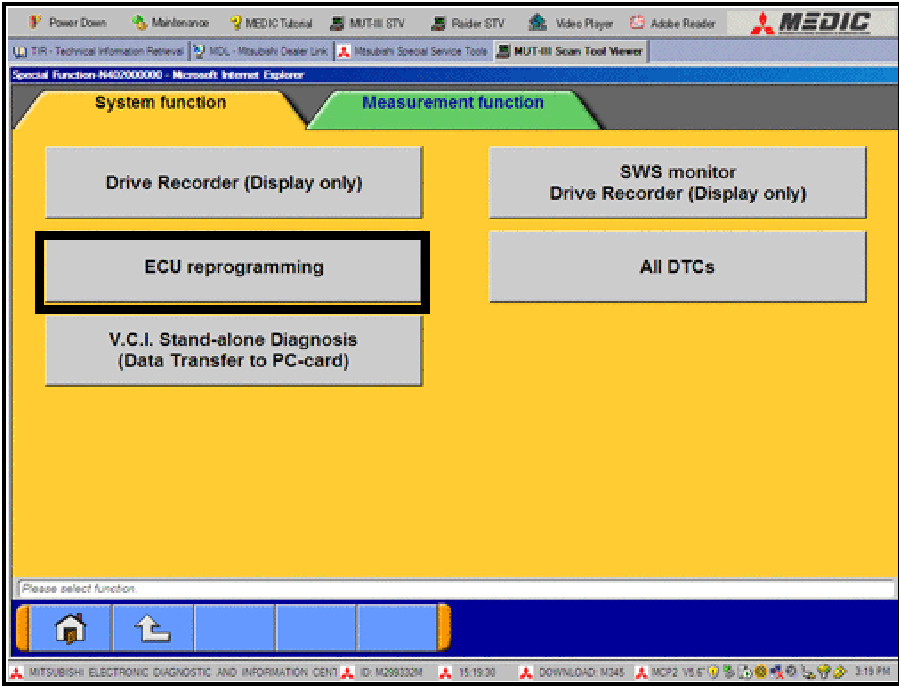 |
d. Select “ECU Reprogramming.” |
|
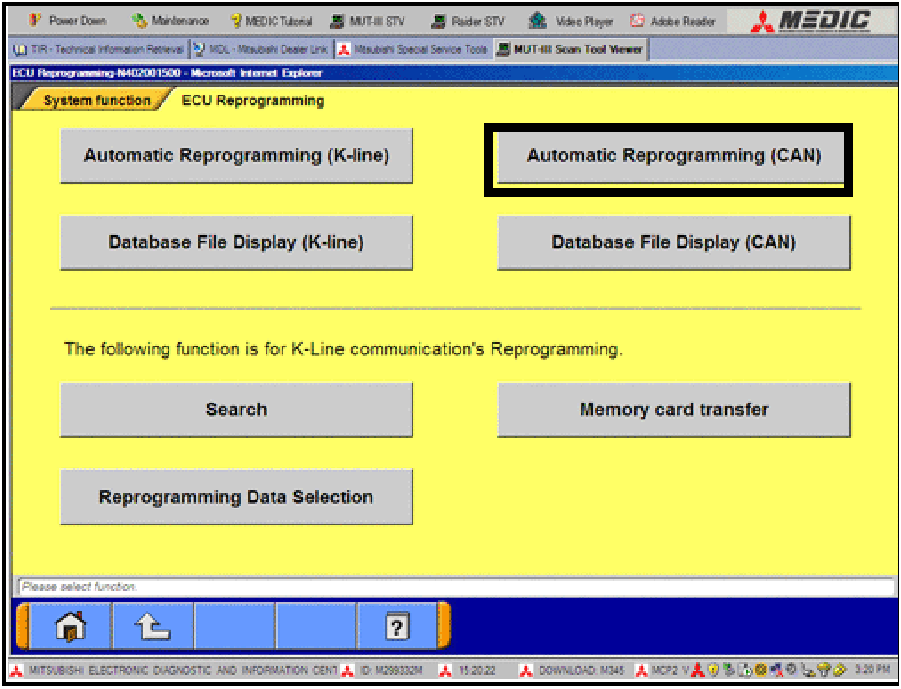 |
e. Select “Automatic Reprogramming (CAN).” |
|
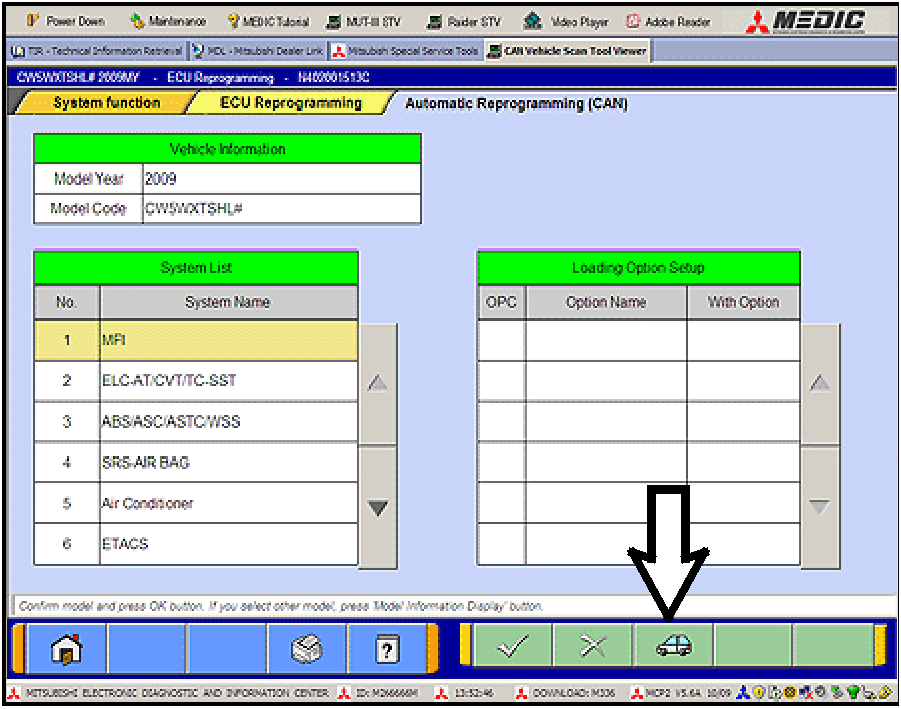 |
f. Click the car icon at the bottom of the page. |
|
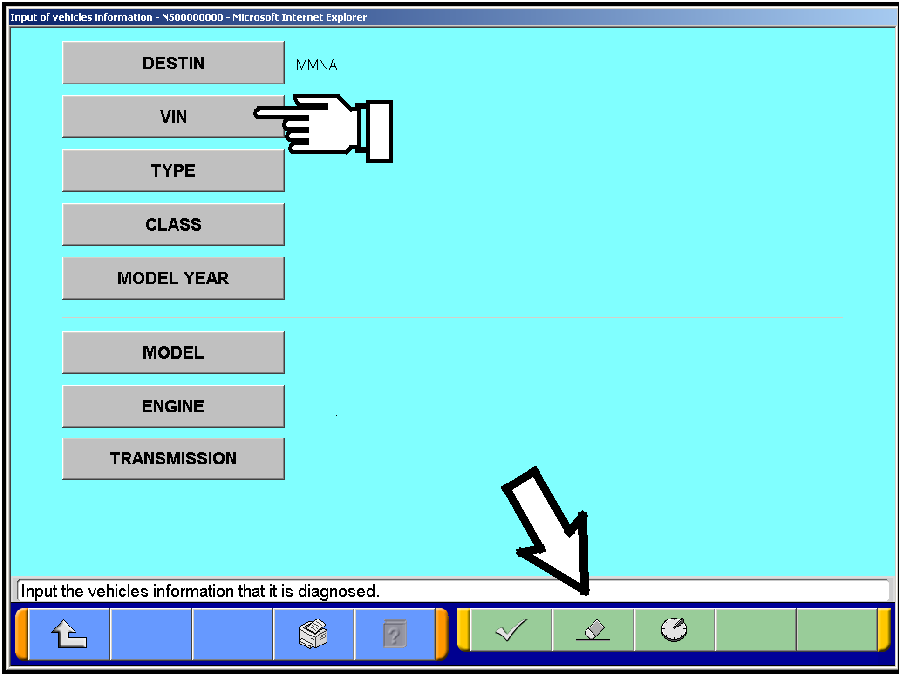 |
g. If the VIN or vehicle description displayed does not match the vehicle you are working on, click the eraser icon at the bottom of the page to erase vehicle data. Then click the VIN button. |
|
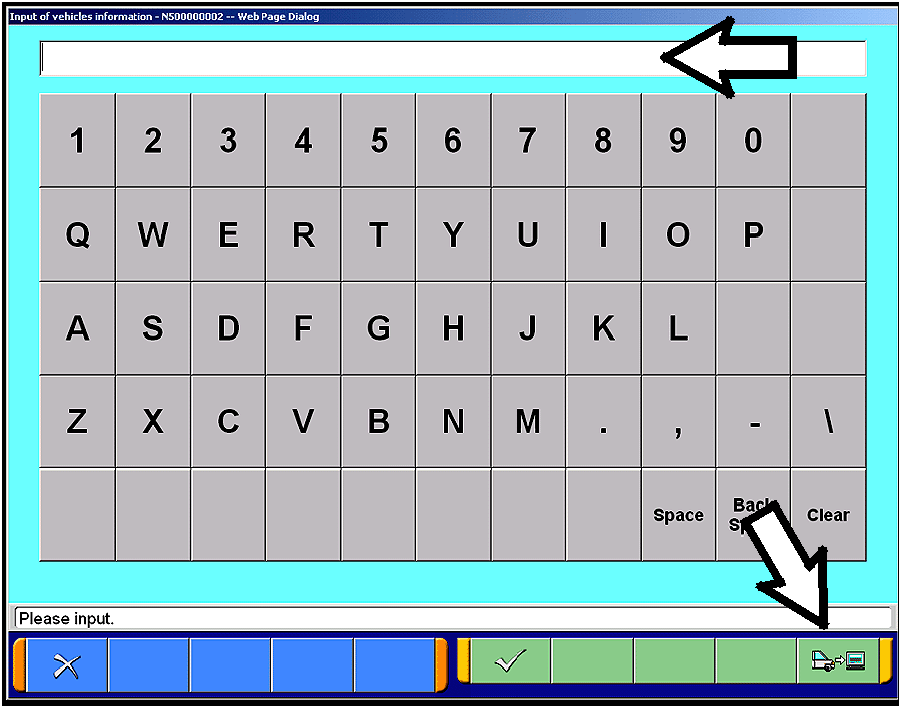 |
h. Click the icon in the lower RH corner of the screen to have MUT-III automatically read the VIN. If a message appears saying the VIN cannot be input automatically, manually enter the 17 digit VIN into the VIN field at the top of the page. Make sure the VIN is correct and click the check mark. |
|
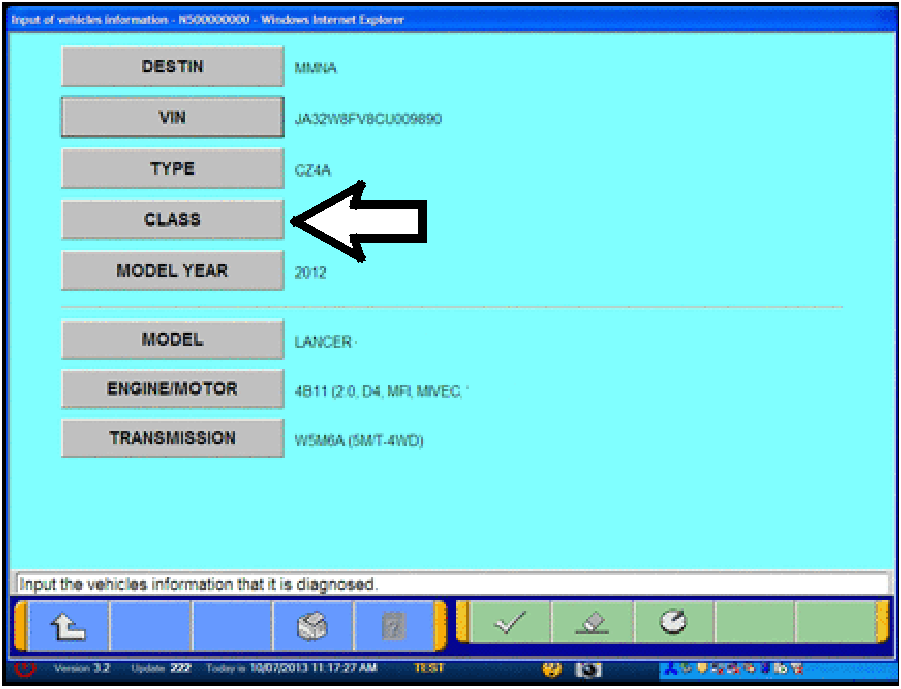 |
i. Click the CLASS button. |
|
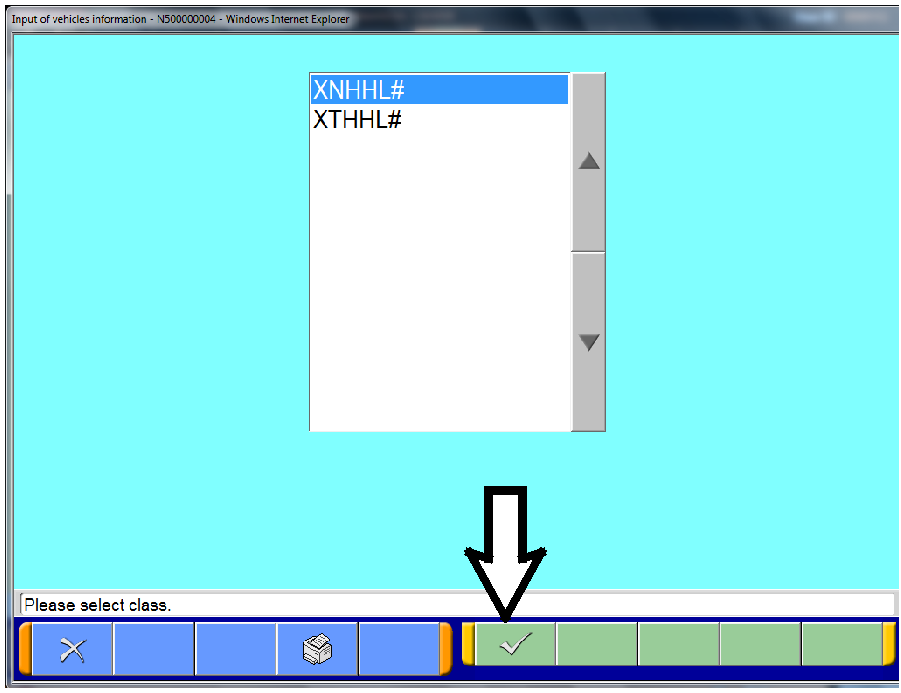 |
j. Look at the label on the passenger side B-pillar to identify the appropriate class. Select it and click the check mark at the bottom of the page. |
|
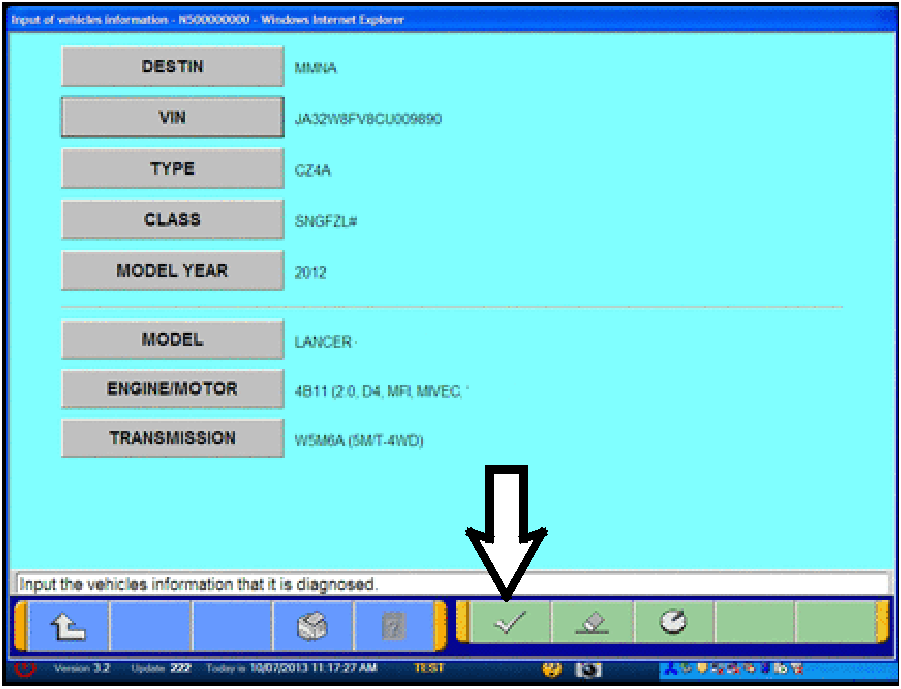 |
k. Confirm all data matches the vehicle and click the check mark at the bottom of the page. |
|
 |
l. MFI should be highlighted as the default. If not, click it to highlight it. Click the check mark at the bottom of the page. |
|
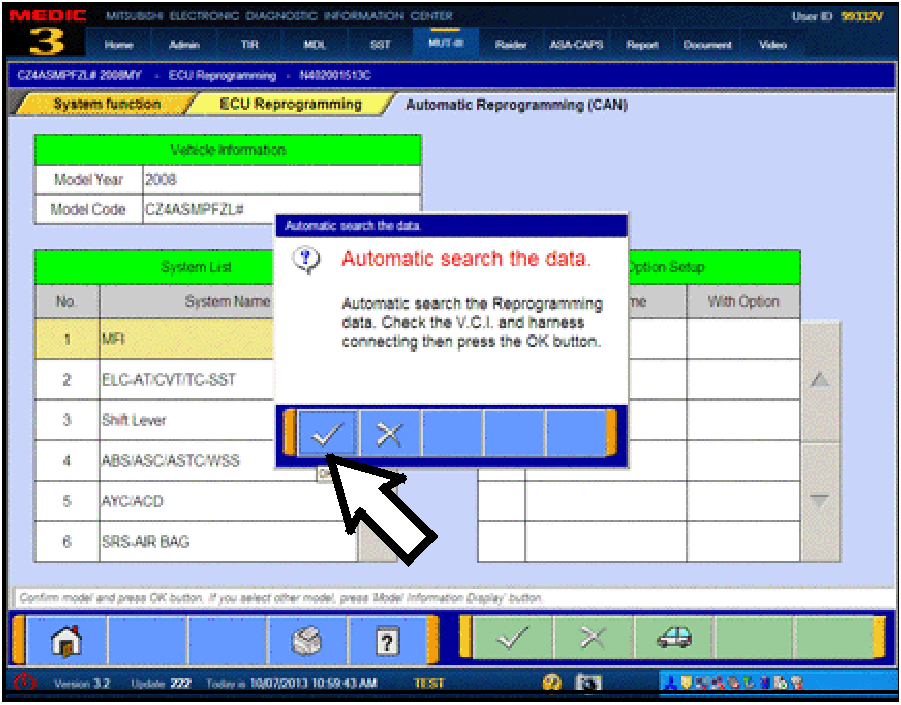 |
m. A message will advise the system will “Automatic search the data.” Click the check mark to continue. |
|
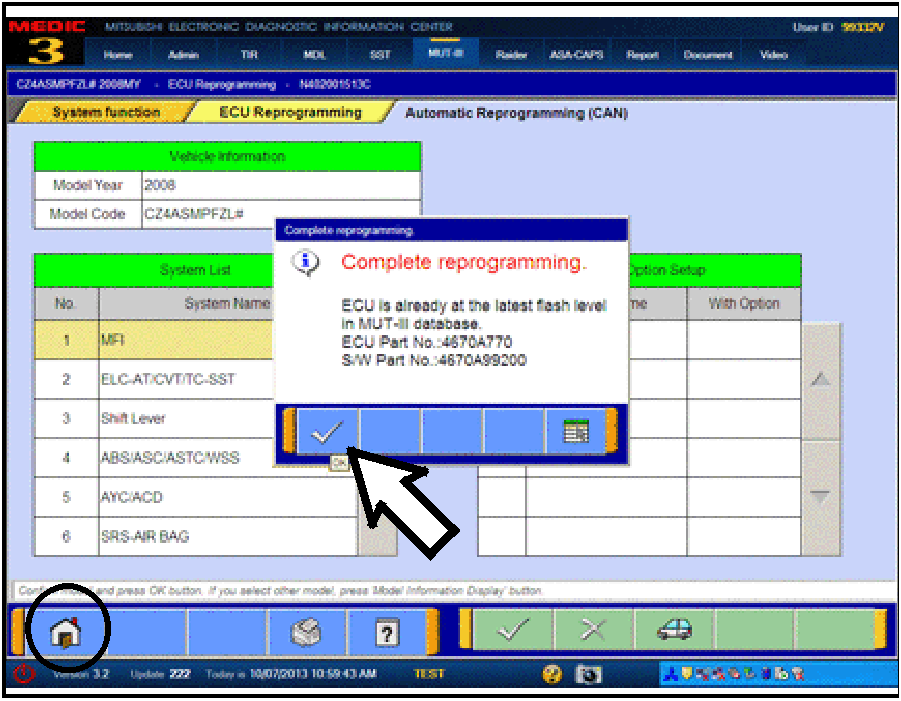 |
ECM TO LATEST VERSION If a “Complete Reprogramming” message does not appear, continue with step l. If the message seen at left is displayed, the ECM software is already at the most current level. Do not continue with the reprogramming procedure. This TSB does not apply. Click the check mark to clear the window, then click the Home icon at the lower left corner of the screen to return to the System Select main page. Turn the ignition switch to the OFF position and disconnect the MUT-III. Turn off and disconnect the battery charger. Conduct normal diagnosis per the service manual. |
|
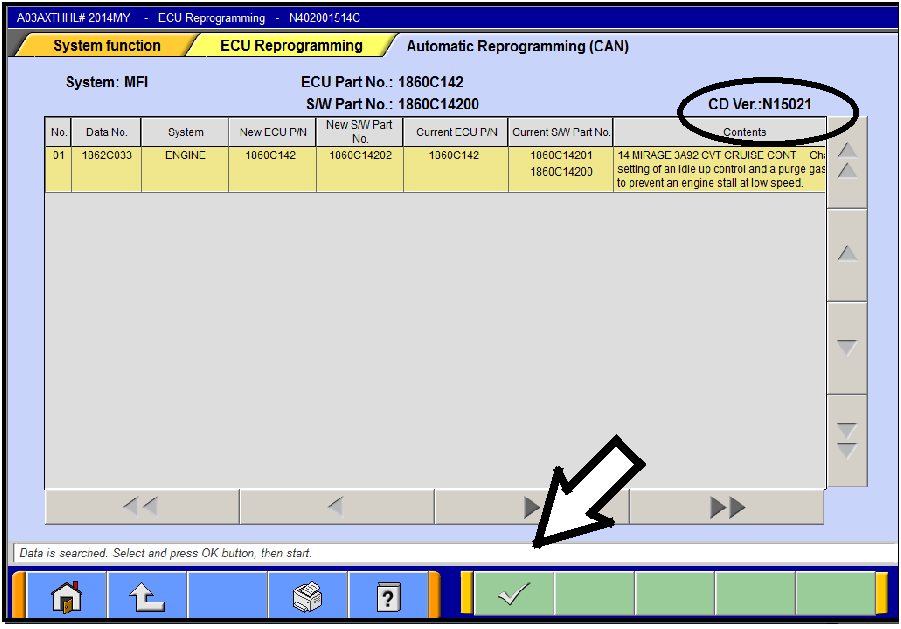 |
n. The Automatic Reprogramming (CAN) database screen will display. Confirm the database number at the top right of the table is N15021 or higher. If more than one row is displayed in the table, refer to the ECM Reprogramming Chart on Page 2 to select the correct row. Click on the row to highlight it. Click the check mark to continue. |
|
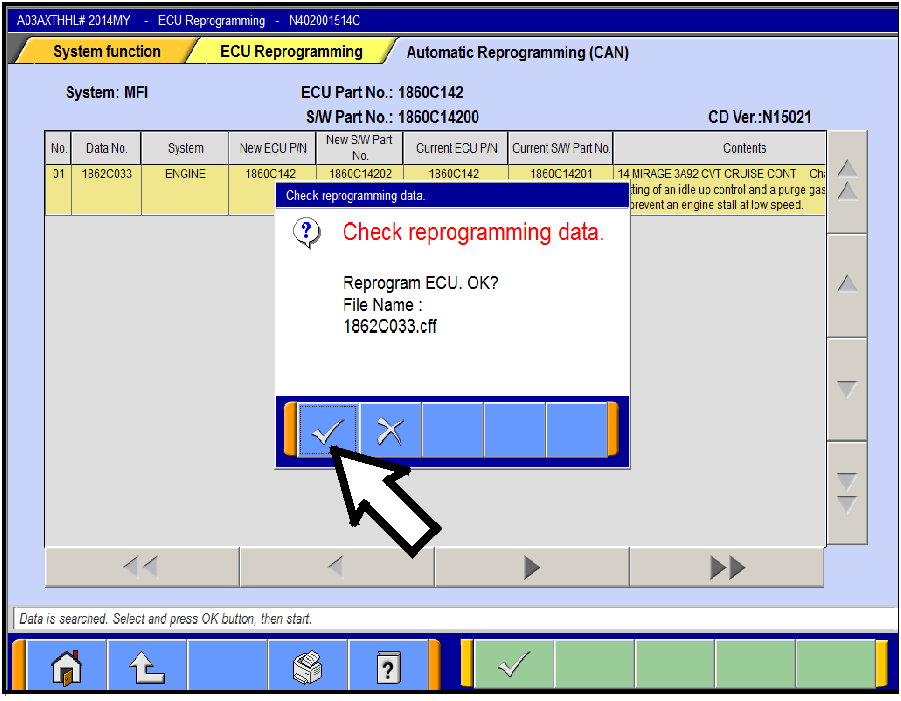 |
o. A message will ask you to “Check reprogramming data.” p. Click the check mark to begin reprogramming. Reprogramming will take up to 5 minutes to complete. |
|
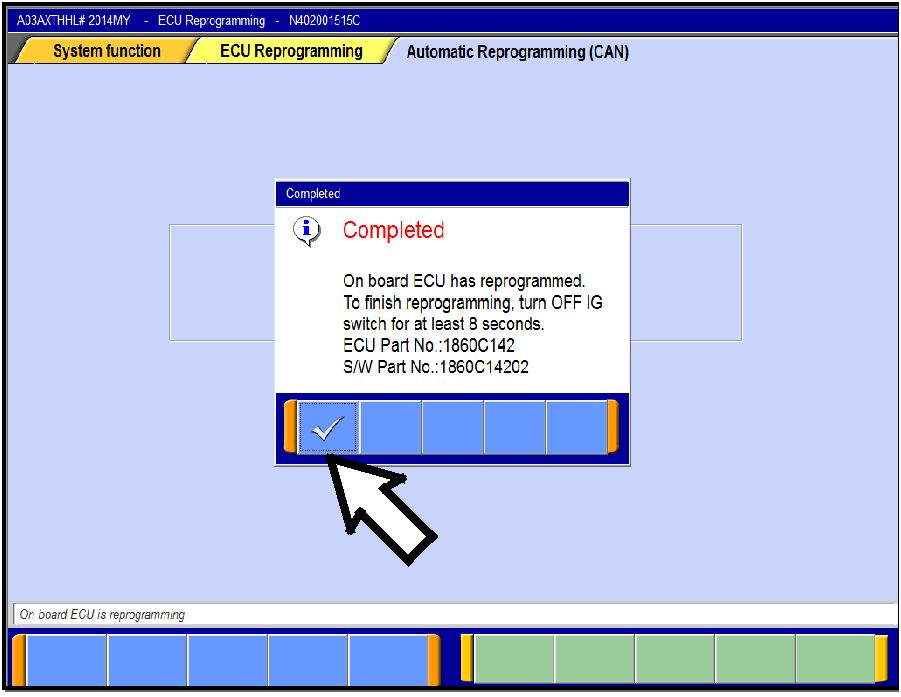 |
q. This message will display when ECM reprogramming is successfully completed. Confirm the “New S/W P/N” displayed matches the table at the beginning of this TSB. Then click the check mark to clear the message. r. Turn the ignition switch off, wait 8 seconds, then turn
the ignition switch on.
|
|
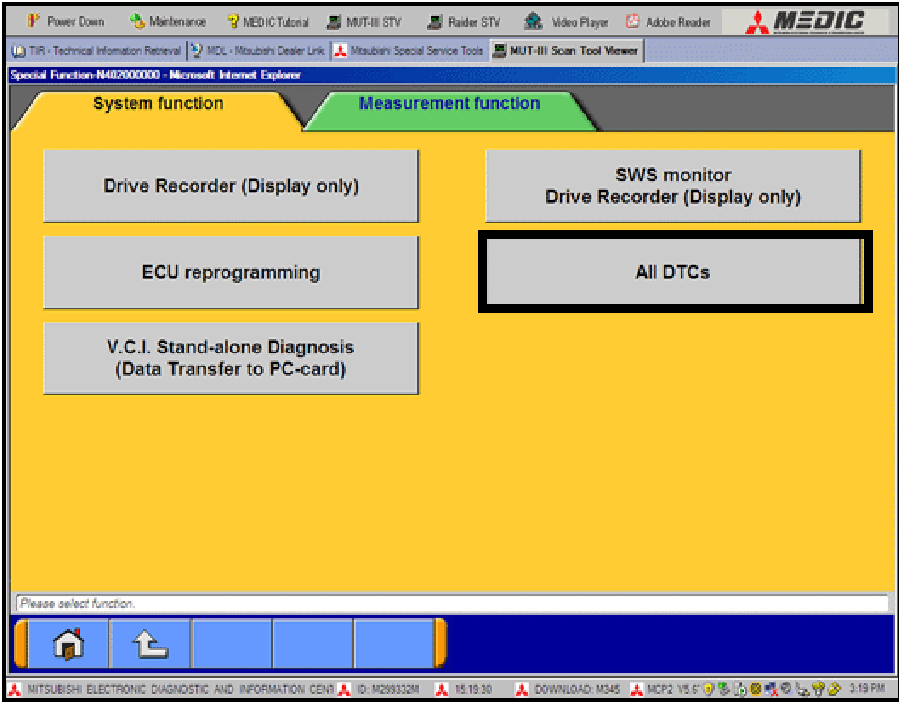 |
a. Select “Special Function.” b. Select “All DTCs,” then select “ERASE AND READ ALL DTCS.” |
|
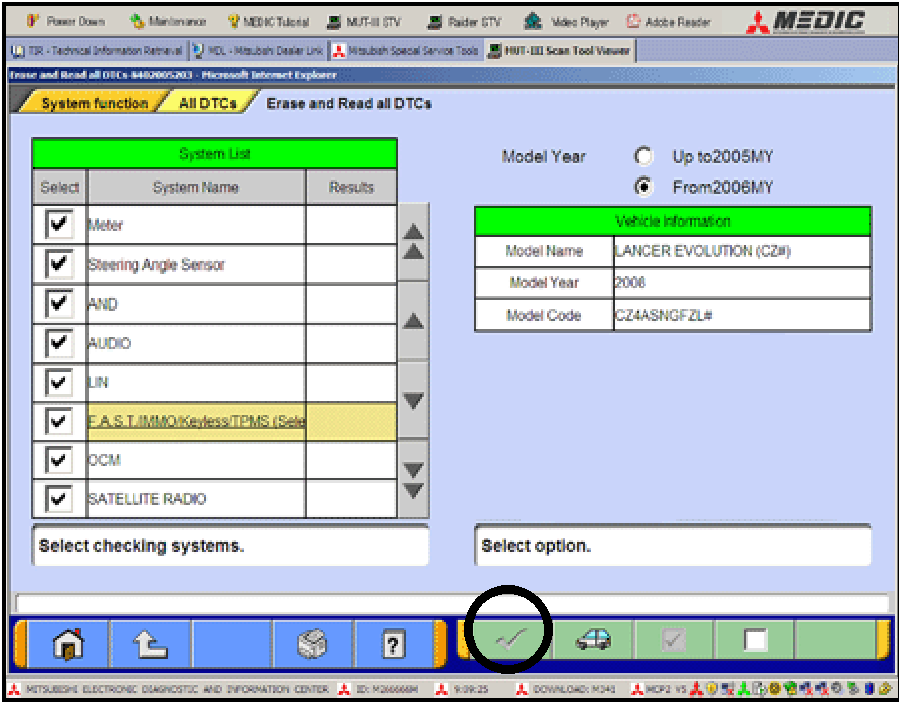 |
c. The “System List” on the left side of the screen will have all selections checked. Do not change these selections. DTCs may be set if the vehicle is equipped with options that are unchecked. d. If the check mark at the bottom of the screen is highlighted, click it and move ahead to step 4. If not, continue with sub step e. |
|
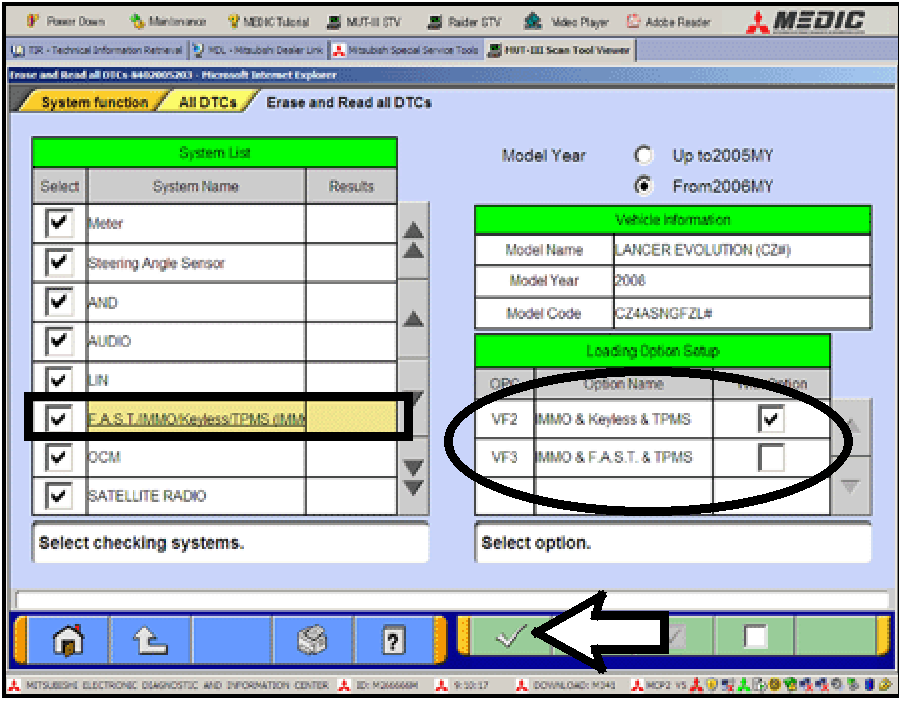 |
e. In the left column, scroll to and click FAST/IMMOB/KEYLESS/TPMS. In the right column, check the correct option code (VF#) from the Loading Options Setup list. This will activate the check mark at the bottom of the page. - Vehicles with regular keyless entry (buttons on a multi-function key), select VF2. - Vehicles with F.A.S.T. Key, select VF3. f. Click the check mark to continue. |
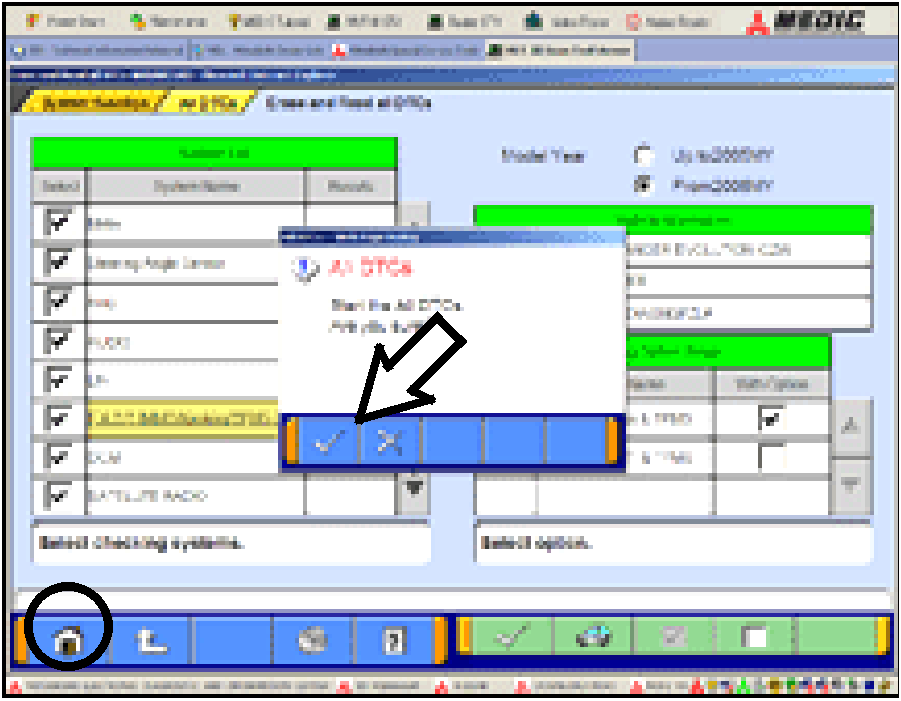 |
a. If DTCs return after reprogramming, click the check mark to clear the window. Diagnose and repair per the Service Manual. b. If DTCs do not return, click the check mark to clear the window, then click the home icon at the lower left of the screen to return to the main menu.
|
Use only the Genuine Mitsubishi Parts listed below.
|
Description |
Part Number |
Quantity |
|
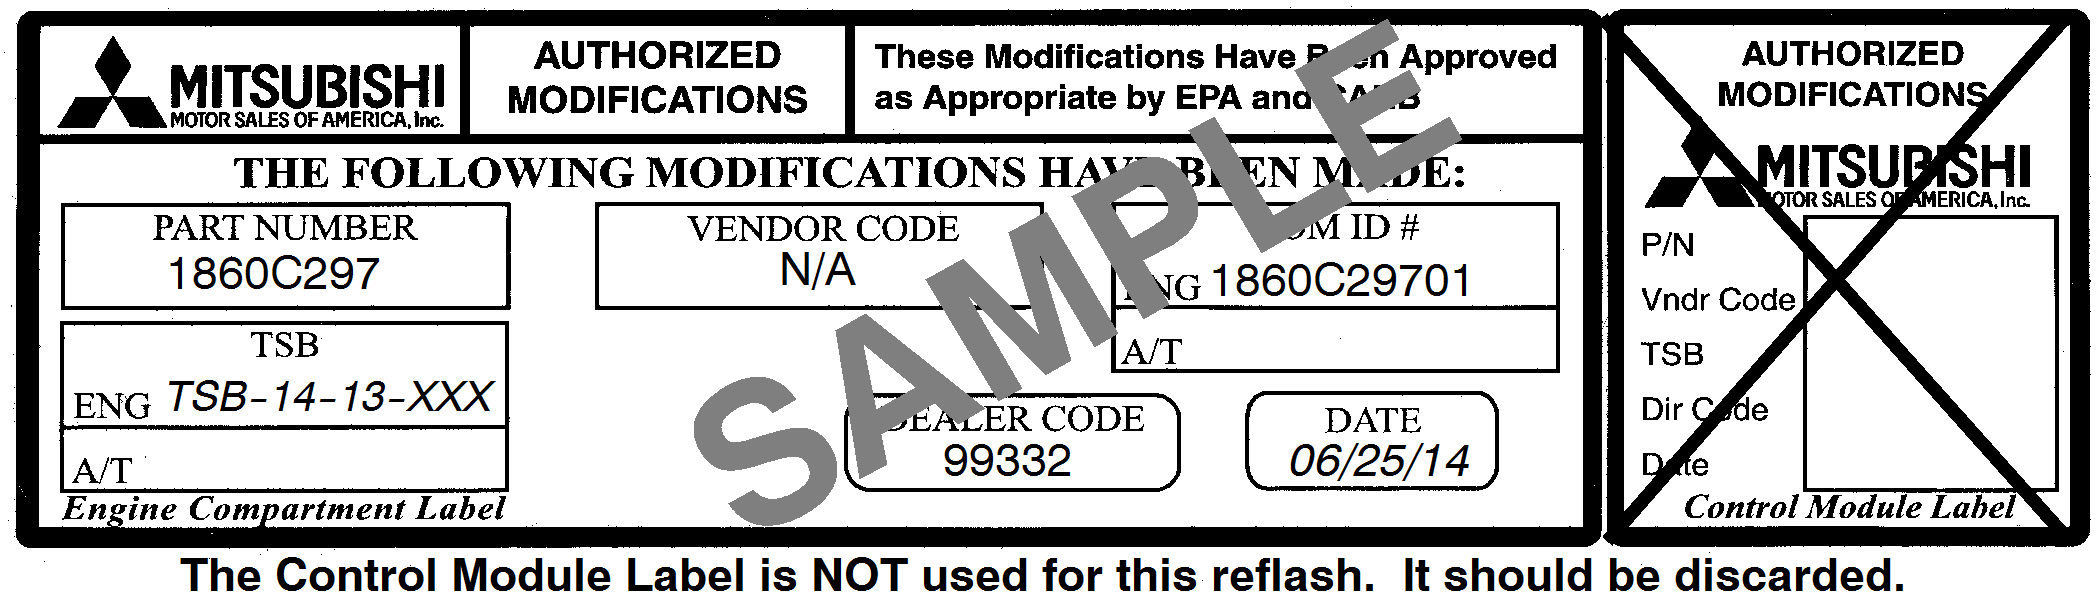
Label, Engine Compartment |
MSSF024G00 |
1 |
This bulletin is supplied as technical information only and is not an authorization to repair. If an affected vehicle is reported with the described condition, diagnose the condition, repair as described in this bulletin and submit a normal warranty claim using the following information.
|
Nature Code: 08A |
Cause Code: 605 |
||
|
Labor Operation No.: 13850113 |
Time Allowance: 0.4 hrs. |
|
|
|
Warranty Coverage: Emissions Coverage - Refer to the Superscreen for individual vehicle warranty coverage terms. |
|||
|
|
|
|
|
|
NOTE: The addition of Labor Operation 138501A2 “Learning Drive” is NOT applicable to the ECM reflash in this TSB. |
|||
Copyright 2015, Mitsubishi Motors North America, Inc.