On affected vehicles equipped with W6DGA TC-SST transmissions, the TCM quickly engages and
disengages 5th gear to determine whether the vehicle is moving. Noises can be heard as the shift fork
attempts to move from neutral to 5th gear, and back to neutral immediately following engine start after an
extended time being parked (e.g. overnight parking).
This TSB instructs technicians to reprogram the TCM with new software to prevent gear noise by
eliminating the 5th gear vehicles speed check.
This TCM software update fixes a program fault unrelated to any emission or diagnostic performance.
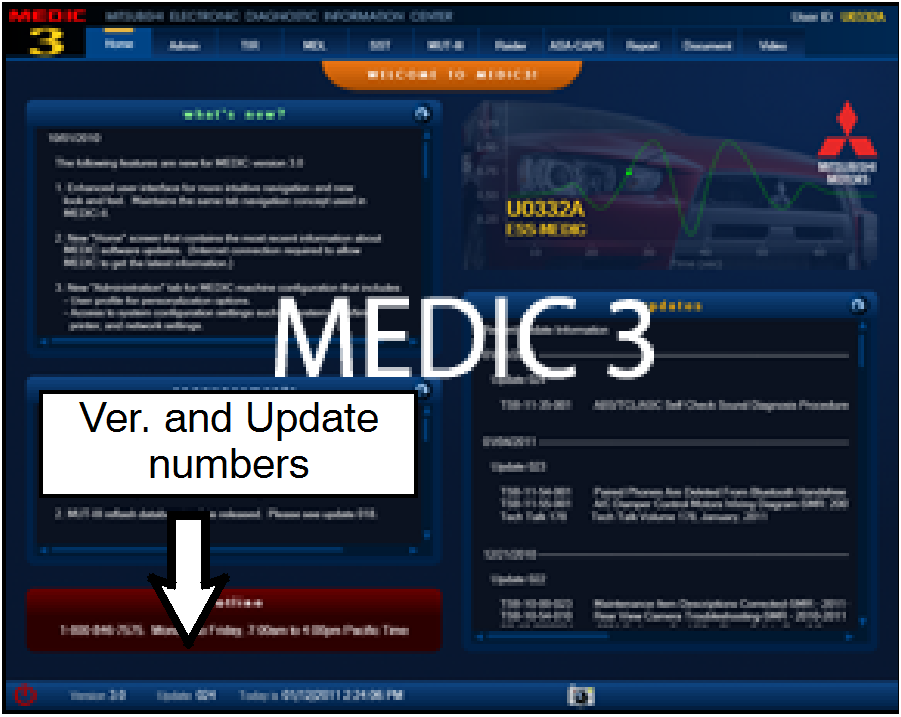 |
For MEDIC 3 users only: (MUT-III users go to step 5)
- Verify the MEDIC 3 is at version 3.1 and at update 267
or higher.
If your MEDIC 3 update is at least 267, continue with
the Reprogramming Procedure on page 4.
If your MEDIC 3 update is below 267, update your
MEDIC 3 as follows.
|
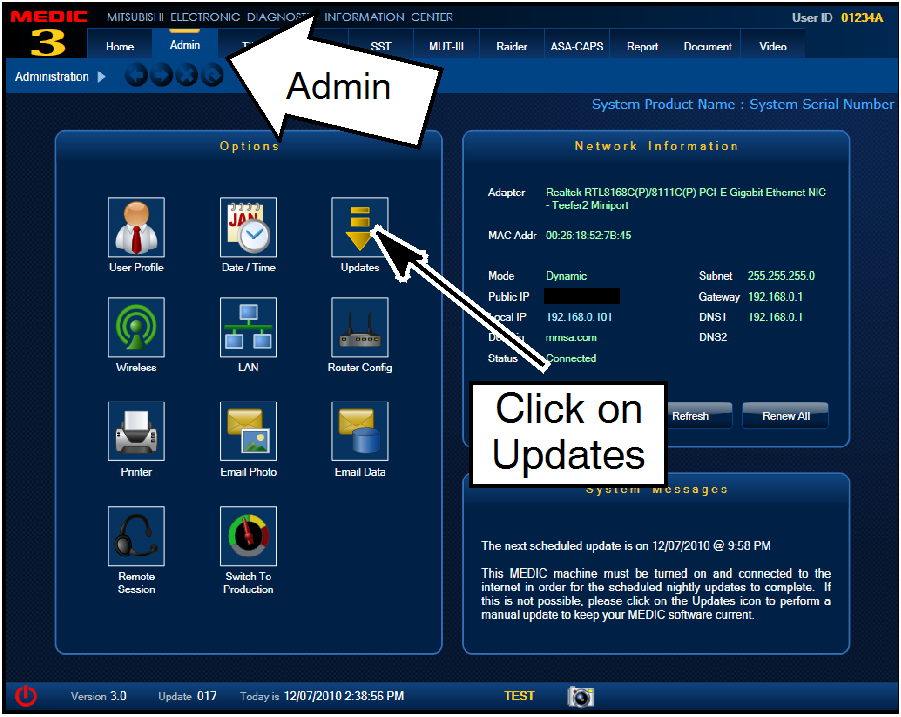 |
- Select the MEDIC 3 Admin tab and click on “Updates.”
|
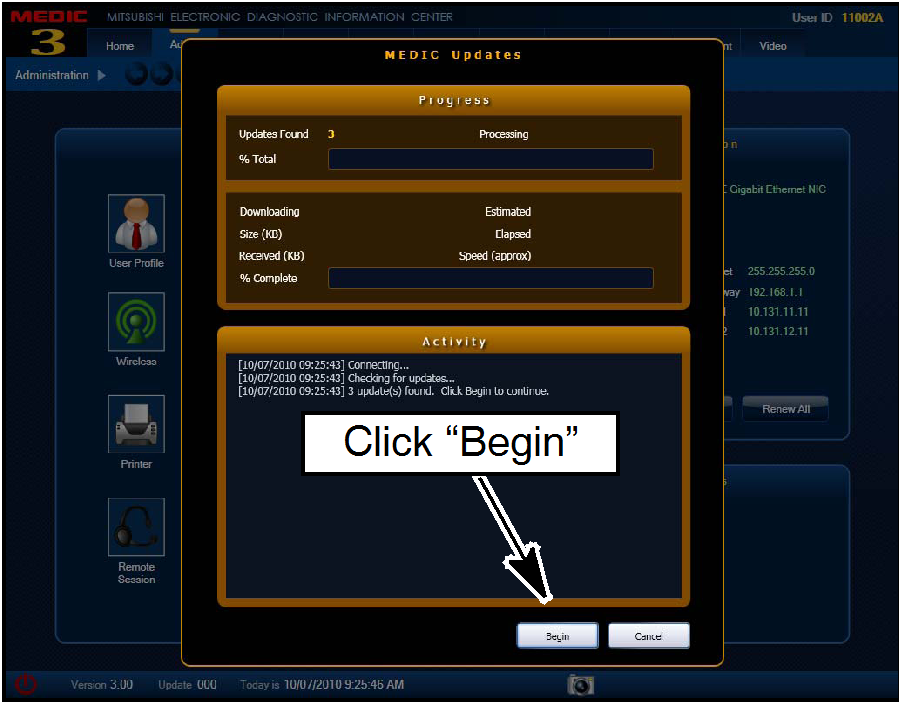 |
- IF the MEDIC update screen advises updates are
available, click the “Begin” button. After all updates are
complete, GO TO THE REPROGRAMMING
PROCEDURE ON PAGE 4.
|
 |
- STANDALONE MUT-III SCAN TOOL VIEWER (STV)
ONLY: (MEDIC 3 USERS GO TO THE
REPROGRAMMING PROCEDURE ON PAGE 4).
Verify that your MUT-III has the most current version
of the reprogramming database:
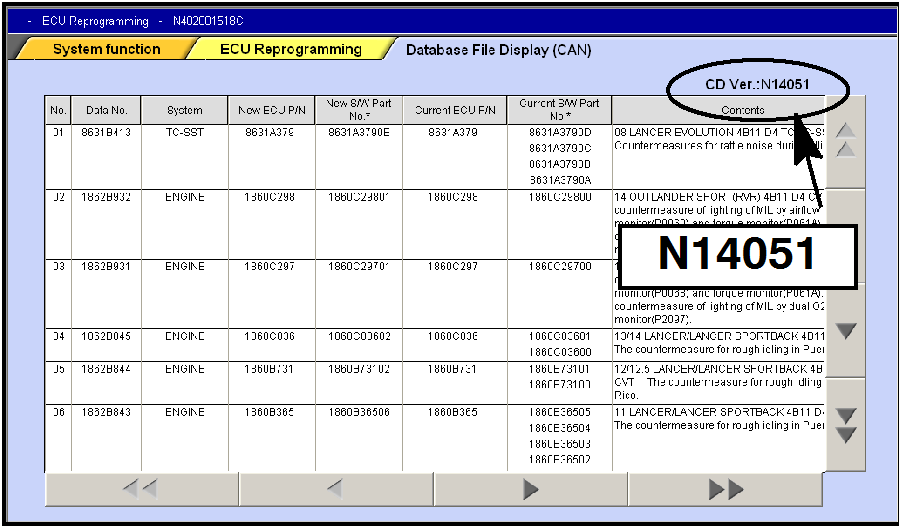
- From the MUT-III Main Page:
‧ Select “Special Function”
‧ Select “ECU Reprogramming”
‧ Select :Database File Display-CAN”
‧ Confirm the database number displayed at the
top right of the chart is N14051 or higher
- If the database number displayed on your
MUT-III is N14051 or greater, continue to the
Reprogramming Procedure on page 4.
- If the reprogramming database number
displayed on your MUT-III is lower than
N14051, locate the reprogramming CD
containing database N14051 and follow the
instructions provided with the CD to update
your MUT-III.
|
 |
- Conduct the following steps to reprogram the TCM.
a. Turn the ignition switch to the ON position. If the
vehicle is equipped with the F.A.S.T. System, the
transmitter must remain in the vehicle for the entire
procedure.
For vehicles equipped with OSS, press the
START/STOP button twice without applying the
brake. The LED in the button should be green.
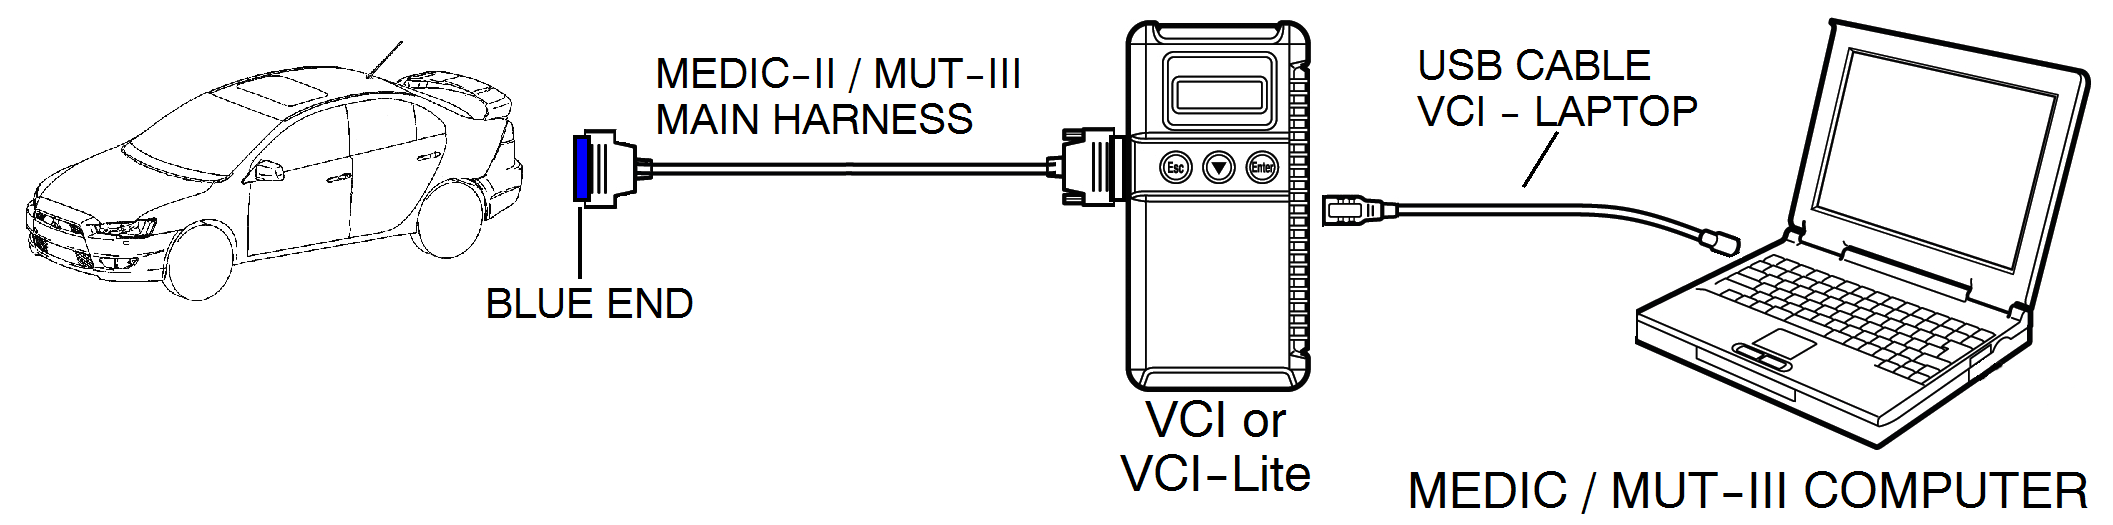
b. If using MEDIC, from the main page, click the
MUT-III STV icon at the top center of the screen to
open MUT-III.
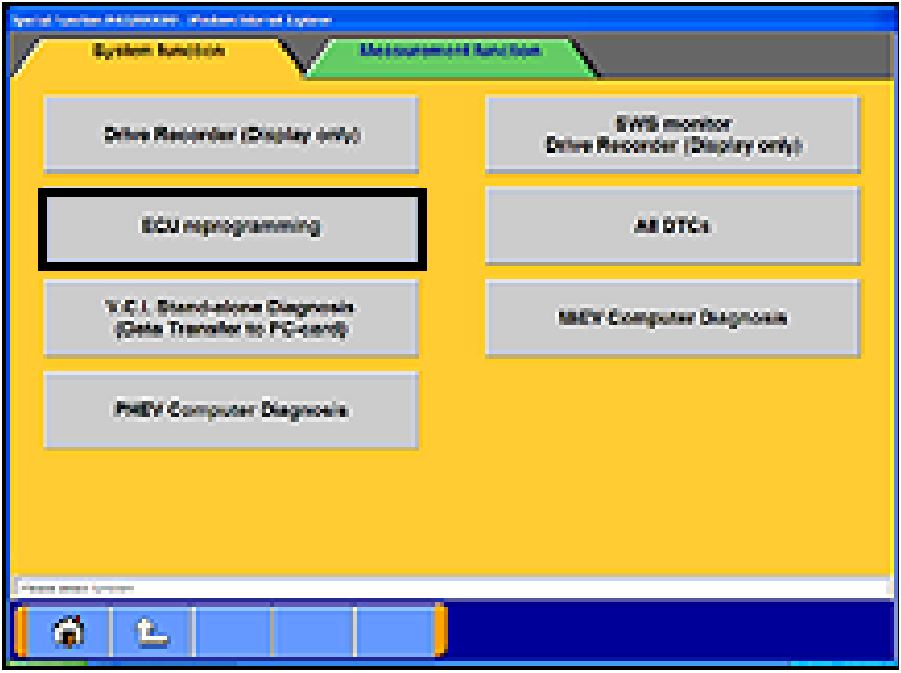
c. From the MUT-III Main Menu, select “Special
Function.”
|
 |
|
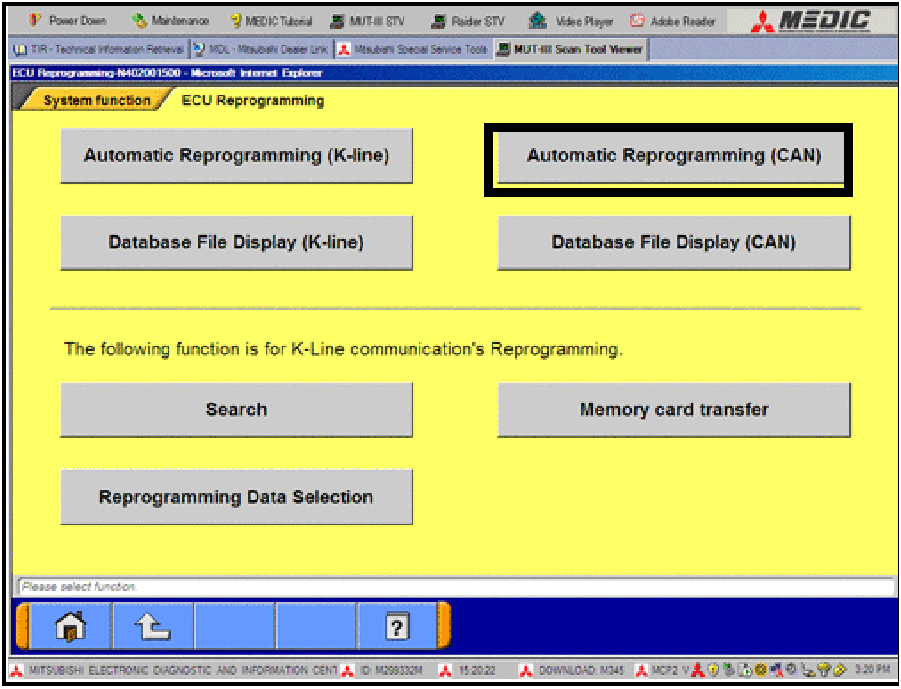 |
d. Select “Automatic Reprogramming (CAN).”
|
 |
e. Click the car icon at the bottom of the page.
|
 |
f. If the VIN or vehicle description displayed does not
match the vehicle you are working on, click the
eraser icon at the bottom of the page to erase
vehicle data.
Then click the VIN button.
|
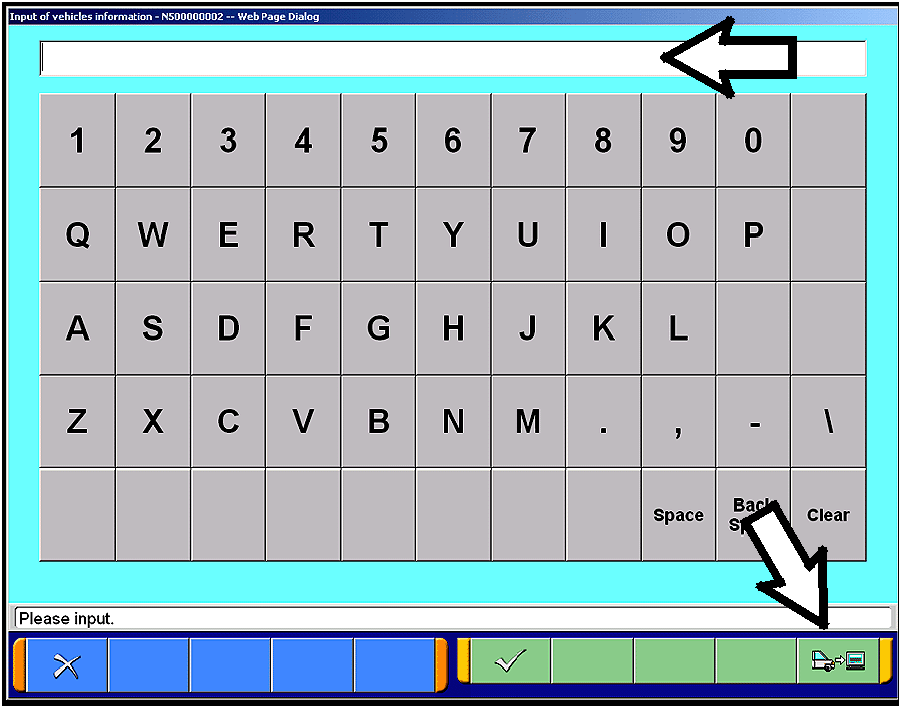 |
g. Click the icon in the lower RH corner of the screen
to have MUT-III automatically read the VIN.
If a message appears saying the VIN cannot be
input automatically, manually enter the 17 digit VIN
into the VIN field at the top of the page.
Make sure the VIN is correct and click the check
mark.
|
 |
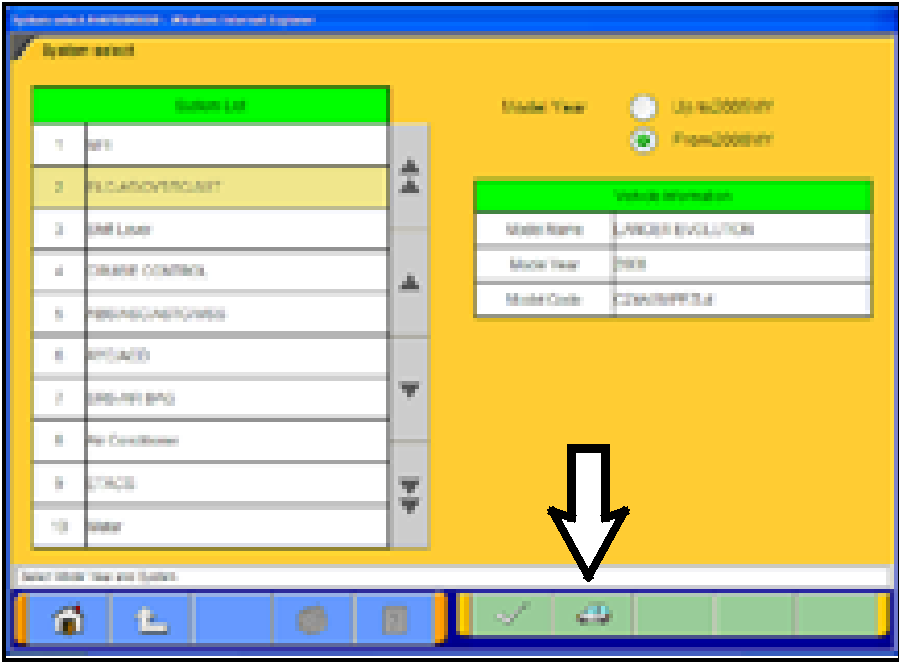
h. Confirm all data matches the vehicle and click the
check mark at the bottom of the page.
|
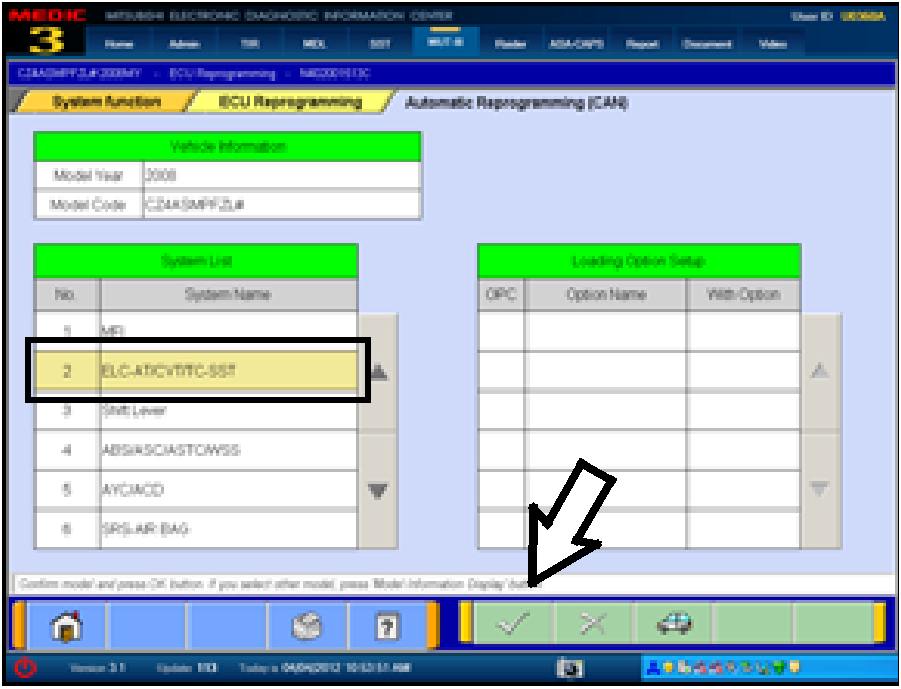 |
- Select ELC-AT/CVT/SST and click the check mark to
continue.
|
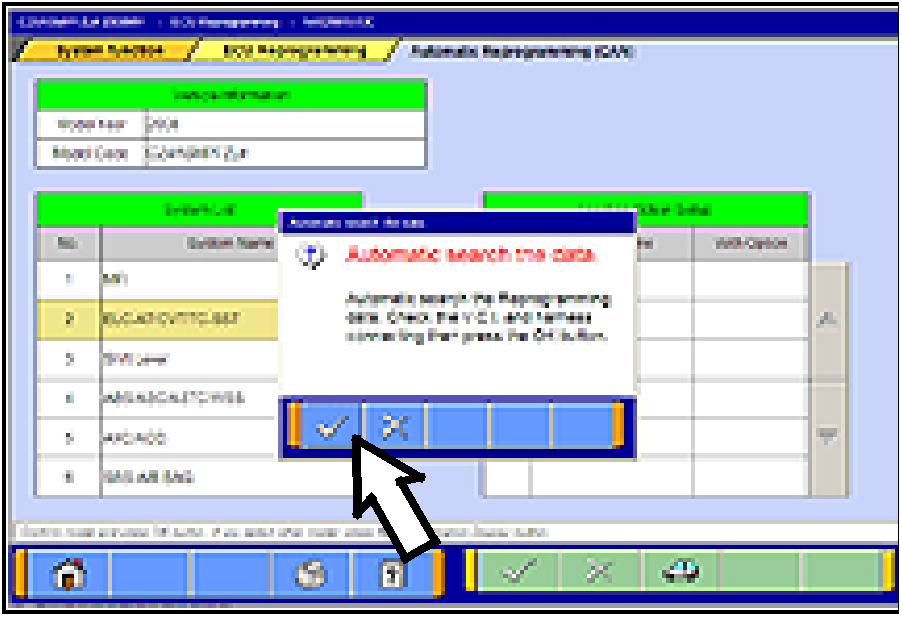 |
- In the “Automatic search the data” dialog box, click the
check mark to begin a search for reprogramming
data.
|
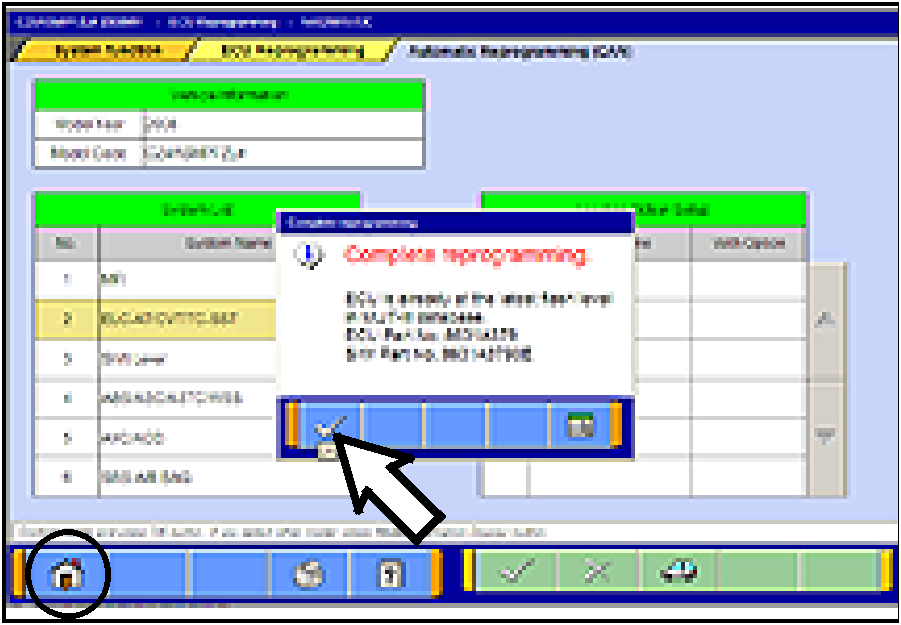 |
TCM TO LATEST VERSION
If a “Complete Reprogramming” message does not
appear, continue with step i.
If the message seen at left is displayed, the TCM
software as already at the most current level. Do not
continue with the reprogramming procedure. This TSB
does not apply.
Click the check mark to clear the window, then click the
Home icon at the lower left corner of the screen to return
to the System Select main page.
Turn the ignition switch to the OFF position and
disconnect the MUT-III. Turn off and disconnect the
battery charger. Conduct normal diagnosis per the
service manual.
|
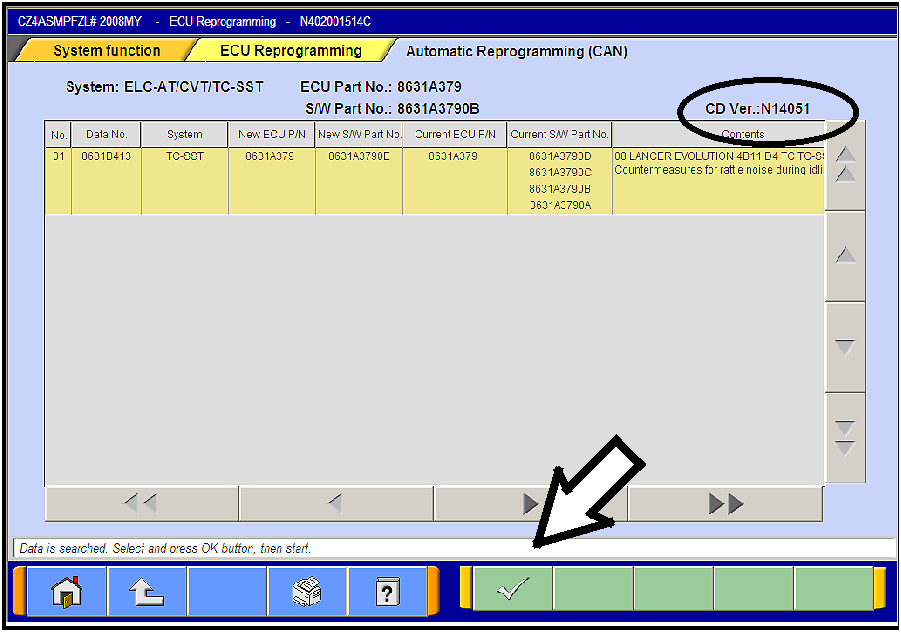 |
i. The Automatic Reprogramming (CAN) database
screen will display.
Confirm the database number at the top right of the
table is N14051 or higher.
If more than one row is displayed in the table, refer
to the reprogramming chart on Page 2 to select the
correct row.
Click on the row to highlight it.
Click the check mark to continue.
|
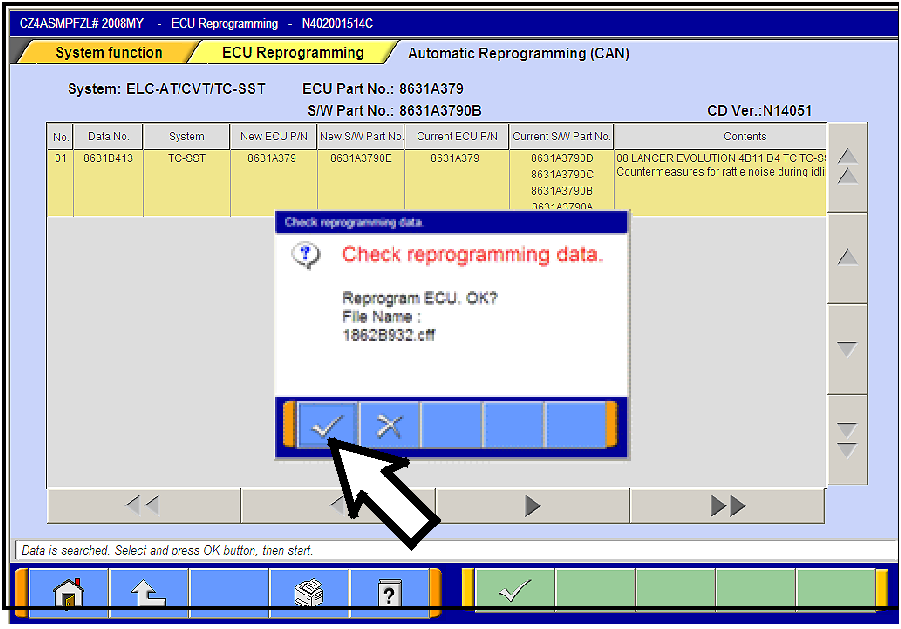 |
j. A message will ask you to “Check reprogramming
data.”
k. Click the check mark to begin reprogramming.
Reprogramming will take up to 5 minutes to
complete.
|
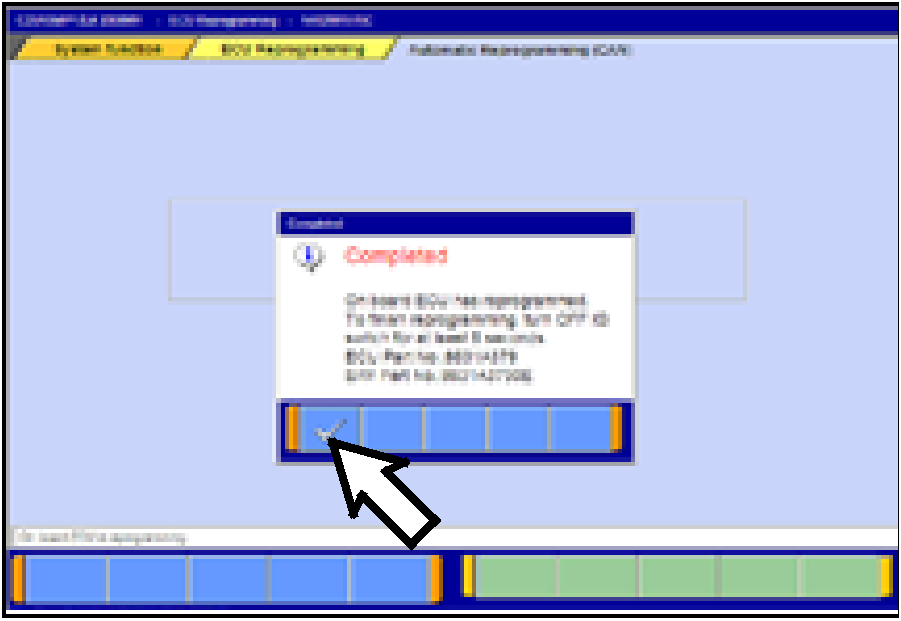 |
l. This message will display when TCM
reprogramming is successfully completed. Confirm
the “New S/W P/N” displayed matches the table at
the beginning of this TSB. Then click the check
mark to clear the message.
- Click the UP arrow at the lower left corner of the page
to return to the System Function page.
|
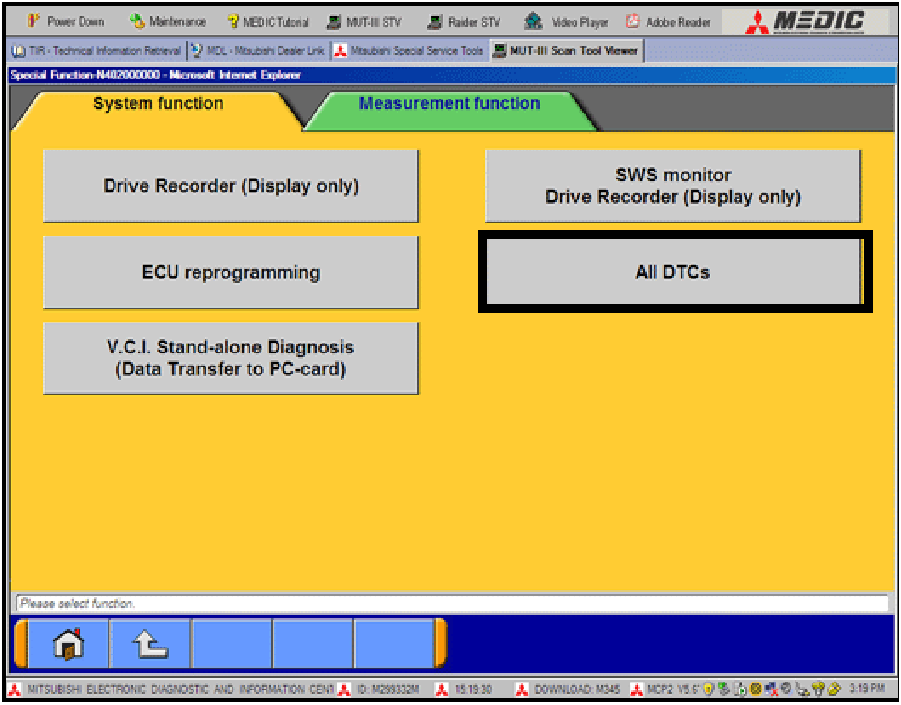 |
- Using MUT-III, check and erase ALL DTCs from all
systems as follows.
a. Select “Special Function.”
b. Select “All DTCs,” then select “ERASE AND
READ ALL DTCS.”
|
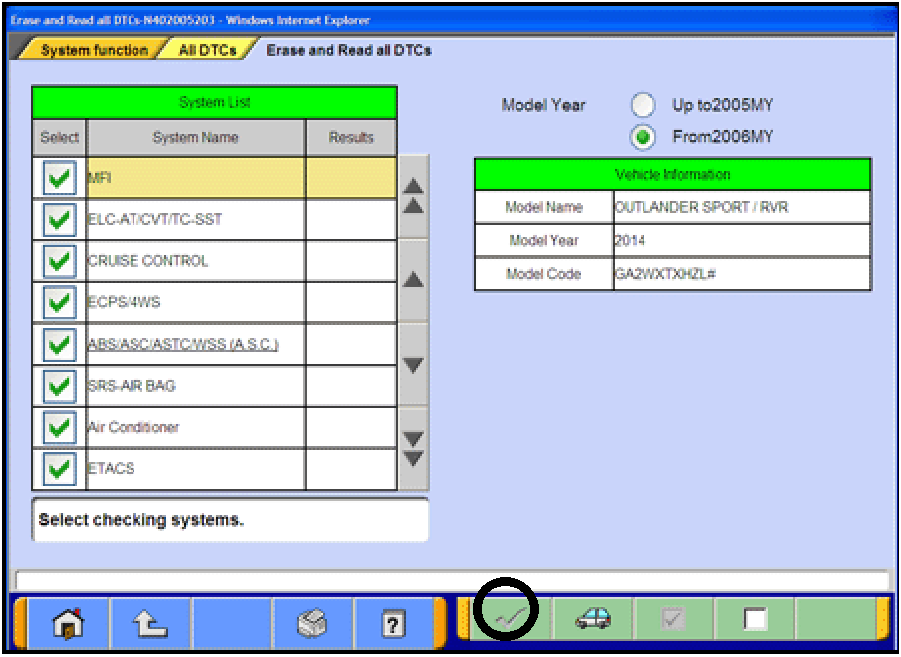 |
c. The “System List” on the left side of the screen will
have all selections checked. Do not change
these selections. DTCs may be set if the vehicle
is equipped with options that are unchecked.
d. If the check mark at the bottom of the screen is
highlighted, click it and move ahead to step 6. If
not, continue with sub-step e.
|
 |
e. In the left column, scroll to and click
FAST/IMMOB/KEYLESS/TPMS. In the right
column, check the correct option code (VF#) from
the Loading Options Setup list. This will activate
the check mark at the bottom of the page.
‧ Vehicles with regular keyless entry (buttons on
a multi-function key), select VF2.
‧ Vehicles with F.A.S.T. Key, select VF3.
Click the check mark to continue.
|
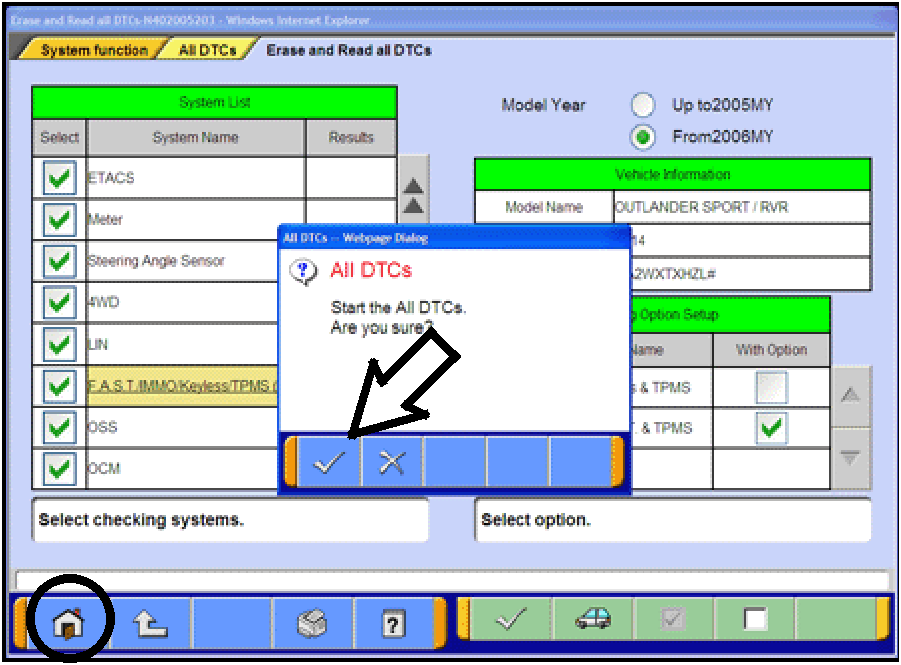 |
- A window will pop up asking you to confirm DTC
erasing. Click the check mark for DTC erasing and
reading to begin.
- When DTC erasing is completed, a window will display.
a. If DTCs return after reprogramming, click the
check mark to clear the window. Diagnose and
repair per the Service Manual.
b. If DTCs do not return, click the check mark to
clear the window, then click the home icon at the
lower left of the screen to return to the main
menu.
- Turn off the ignition switch and disconnect the MUT-III.
Turn off and disconnect the battery charger.
|
This bulletin is supplied as technical information only and is not an authorization to repair. If an affected
vehicle is reported with the described condition, diagnose the condition, repair as described in this bulletin
and submit a normal warranty claim using the following information.
Copyright 2014 Mitsubishi Motors North America, Inc.


