[Previous][Next]
REMOVAL AND INSTALLATION
 
 
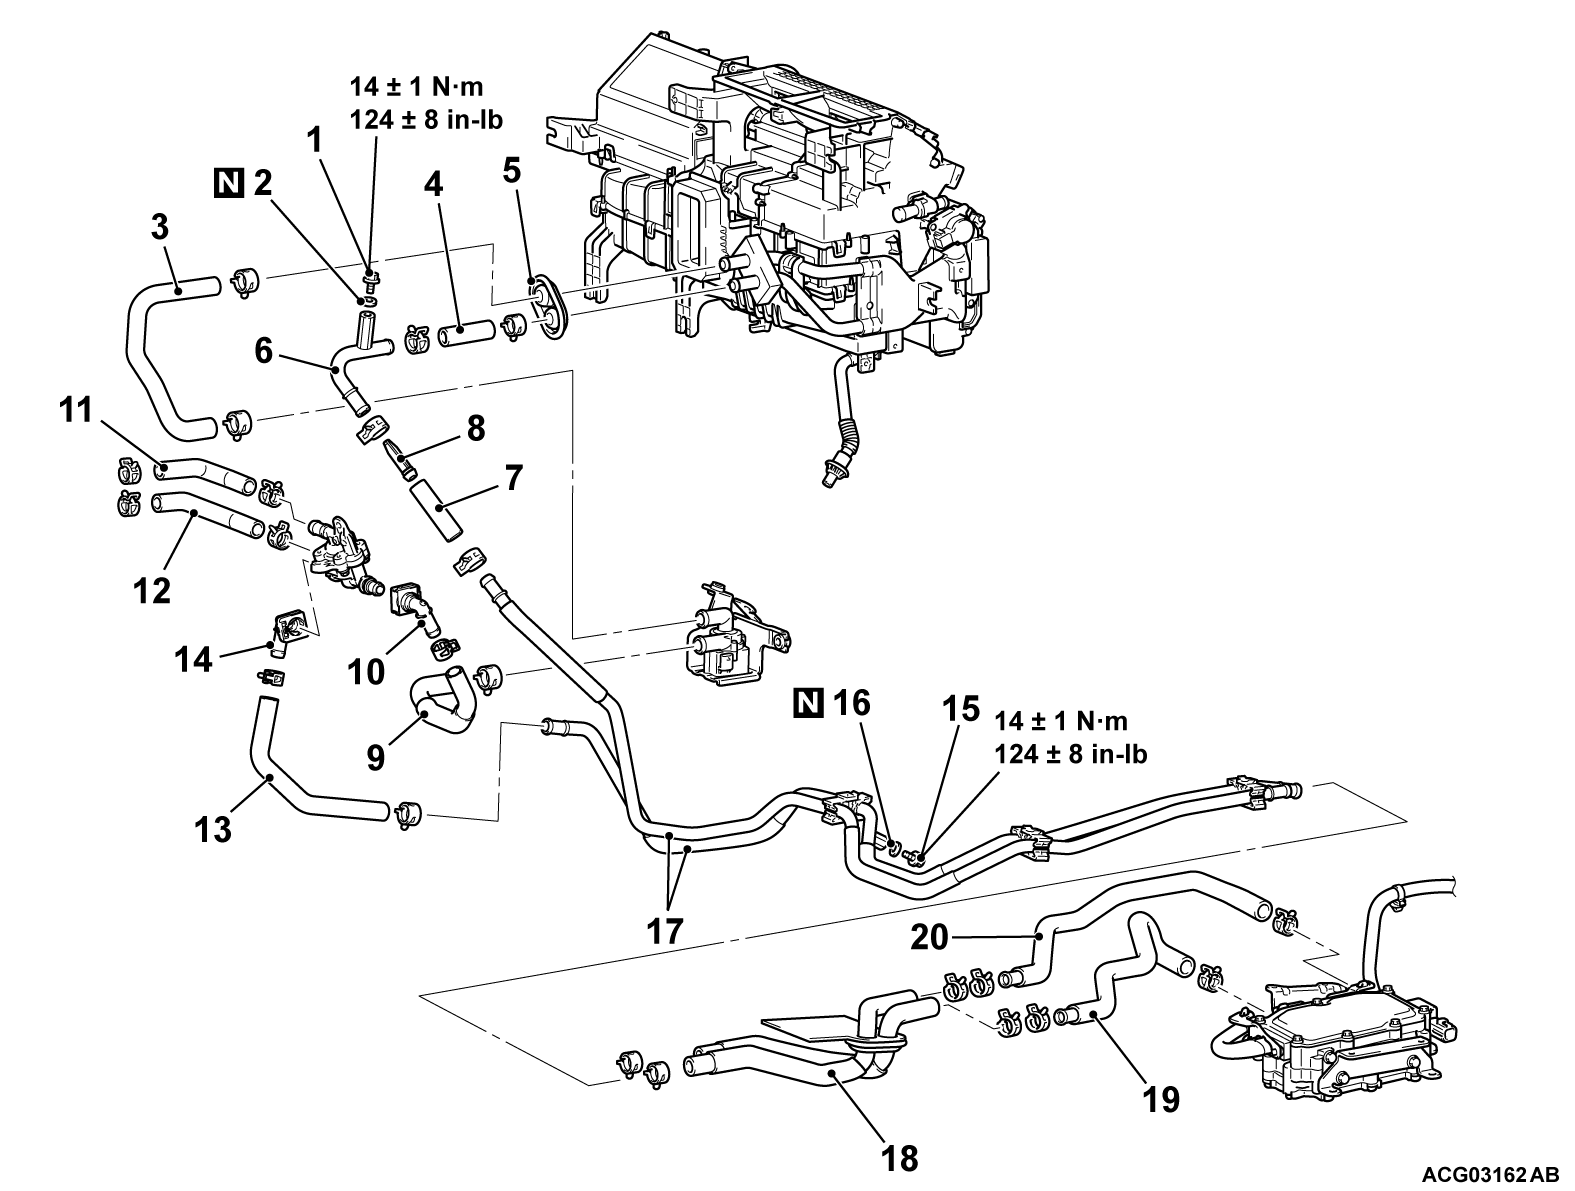
HEATER PIPING HOSE
Pre-removal operation
  • Draining Engine coolant replacement (Refer to GROUP 14A, On-vehicle Service ).
Post-installation operation
  • Filling up Engine coolant replacement (Refer to GROUP 14A, On-vehicle Service ).
Removal steps
1.Bolt (for air bleeding)
2.Washer ring
<<A>>>>A<<3.Heater piping hose B
<<A>>>>A<<4.Heater piping hose
5.Grommet
<<A>>>>A<<6.Heater pipe A
<<A>>>>A<<7.Heater piping hose
>>A<<8.Heater piping filter
<<A>>>>A<<9.Heater piping hose C
<<A>>>>B<<10.Heater water inlet pipe
<<A>>>>A<<11.Heater piping hose D
<<A>>>>A<<12.Heater piping hose E
<<A>>>>A<<13.Heater piping hose F
<<A>>>>B<<14.Heater water inlet pipe
15.Drain plug
16.Washer ring
<<A>>>>A<<17.Heater pipe J
<<A>>>>A<<18.Heater piping hose assembly
<<A>>>>A<<19.Heater piping hose I
<<A>>>>A<<20.Heater piping hose J
 
 
REMOVAL SERVICE POINT
 
 
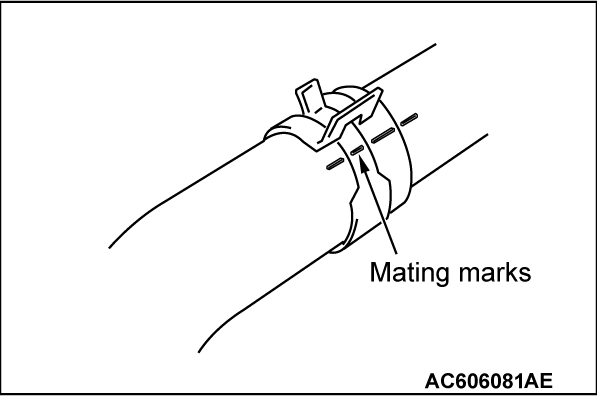
<<A>> HEATER PIPING HOSE/HEATER PIPING HOSE ASSEMBLY DISCONNECTION
Make mating marks on the heater piping hose or heater piping hose assembly clip as shown to install them in the original position.


INSTALLATION SERVICE POINTS
 
 
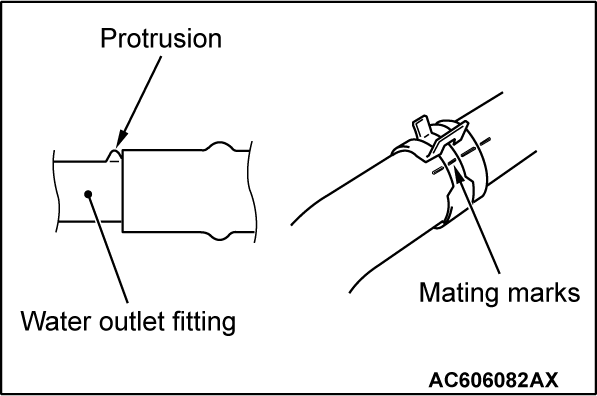
>>A<< HEATER PIPING HOSE/HEATER PIPING FILTER CONNECTION
1. Make mating mark on a new hose clip in the same position as the remove one.
2. Insert the heater piping hose, heater piping filter or heater piping hose assembly until the protrusion of the water outlet fitting.
3. Align the mating marks on the heater piping hose, heater piping filter or heater piping hose assembly and hose clip.


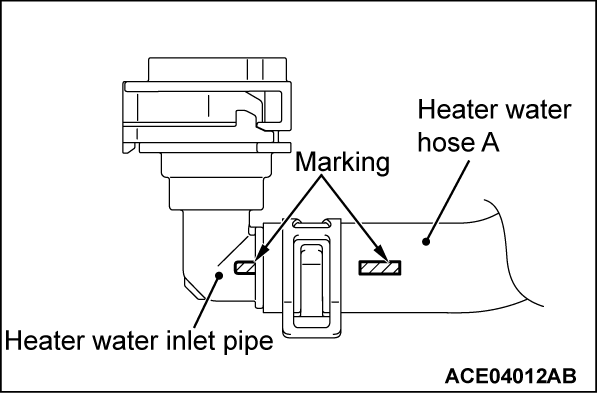
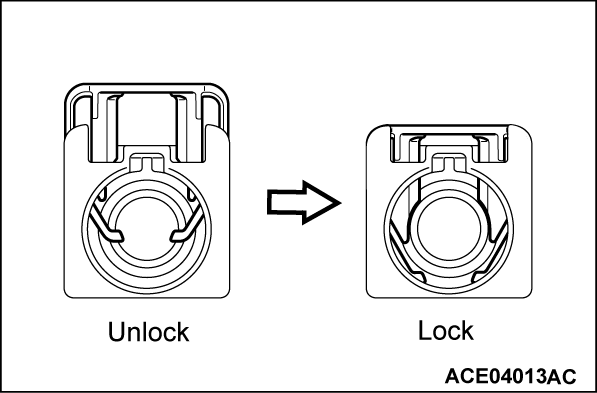
>>B<< HEATER WATER INLET PIPE CONNECTION
1. Align the marking on the heater water hose A with that on the heater water inlet pipe.
2. Lock the heater water inlet pipe.