| caution | - The charging must be performed with AC 220 V normal charging equipment.
- Do not operate the electric motor switch or do not remove the EV charging cable from the STEP 2 to the STEP 15. If wrongly doing those or if interrupting the charging before the battery is fully charged, do the steps again.
Under low temperatures, the charging can be interrupted before all the segments are illuminated. However, measuring the capacity is completed. - While the scan tool (M.U.T.-IIISE) is communicating with the vehicle, the electric motor switch may not be turned off and no normally. Therefore, when you turn off the electric motor switch for that communication, wait for several seconds and then turn on it again (do not turn on it immediately).
|
| note | - If the MITSUBISHI Remote System has the charging timer, cancel beforehand the charging timer because the normal charging cannot be performed.
- If the MITSUBISHI Remote System has the remote climate control, cancel beforehand the remote climate control or open the hood during the steps because the air conditioning can be operated during the normal charging.
- Do not disconnect the battery cable from the auxiliary battery terminal (-) during the work.
- To improve the measuring accuracy, working at more than 10°C (50°F) of the outside temperature is recommended.
- If charging cable (for normal charging) is used, the charging time may become longer and the measurement may not be completed normally.
|
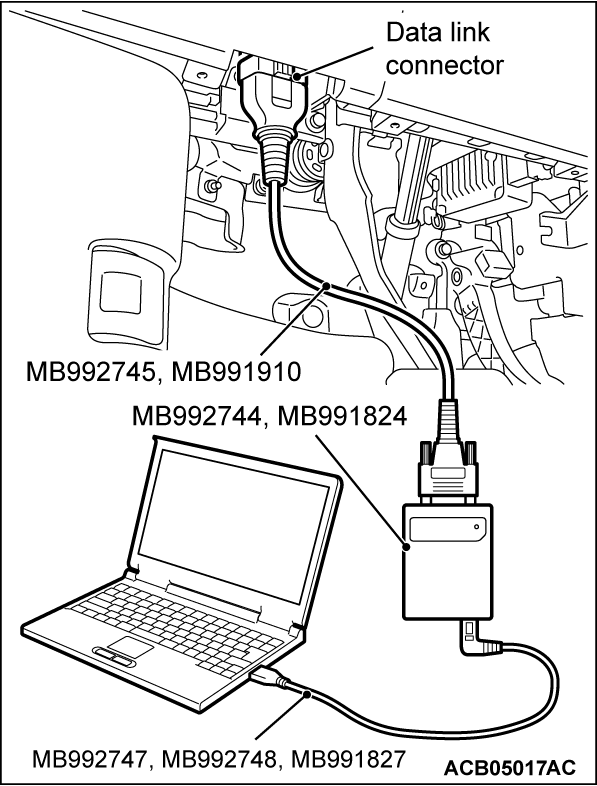
1. After power supply mode of electric motor switch is OFF, connect the scan tool (M.U.T.-IIISE) to the data link connector.
2. Connect the EV charging cable to perform the normal charging.
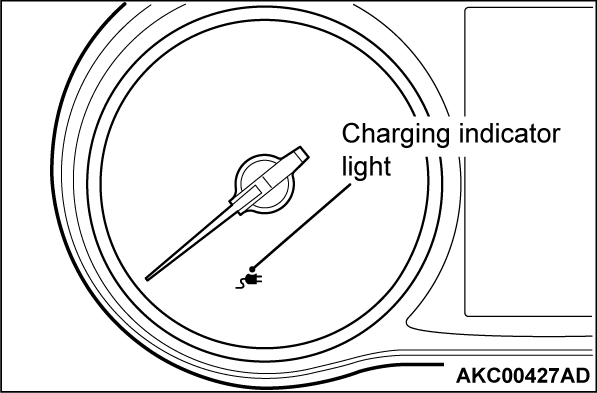
3. Check that the charging indicator is illuminated in the combination meter and the normal charging is being performed.
4. Select "BMU" from System select Screen of the scan tool (M.U.T.-IIISE).
5. Select "Date list" from BMU Screen.
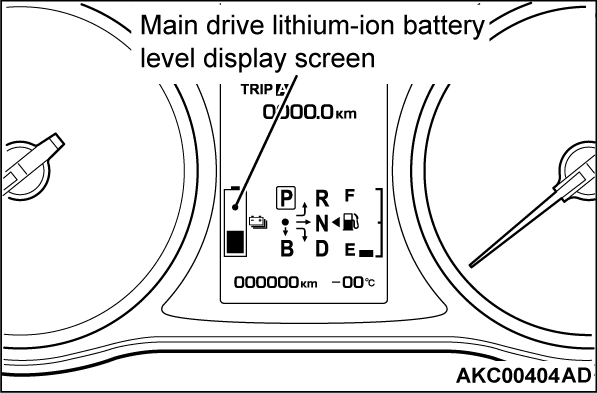
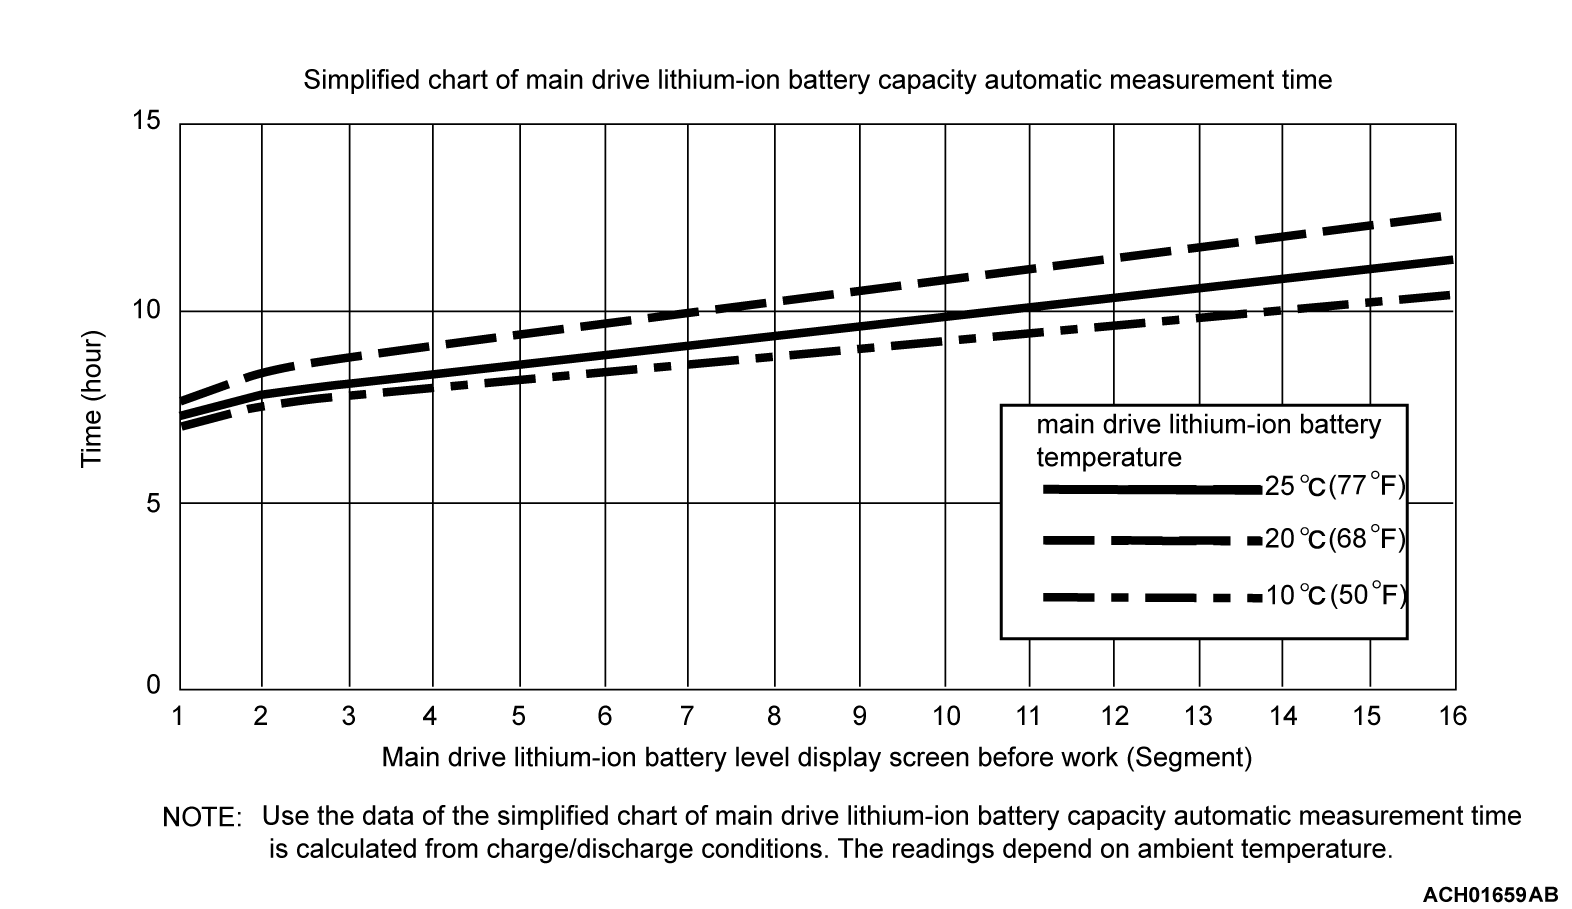
6. Check that the main drive lithium-ion battery level display screen. If the main drive lithium-ion battery level display screen more than 2 segment, discharge the main drive lithium-ion battery so that it can become 1 segment. | note | The less the main drive lithium-ion battery level indicator reading is, the shorter the measuring time is. |
7. Select "Special Function" from BMU Screen.
8. Select "Battery auto capacity measured" from Special Function Screen.| note | If the error occurs, perform the steps from the STEP 2 again. If the diagnostic trouble code is set, perform the troubleshooting. |
| note | In case of the vehicle without the electric heater, the discharging period should be longer. Even if the main drive lithium-ion battery level display screen 1 segment, the main drive lithium-ion battery capacity automatic measurement may not be completed. However, that is not abnormal. Perform the main drive lithium-ion battery capacity automatic measurement again. |
| note | If more than or equal to 12 hours elapse for the discharging, the main drive lithium-ion battery capacity automatic measurement may not be completed. Interrupt the main drive lithium-ion battery capacity automatic measurement and then perform the main drive lithium-ion battery capacity automatic measurement again. |
| note | The higher the main drive lithium-ion battery temperature is, the shorter the main drive lithium-ion battery capacity automatic measurement is. |
| note | The larger the auxiliary battery consumption is, the shorter the main drive lithium-ion battery capacity automatic measurement is. |
| note | When the charging is completed, the blower function of the air conditioning should be stopped. |
9. Record the number of the following histories shown on the scan tool (M.U.T.-IIISE): the Auto capa. measured result his. 1 and the Auto capa. measured ODO his. 1. | note | This record can be used for the STEP 16. |
10. Check that the Capa. measured discharge current is OK on the scan tool (M.U.T.-IIISE). If NG/Not performed is shown, perform the steps again from the STEP 8.
11. Leave the vehicle being charged until the charging indicator is turned off.| note | Even if the scan tool (M.U.T.-IIISE) is disconnected during this, the procedures cannot be affected. |
12. Select "BMU" from System select Screen of the scan tool (M.U.T.-IIISE).
13. Select "Special Function" from BMU Screen.
14. Select "Battery auto capacity measured" from Special Function Screen.
15. Check that the Execution status and the Complete are shown on the scan tool (M.U.T.-IIISE). If the Not run or the Not completed is shown, check the error status. Perform the steps from the STEP 2.
16. Check that the Auto capa. measured result his. 1 and the Auto capa. measured ODO his. 1 are updated on the scan tool (M.U.T.-IIISE) screen. If they are not updated, perform the steps again from the STEP 2.
![[Previous]](../../../buttons/fprev.png)
![[Next]](../../../buttons/fnext.png)


