Air leak check
- MB992336: EV Battery Cart
- MB992935: Pressure Gauge Unit
- MB992937: Hoses
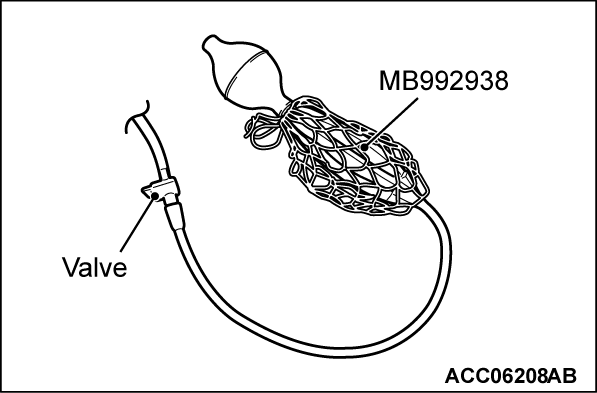
- MB992938: Pump
- MB992939: Plug
- MB992940: Nipples
- MB992942: Service Plug Duct Seal Attachment Set
- MB992943: Service Plug Gasket
- MB992944: Front Harness Cover
- MB992945: Front Harness Gasket
- MB992946: Drain Plug Cover
- MB992947: Drain Plug Gasket
- MF450156: Washers
- MU001480: Hexagon Nuts
Required Special Tools:
Preparation for inspection
1.
| caution | When placing the main drive lithium-ion battery, allow sufficient clearance to cover the drain plug with the special tool. |
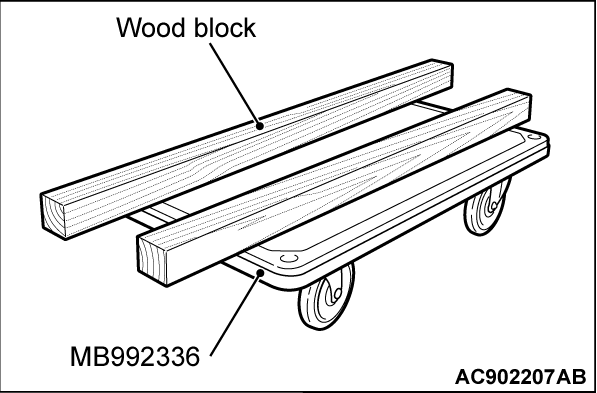
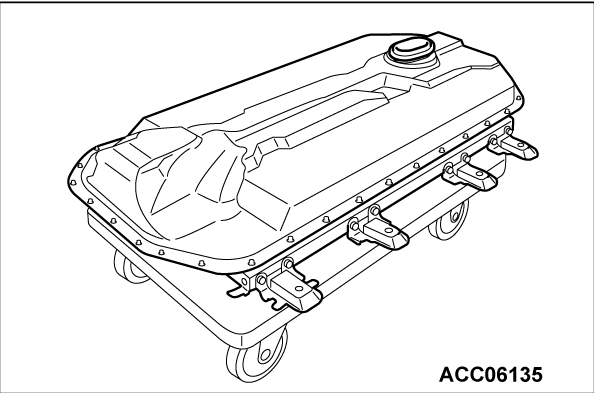
Remove the handle of the special tool MB992336 and set the two wood blocks [right side: 90 (3.54) x 90 (3.54) x 1500 (59.1) mm, left side: 90 (3.54) x 90 (3.54) x 1650 (65.0) mm (inches)]. Then place the main drive lithium-ion battery on the wood blocks.
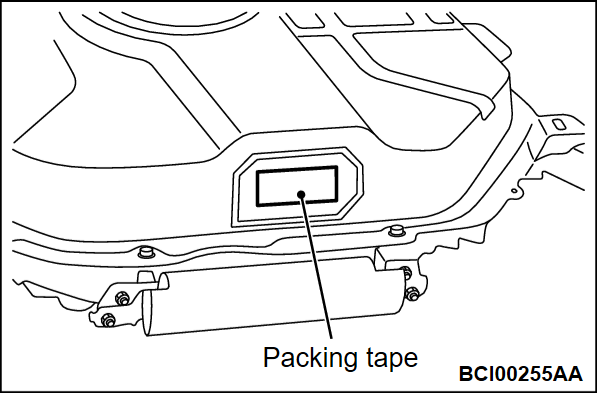
2. Remove the battery tray cover, and remove the breather plug by disengaging its tab behind the cover.
3. Use a packing tape to seal the breather plug hole.
4.
| caution | Set the special tool securely, or air leak may be caused. |
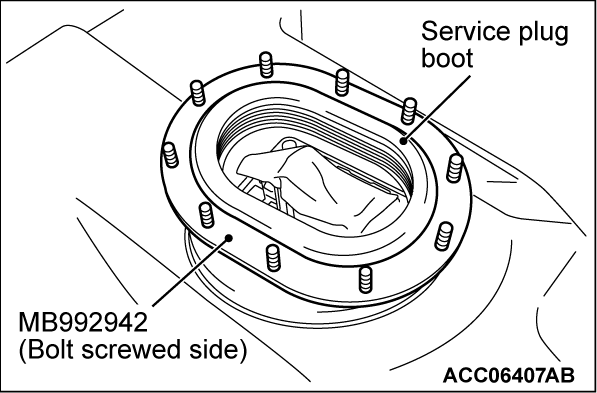
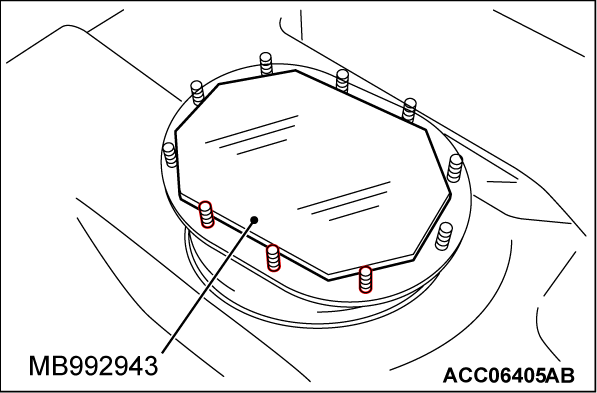
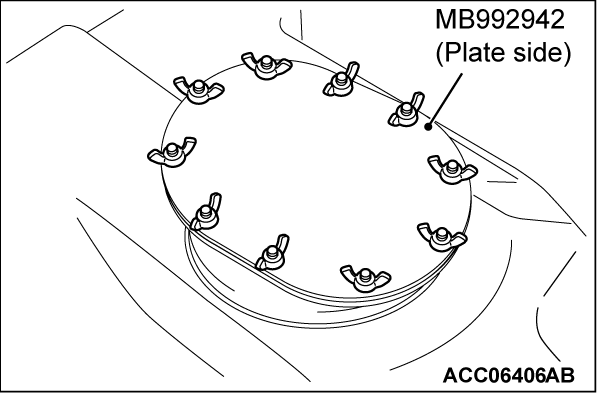
Fit the special tool MB992942 to the service plug boot.
(1) The stud bolt screwed side of the special tool MB992942 should face upwards.
(2) Place the special tool MB992943 on the service plug boot.
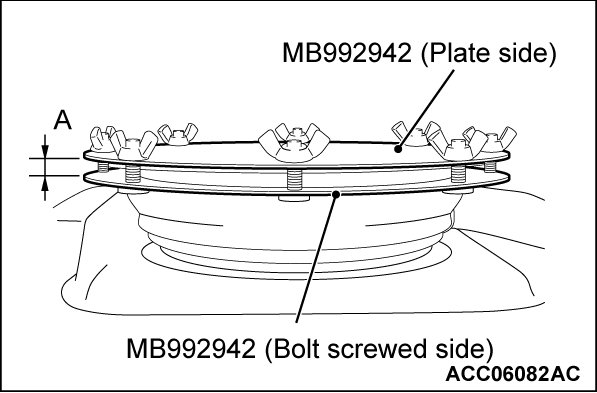
(3) Set the special tool MB992942 (plate side). Tighten the wing nuts so that the distance (A) between the bolt screwed side and the plate side of the special tool MB992942 is even.
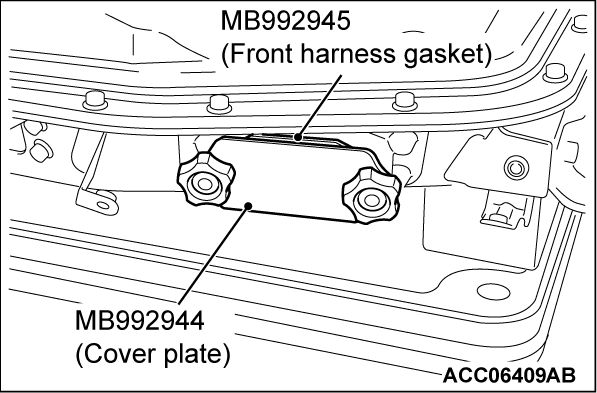
5. Use the special tool MB992945, which is included in the special tool MB992944, to seal the disconnected main drive lithium-ion battery front cables (P and N lines). Then secure the gasket with the cover plate included in the special tool MB992944.
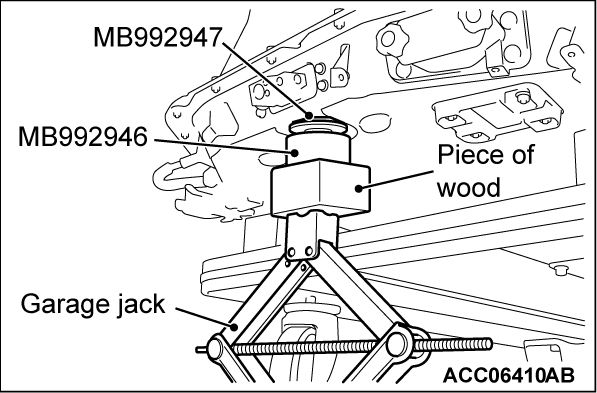
6. Use the special tool MB992947, which is included in the special tool MB992946, to seal the opening of the drain plug. Then support the gasket with the special tool MB992946, a piece of wood and a garage jack.
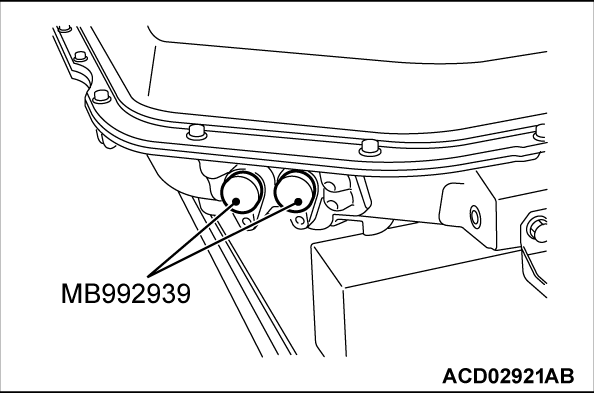
7. Insert the special tool MB992939 into the ports for the EV charger cables.
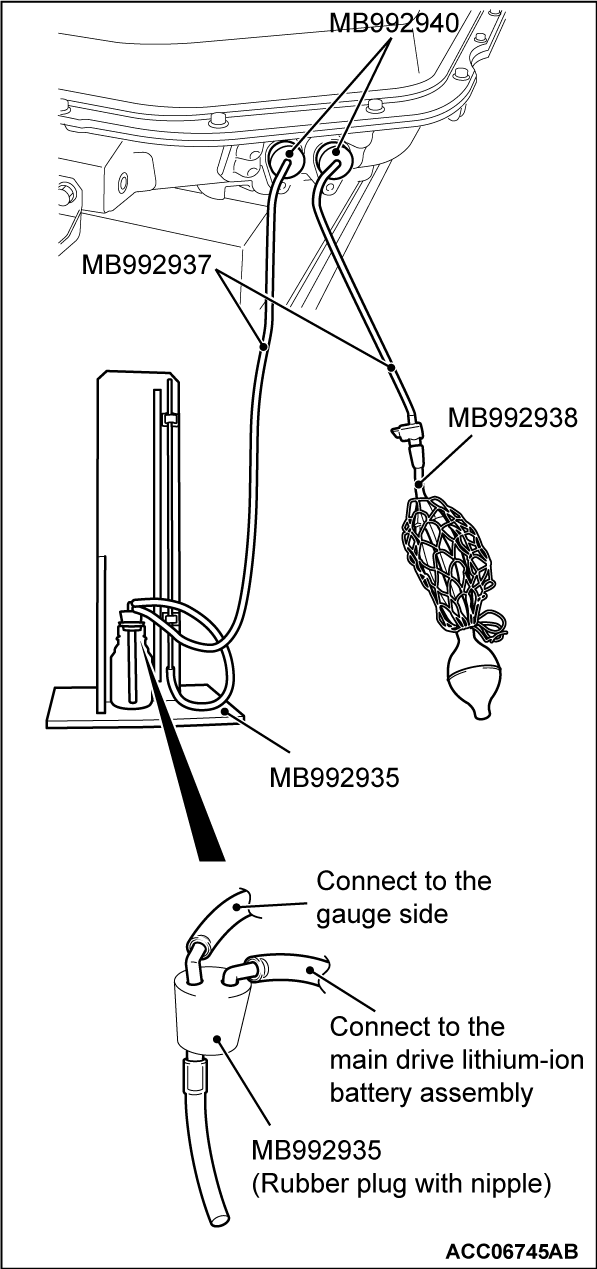
8. Install the special tool MB992935, MB992937, MB992938 and MB992940 into the ports for the main drive lithium-ion battery cables. Connect the longer tube spliced at rubber plug with nipples of the special tool MB992935 to the gauge on the measuring bench, and connect the shorter tube to the main drive lithium-ion battery assembly.
How to check
| caution | Do not place the special tool MB992935 higher than the main drive lithium-ion battery assembly, or water will intrude into the main drive lithium-ion battery assembly. |
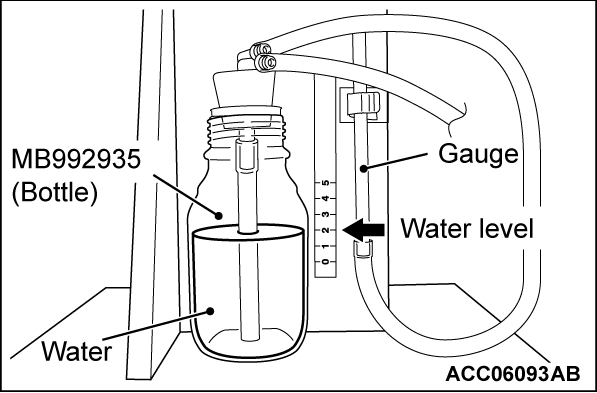
1. Pour 0.2 dm3 (0.21 qt) of water into the bottle of the special tool MB992935.
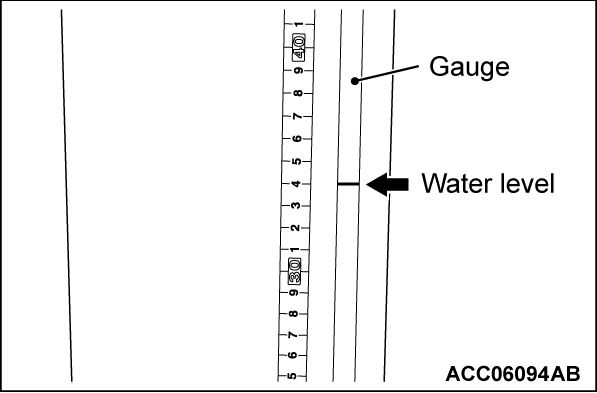
2. Operate the special tool MB992938 to deliver water into the gauge side of the special tool MB992935 so that the water level in the gauge rises 320mm (12.5 inches) above the water level in the bottle.
3. Close the valve of the special tool MB992938 and then wait for five minutes.
4. Operate the special tool MB992938 to deliver water into the gauge side of the special tool MB992935 so that the water level in the gauge rises 320mm (12.5 inches) above the water level in the bottle.
5. Close the valve of the special tool MB992938 and then wait for ten minutes.
6. Then measure the water level inside the gauge.
OK: The water level inside the gauge should fluctuate within 19 mm (0.75 inch).
7. If the water level fluctuation exceeds the specified range, locate air leakage by using soapy water to repair it.
![[Previous]](../../../buttons/fprev.png)
![[Next]](../../../buttons/fnext.png)
