[Previous][Next]
REMOVAL AND INSTALLATION
 
 
Post-installation operation
  • Liftgate alignment (Refer to .)
Liftgate close switch removal
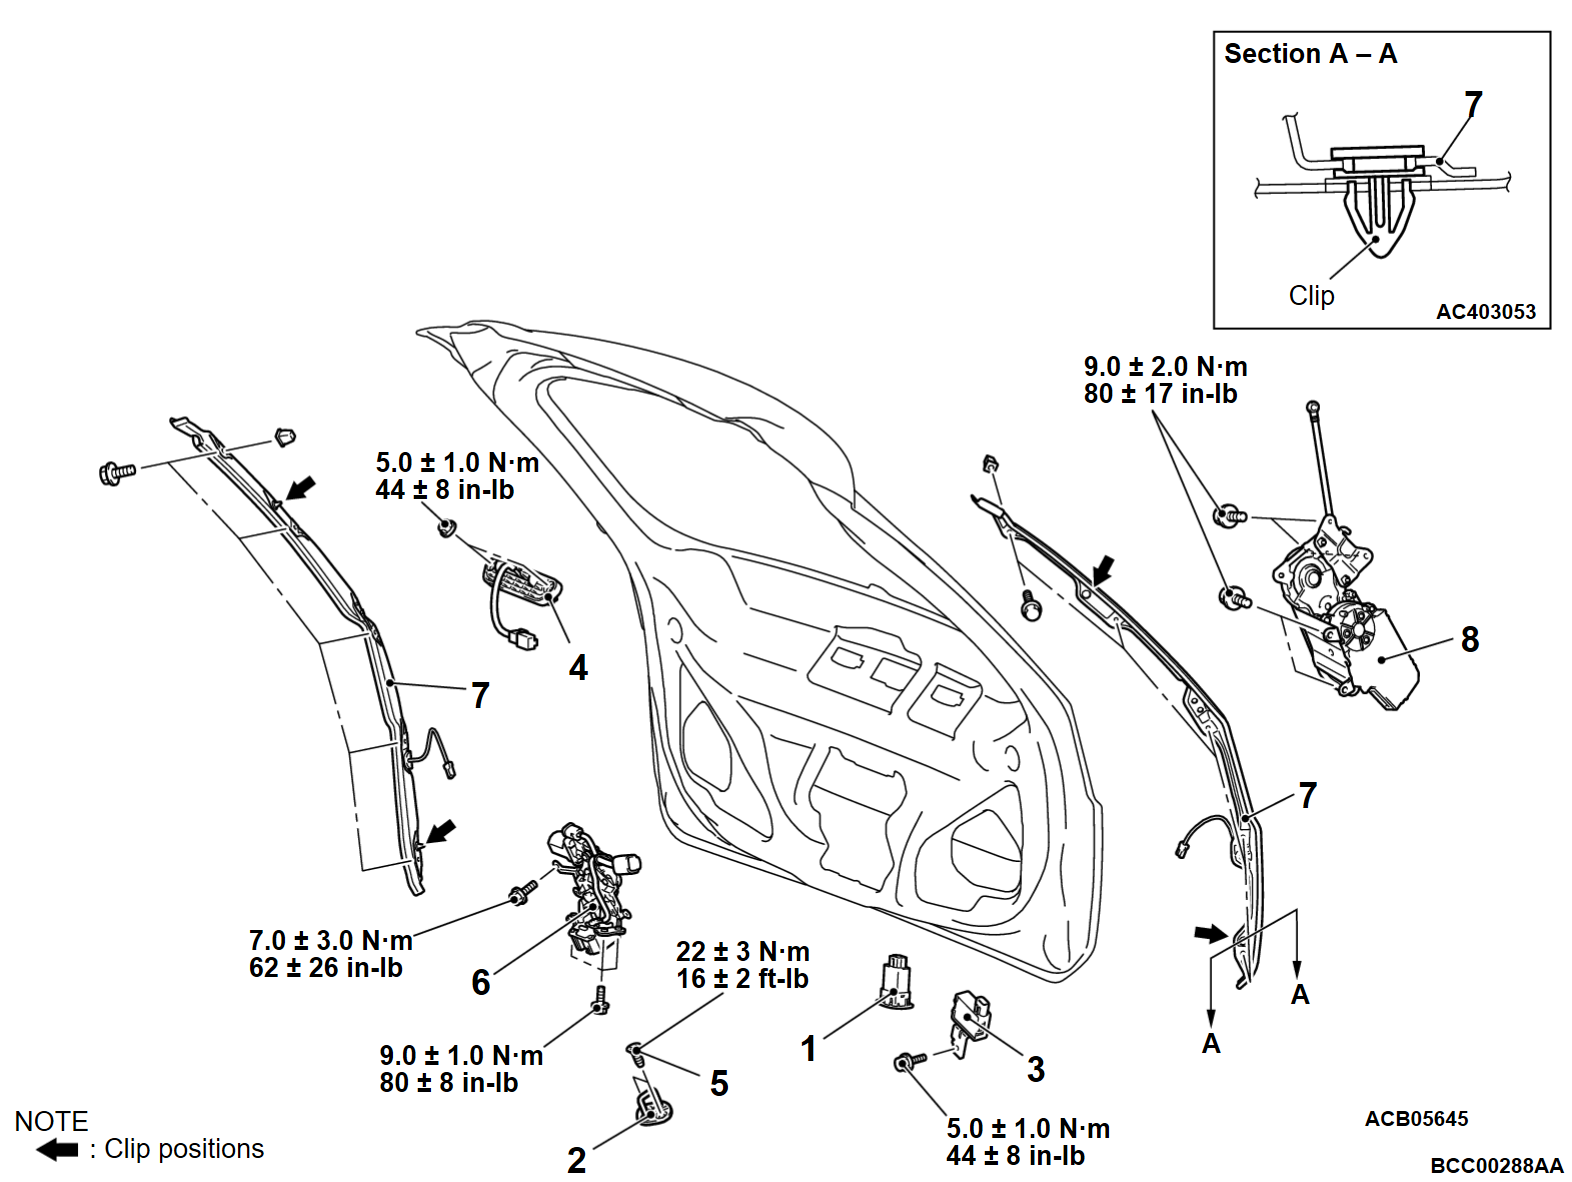
1.Liftgate close switch
Striker removal steps
>>D<<2.Striker
Electric liftgate tone alarm removal steps
Liftgate trim (Refer to GROUP 52A - Liftgate Trim .)
3.Power liftgate tone alarm
Liftgate lock release handle removal steps
Liftgate trim (Refer to GROUP 52A - Liftgate Trim .)
4.Liftgate lock release handle
Liftgate latch removal steps
Liftgate trim (Refer to GROUP 52A - Liftgate Trim .)
5.Ground bolt
>>C<<6.Liftgate latch assembly
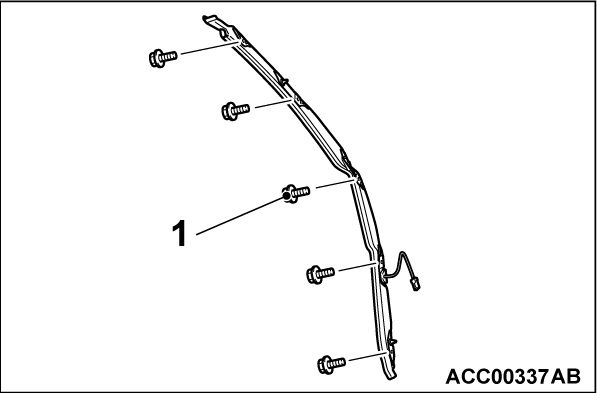
Liftgate sensor removal steps
>>B<<7.Liftgate sensor
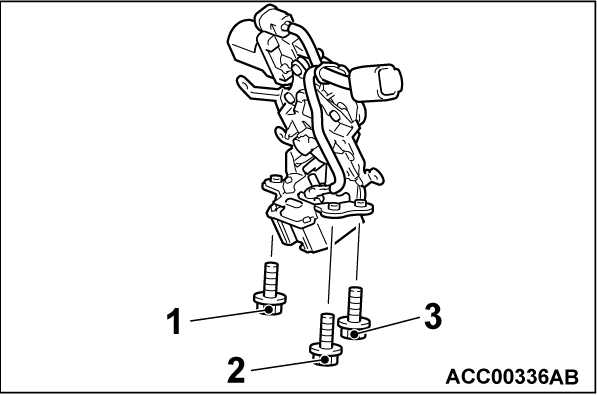
Power liftgate control unit removal steps
Quarter trim cover (Refer to GROUP 52A - Interior Trim .)
>>A<<8.Power liftgate control unit assembly
Power liftgate switch removal steps
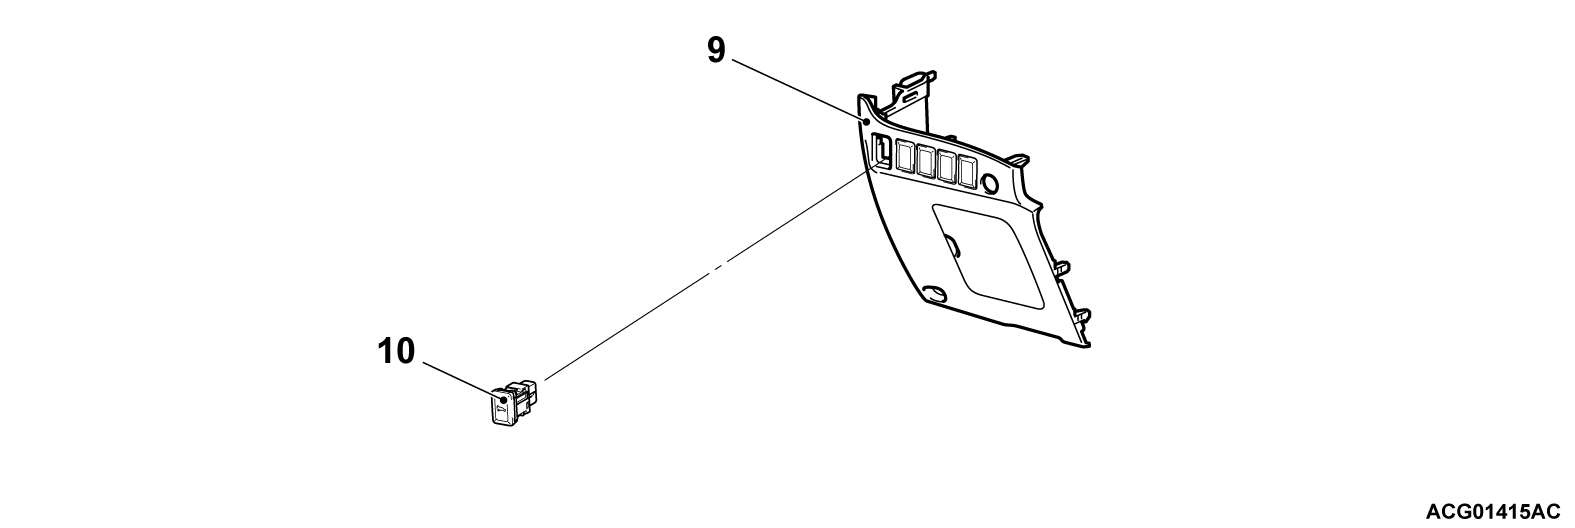
9.Instrument panel lower LH (Refer to GROUP 52A - Instrument Panel Assembly .)
10.Power liftgate switch
Power liftgate main switch removal steps
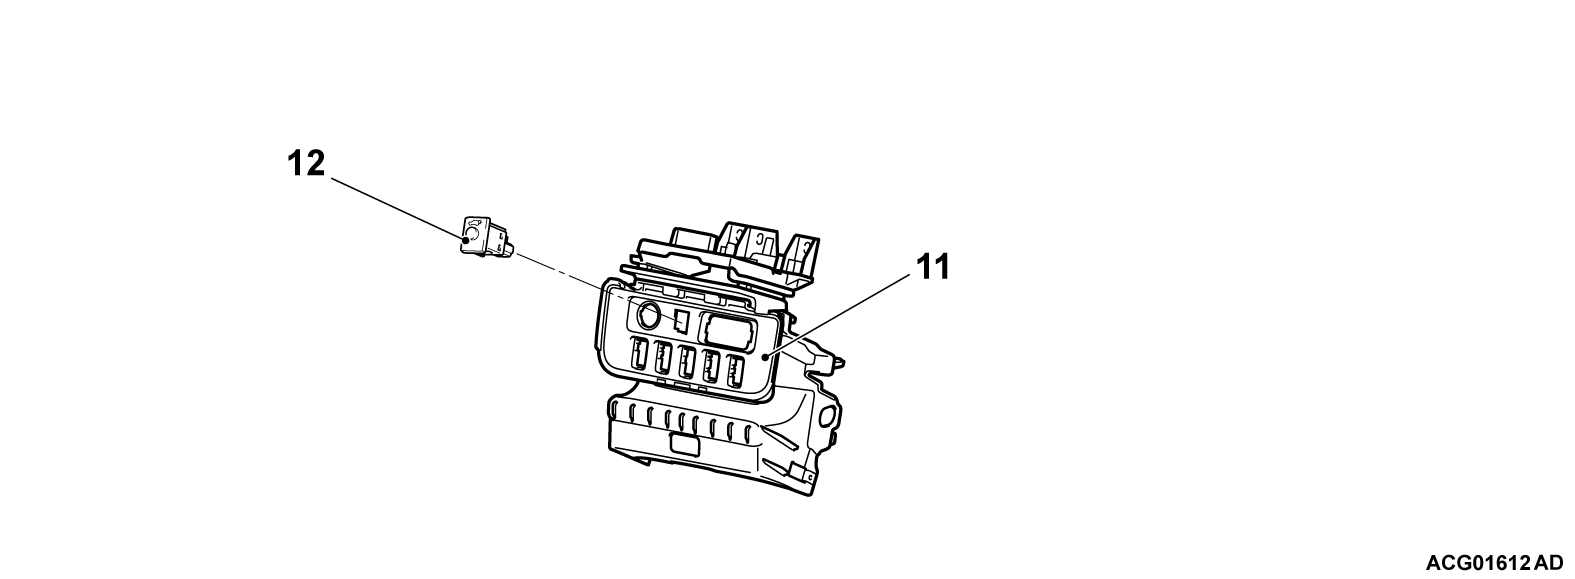
11.Instrument panel console box (Refer to GROUP 52A - Instrument Panel Assembly .)
12.Power liftgate main switch
 
 
INSTALLATION SERVICE POINTS
 
 
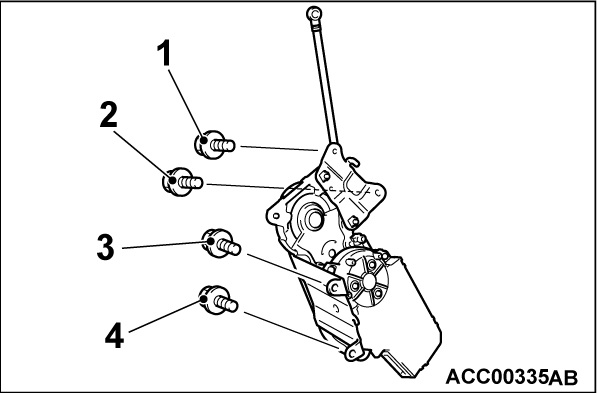
>>A<< LIFTGATE CONTROL UNIT ASSEMBLY INSTALLATION
Install the liftgate control unit assembly mounting bolts in the numerical order.


>>B<< LIFTGATE SENSOR INSTALLATION
Install the liftgate sensor mounting screw in the numerical order.


>>C<< LIFTGATE LATCH ASSEMBLY INSTALLATION
Install the liftgate latch assembly mounting bolts in the numerical order.


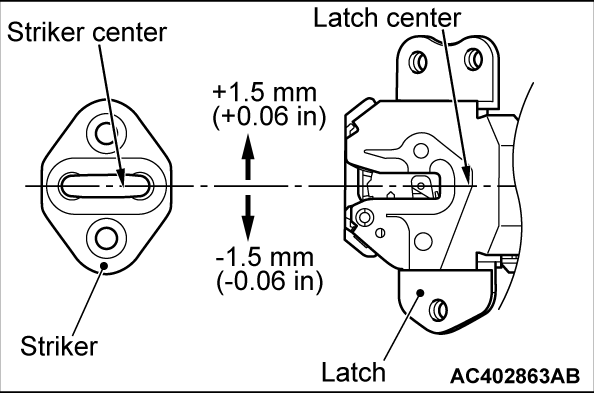
>>D<< STRIKER INSTALLATION
Install the striker so that the striker center does not deviate more than ±1.5 mm (0.06 in) from the latch center.