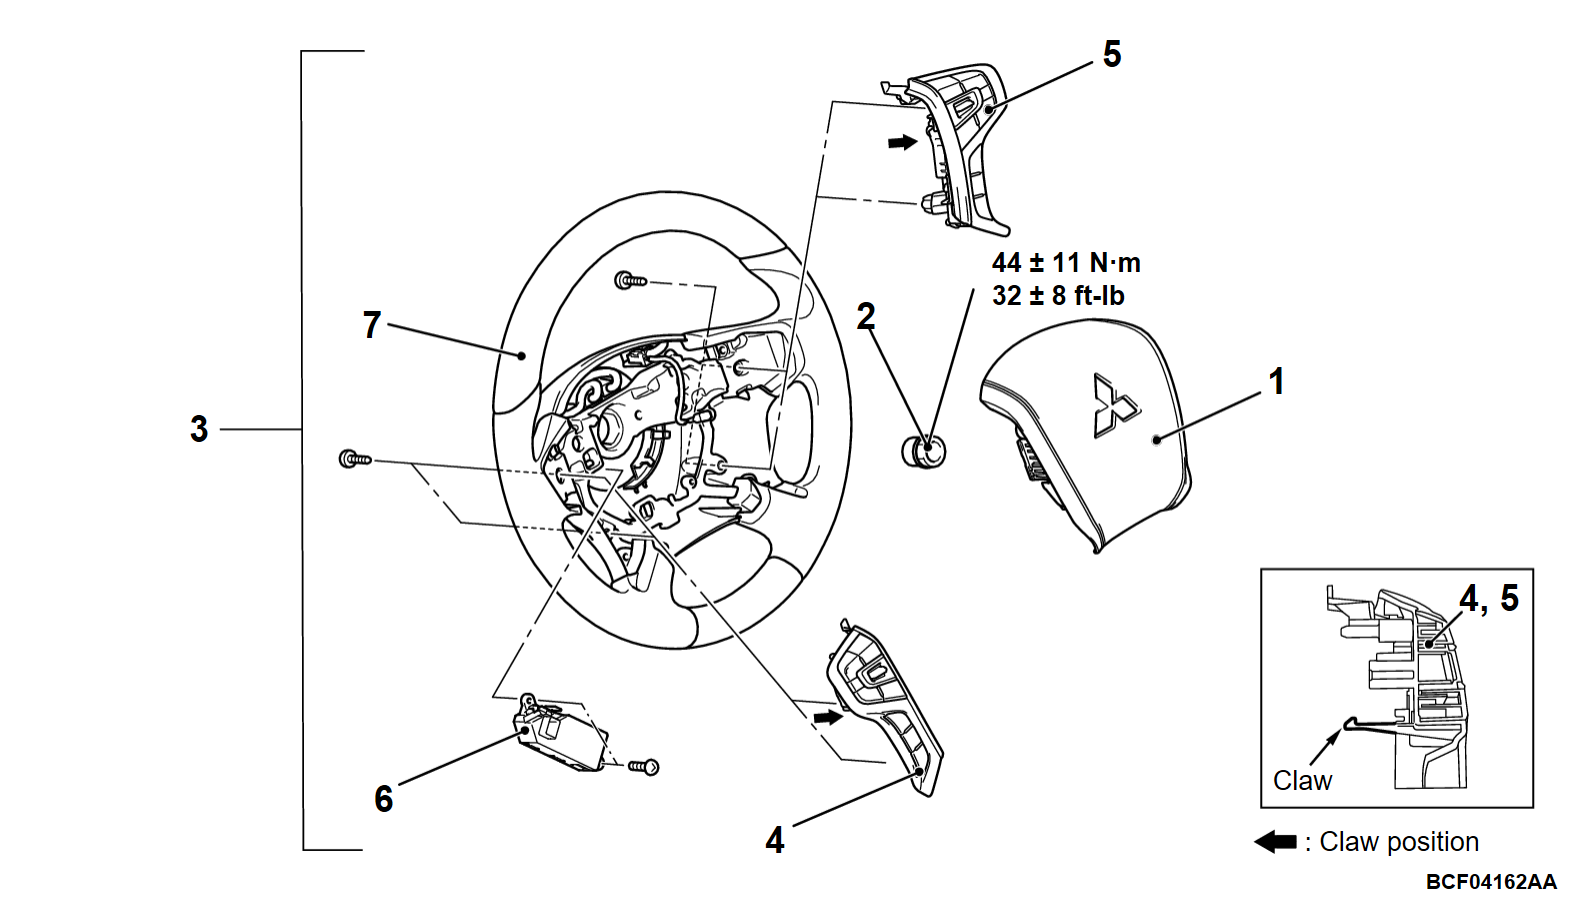
REMOVAL AND INSTALLATION
Pre-removal Operation Steering Wheel Straight-ahead Position Check | Post-installation Operation
|
REMOVAL SERVICE POINTS
<<A>> STEERING WHEEL ASSEMBLY REMOVAL
1. Position the steering wheel in a straight ahead position.
2.
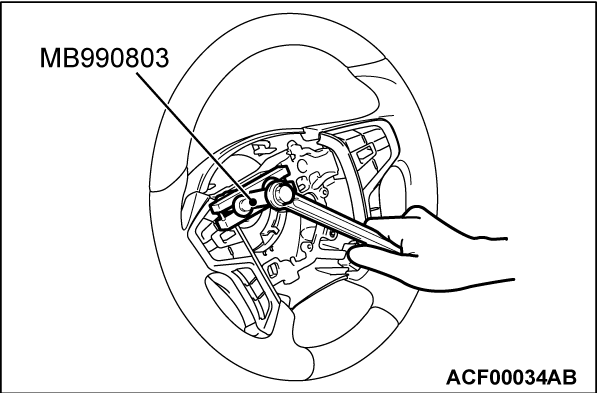
Use special tool steering wheel puller (MB990803) to remove the steering wheel.
| caution | Use the special tool to remove the steering wheel since the steering column collision adsorbing mechanism may be damaged. |
<<B>> STEERING WHEEL REMOTE CONTROL SWITCH/CRUISE CONTROL SWITCH REMOVAL
| caution | To remove the steering wheel remote control switch or cruise control switch, remove the left or right side only. If fail to observe this, the steering lower cover will fall down, thus damaging it. |
<<C>> STEERING HEATER-ECU REMOVAL
| caution | Remove only the left side of steering wheel remote control switch. If fail to observe this, the steering lower cover will fall down, thus damaging it. |
Loosen the tapping screws behind the steering wheel, and then slide the steering wheel lower cover away from the steering wheel to allow sufficient clearance to remove the ECU mounting screws.
<<D>> HEATER ELEMENT CONNECTOR CONNECTION REMOVAL
| caution |
|
INSTALLATION SERVICE POINTS
>>A<< HEATER ELEMENT CONNECTOR CONNECTION INSTALLATION
| caution | To installing the steering heater-ECU, reconnect the heater element connector carefully to avoid damage to the heater element. |
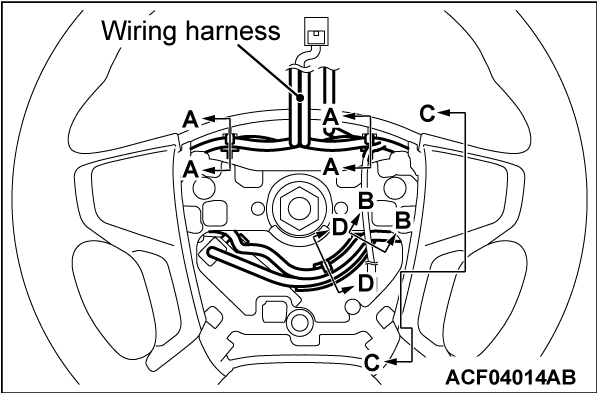
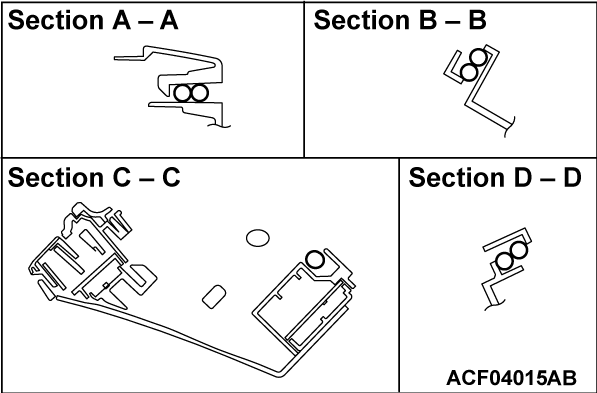
>>B<< STEERING HEATER-ECU WIRING HARNESS/STEERING WHEEL REMOTE CONTROL SWITCH WIRING HARNESS/CRUISE CONTROL SWITCH WIRING HARNESS INSTALLATION
Route the steering heater-ECU wiring harness, the steering wheel remote control switch and the cruise control switch wiring harness as shown.
>>C<< STEERING WHEEL ASSEMBLY/DRIVER'S AIR BAG MODULE INSTALLATION
1.
| caution | When installing the steering wheel assembly and air bag module, do not trap the clock spring harness. |
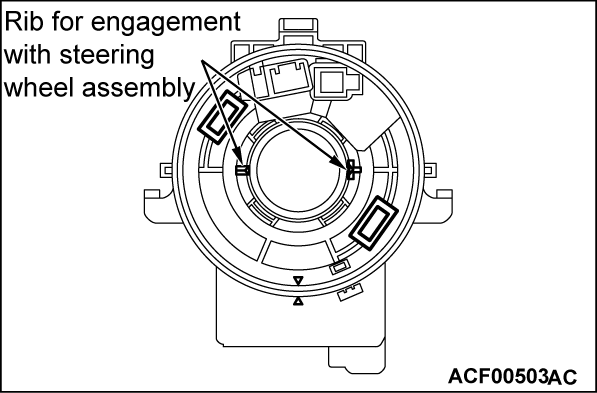
2. After checking that the clock spring center alignment is already performed, install the steering wheel assembly so that its boss part is aligned with the rib of the clock spring slowly.
3. Install the driver's airbag module.
4. After the installation, check that there is no abnormality when the steering wheel is fully turned to left and right.
![[Previous]](../../../buttons/fprev.png)
![[Next]](../../../buttons/fnext.png)

