

DTC P0C79: Electric
motor drive voltage rises abnormally (HW detection)
| danger |
- When servicing the high voltage system parts, always
shut off the high voltage by removing the service plug (Refer to
 ).
- When servicing the high voltage system parts, always wear the protective equipment or
armor to measure the high voltage (Refer to ).
|
MONITOR EXECUTION
MONITOR EXECUTION CONDITIONS (Other monitor and Sensor)
Other Monitor (There is no temporary DTC stored in memory
for the item monitored below)
Sensor (The sensor below is determined to be normal)
Drive motor inverter voltage sensor
DTC SET CONDITIONS
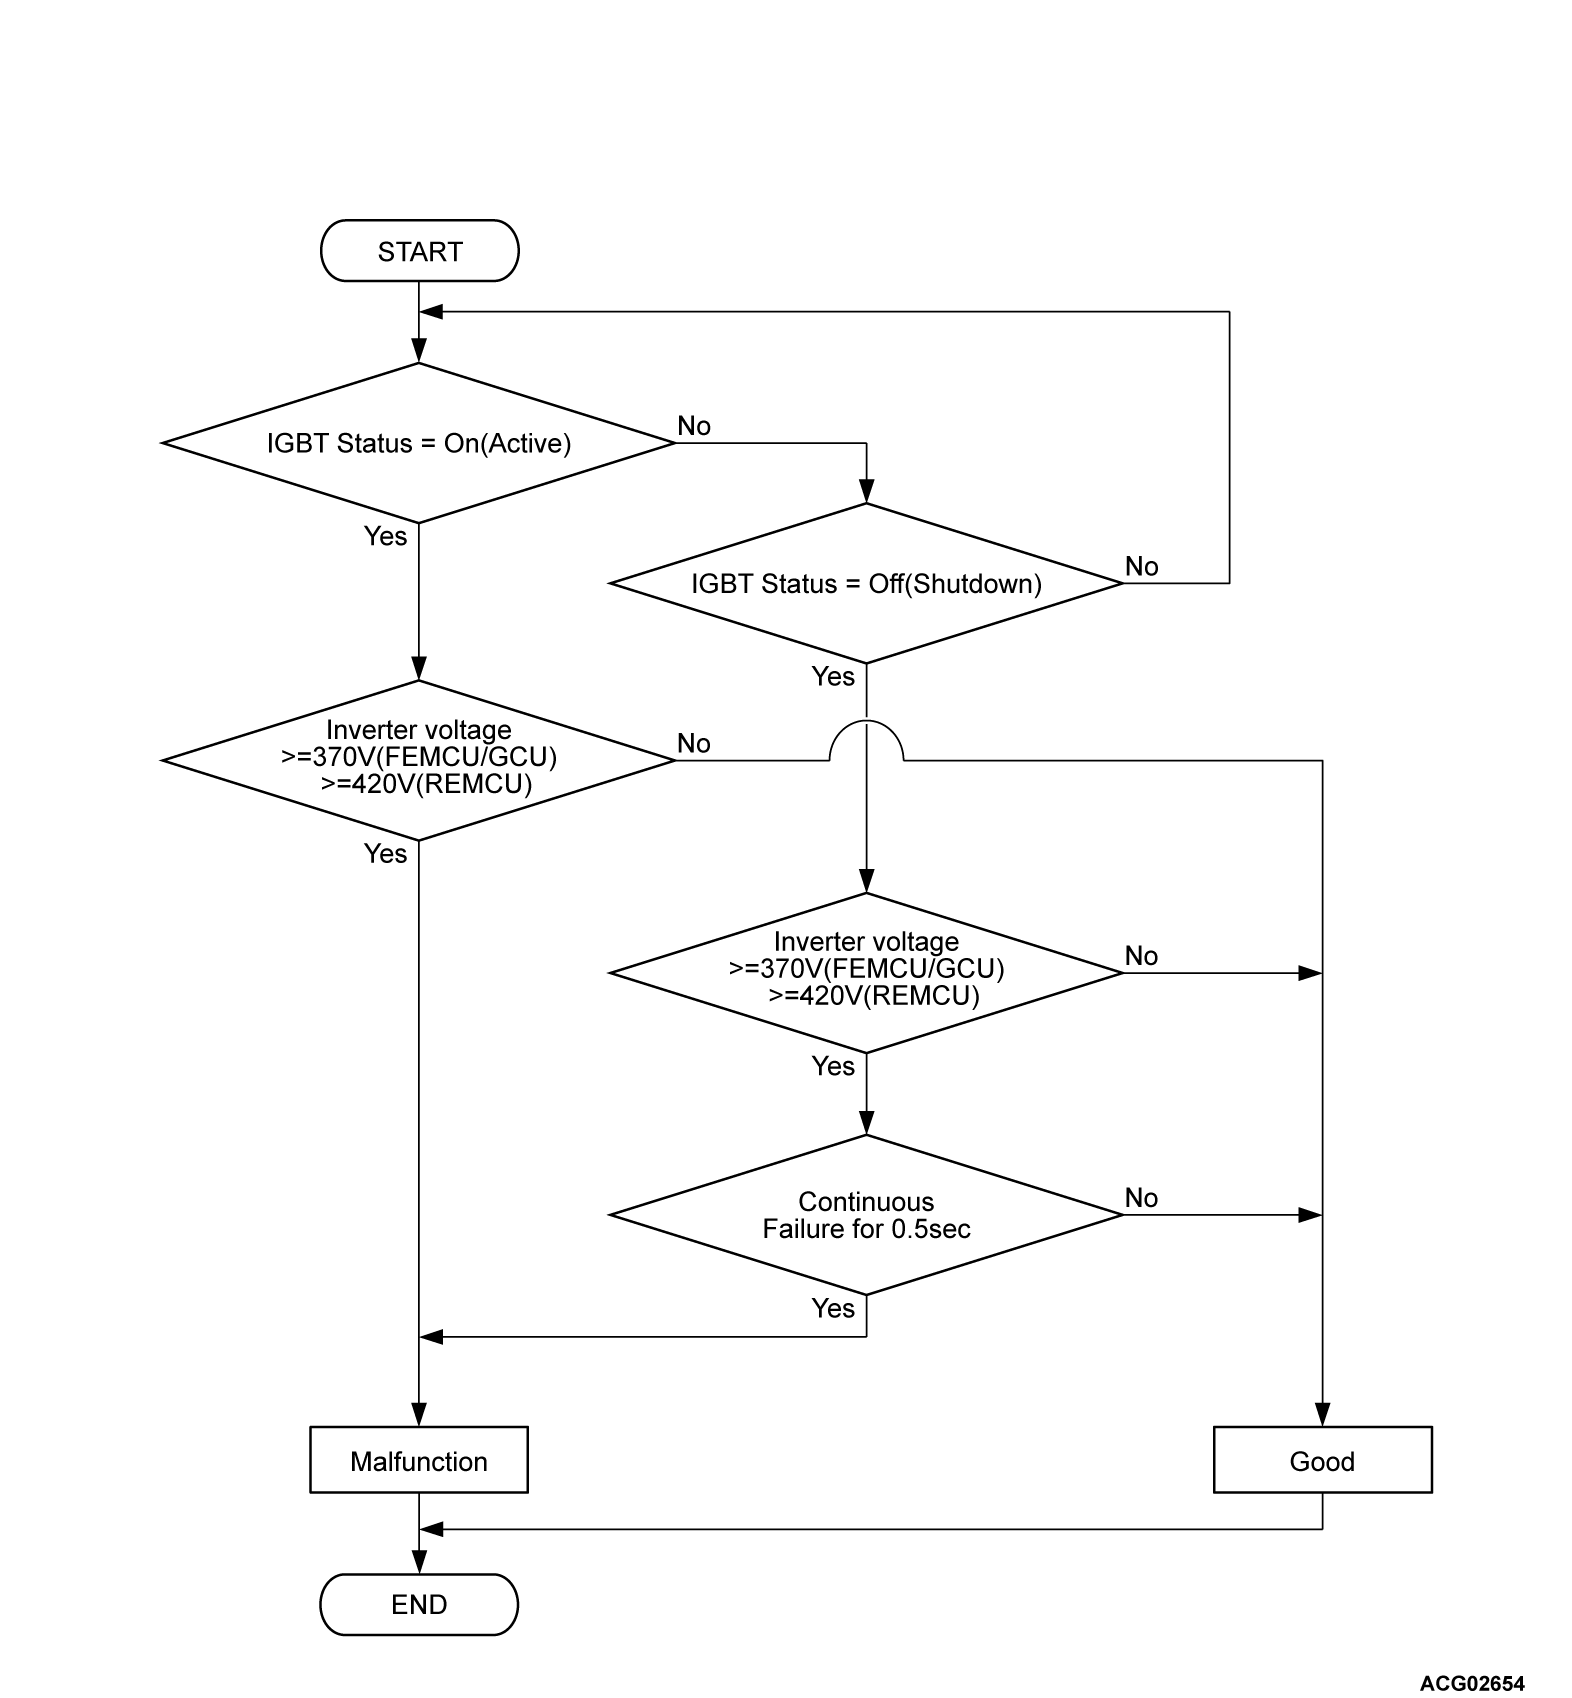
Logic Flow Chart
Check Conditions
- The IGBT status of Power drive unit (FEMCU) is on (Active).
- When the IGBT status of the power drive unit (FEMCU) is off (Shutdown), the power
supply voltage of the power drive unit (FEMCU) is 8 volts to 16 volts.
Judgment Criterion
- When the IGBT status of the power drive unit (FEMCU) is on (Active), a state where
the voltage-high switch * is on is detected once.
- When the IGBT status of the power drive unit (FEMCU) is off (Shutdown), a state
where the voltage-high switch * is on is detected once and continues for 0.5 seconds.
| note |
*: The voltage-high switch turns ON when drive motor inverter voltage is 370
volts or more.
|
OBD-II DRIVE CYCLE PATTERN
Refer to Diagnostic Function - OBD-II Drive
Cycle - Pattern 4 .
PROBABLE CAUSES
- The high-voltage circuit fails
- Malfunction of the power drive unit (FEMCU)
|
|
STEP 1. Using scan tool (M.U.T.-IIISE), check whether
the other DTC is set.
|
|
|
Check whether the PHEV-ECU sets a DTC (Driving voltage or voltage sensor problem except
P0C79).
|
|
|
 Diagnose the system according to the set DTC. Then go to Step 3.
|
|
|
|
|
|
 Go to Step 2.
|
|
|
|
|
|
STEP 2. Check the high-voltage terminal.
|
|
|
| danger |
- Carry out the check on the high-voltage circuit while
reading carefully the precautions on handling a high-voltage vehicle.
- Wear the specified protection equipment during the check.
|
|
|
|
(1)Shut down the high voltage (Refer to ).
|
|
|
(2)Check that the following cable is tightened to the specified torque.
- Main drive lithium-ion battery front cable (P, N line) connection (power
drive unit side) (Refer to ).
|
|
|
Q.
Is the check result normal?
|
|
|
Replace the power drive unit (Refer to ). Then
go to Step 3.
|
|
|
|
|
|
Tighten the main drive lithium-ion battery front cable (P, N line to the specified
torque (power drive unit side) (Refer to ). Then go to
Step 3.
|
|
|
|
|
|
STEP 3. Test the OBD-II drive cycle.
|
|
|
(1)Carry out a test drive with the drive cycle pattern. Refer to Diagnostic Function - OBD-II
Drive Cycle - Pattern 4 .
|
|
|
Retry the troubleshooting.
|
|
|
|
|
|
The inspection is complete.
|
|
|
|
