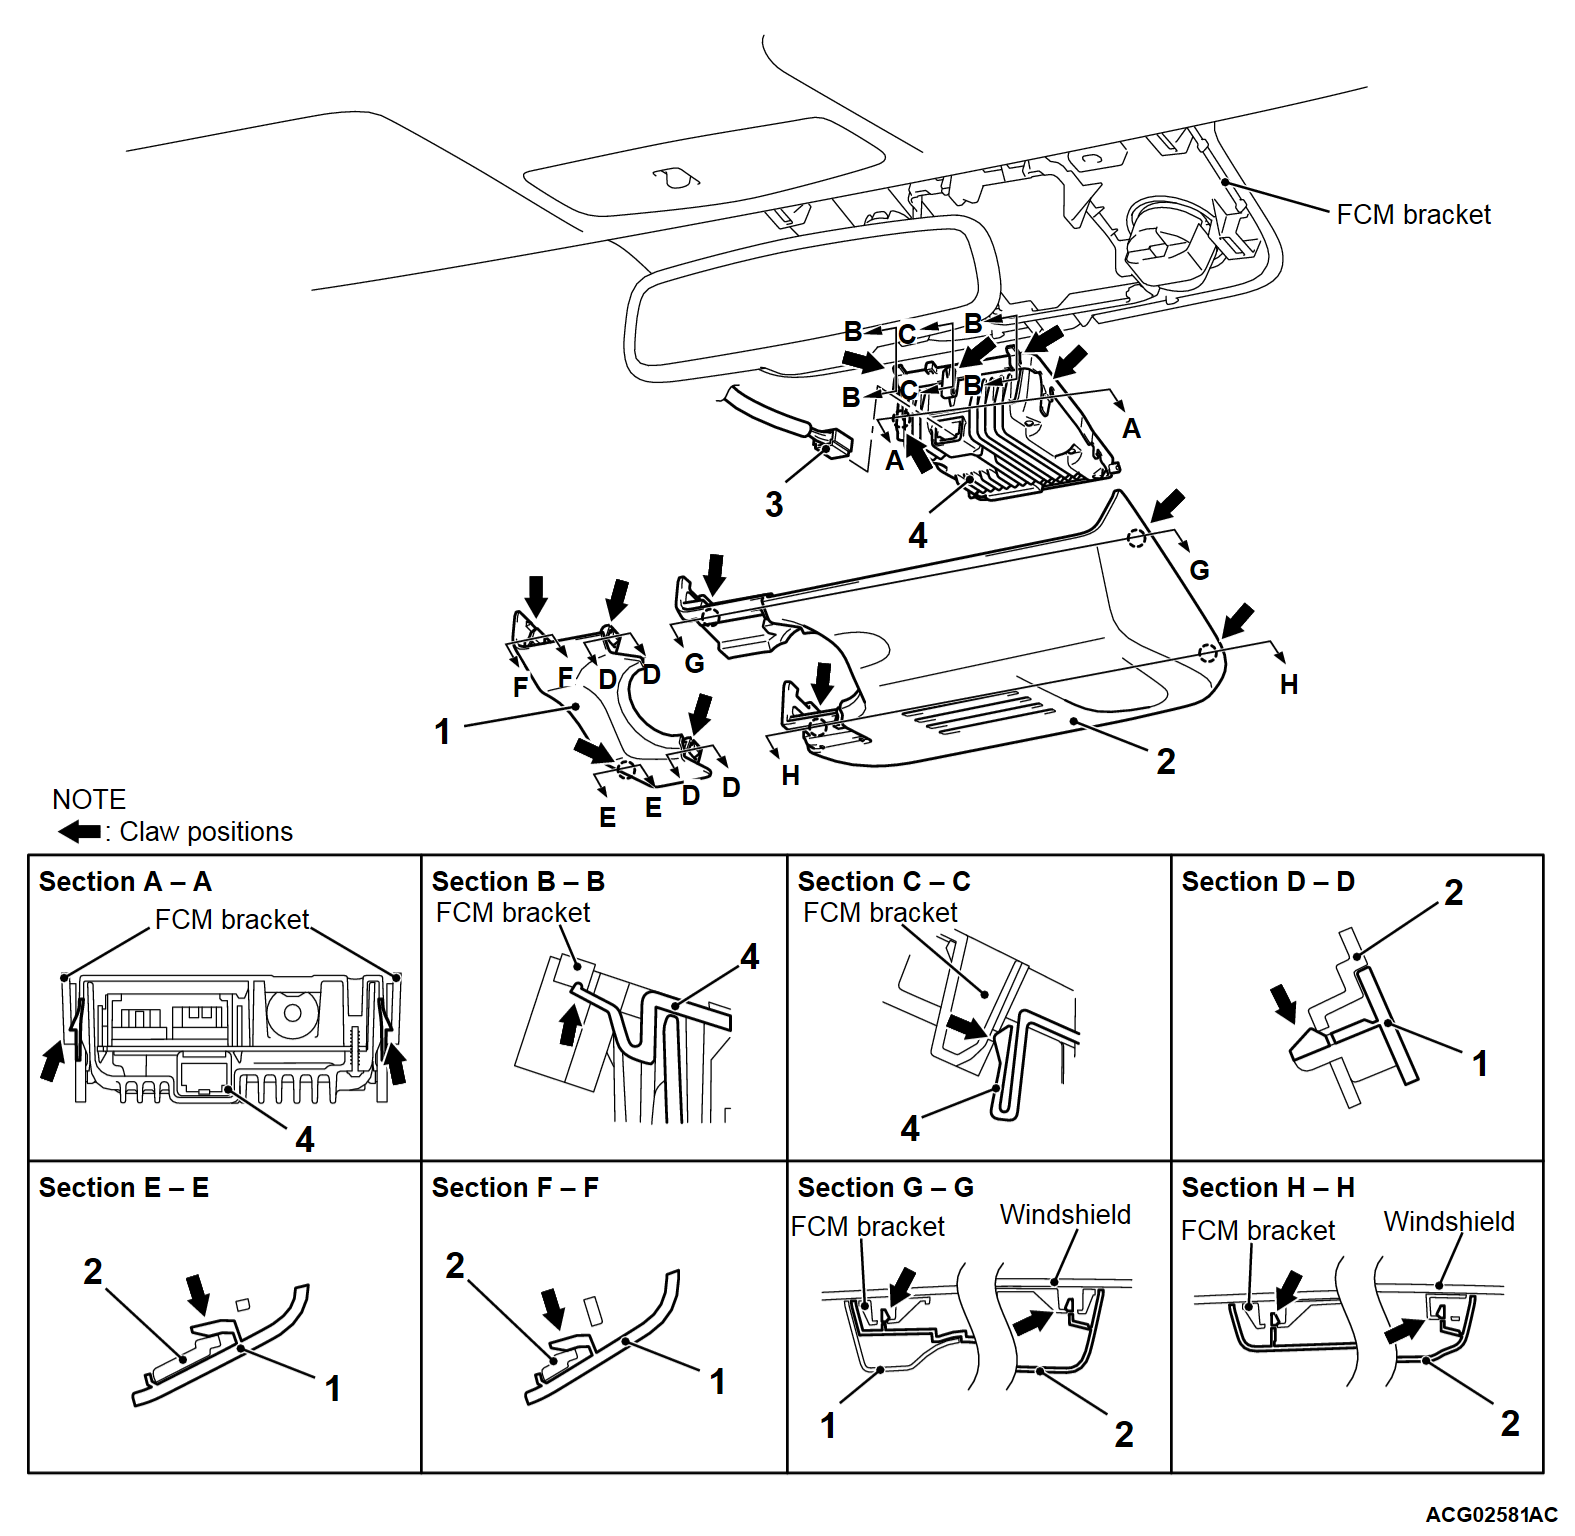
REMOVAL AND INSTALLATION
| danger |
|
REMOVAL SERVICE POINTS
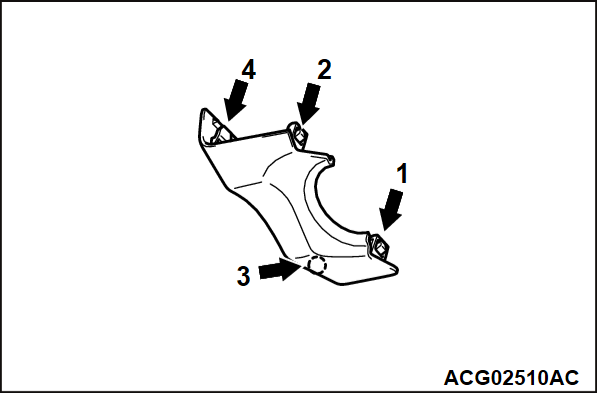
<<A>>FCM CAP REMOVAL
1. Disengage the tabs on the cover in the order shown.
| caution | Slide off the fourth tab vertically along the windshield as it may be broken easily. |
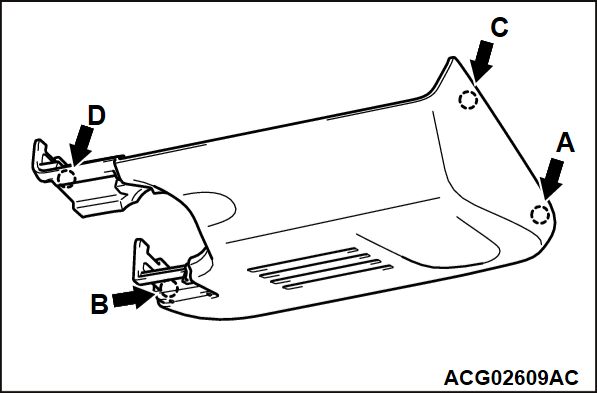
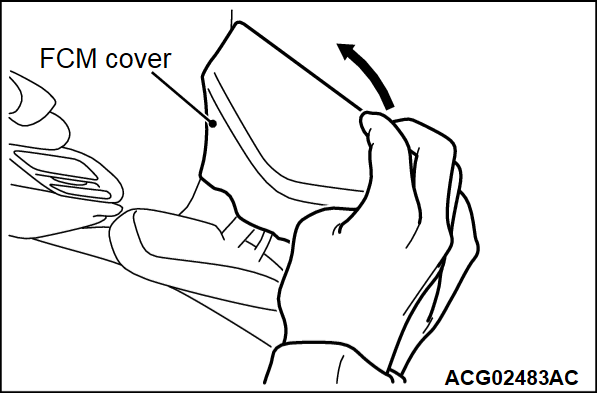
<<B>>FCM COVER REMOVAL
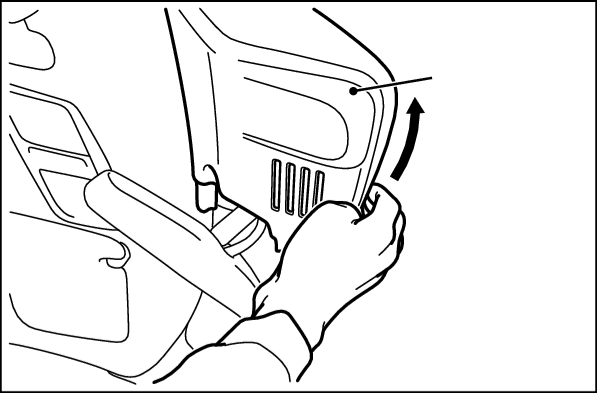
1. Insert your finger into the front opening on the cover as shown. Slide off tab A by moving your finger sideways to ensure the clearance between the windshield and the cover.
2. Repeat step 1 to disengage tab B.
3. Disengage tab C.
4. Disengage tab D to remove the cover.
| note | Tab D is broken easily. To improve access, we recommend that you should move the interior mirror. |
INSTALLATION SERVICE POINT
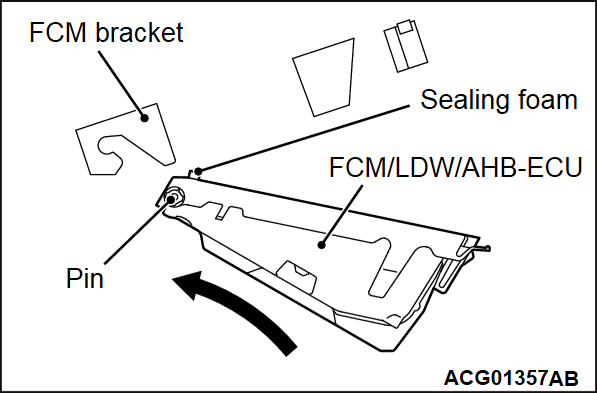
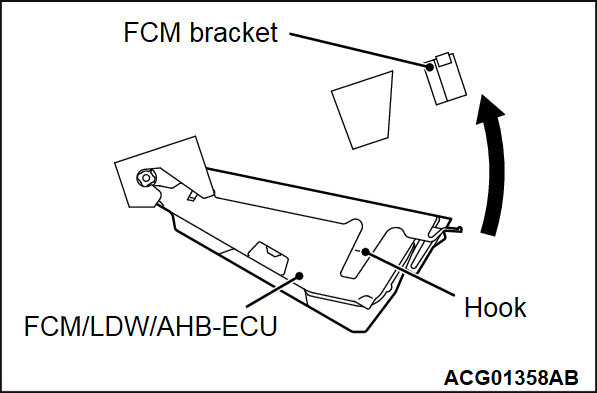
>>A<< FCM/LDW/AHB-ECU INSTALLATION
1.
Move the FCM/LDW/AHB-ECU towards the direction shown until two pins on the front of the FCM/LDW/AHB-ECU are engaged in the FCM bracket.
| caution | To install the FCM/LDW/AHB-ECU, make sure the sealing foam on the FCM/LDW/AHB-ECU is not broken (not cracked and nicked). If yes, do not install the ECU. |
2. Pivot the FCM/LDW/AHB-ECU towards the direction shown until two hooks on the rear end of the FCM/LDW/AHB-ECU are engaged in the FCM bracket.
| note | Engage the two hooks on the rear end of the FCM/LDW/AHB-ECU one after another by pressing an appropriate side by hand. You should hear an audible click at each side. |
![[Previous]](../../../buttons/fprev.png)
![[Next]](../../../buttons/fnext.png)

