REMOVAL AND INSTALLATION
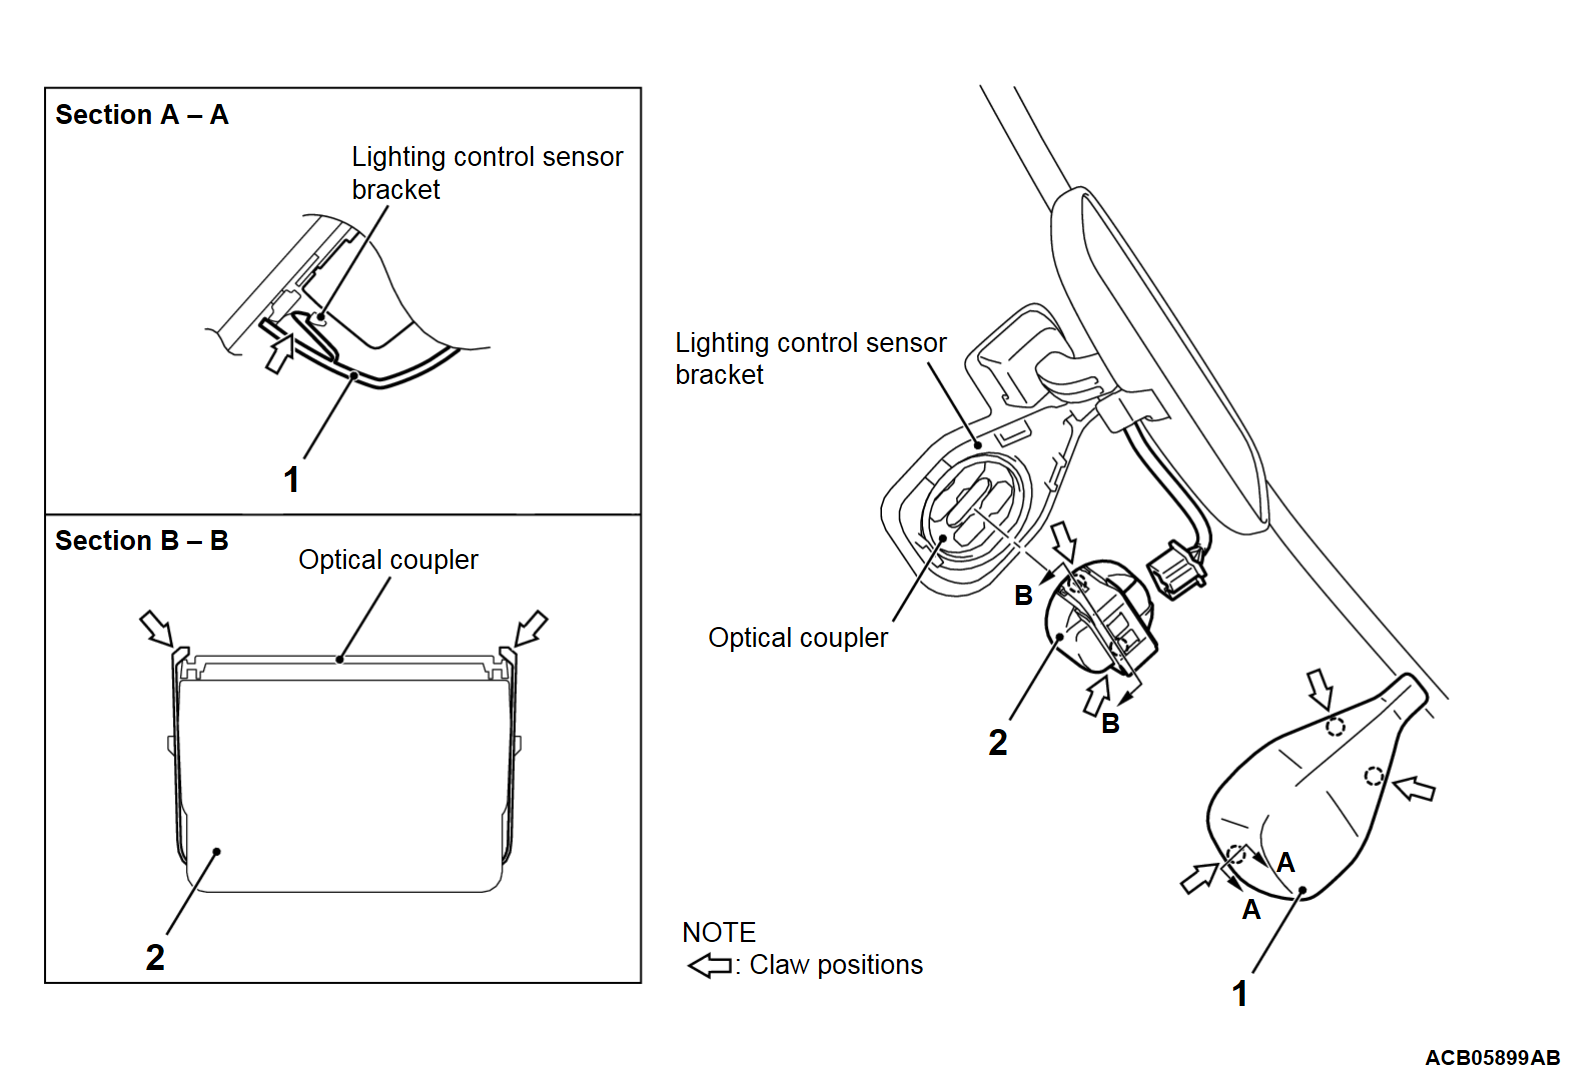
<Vehicles without FCM/LDW/AHB-ECU>
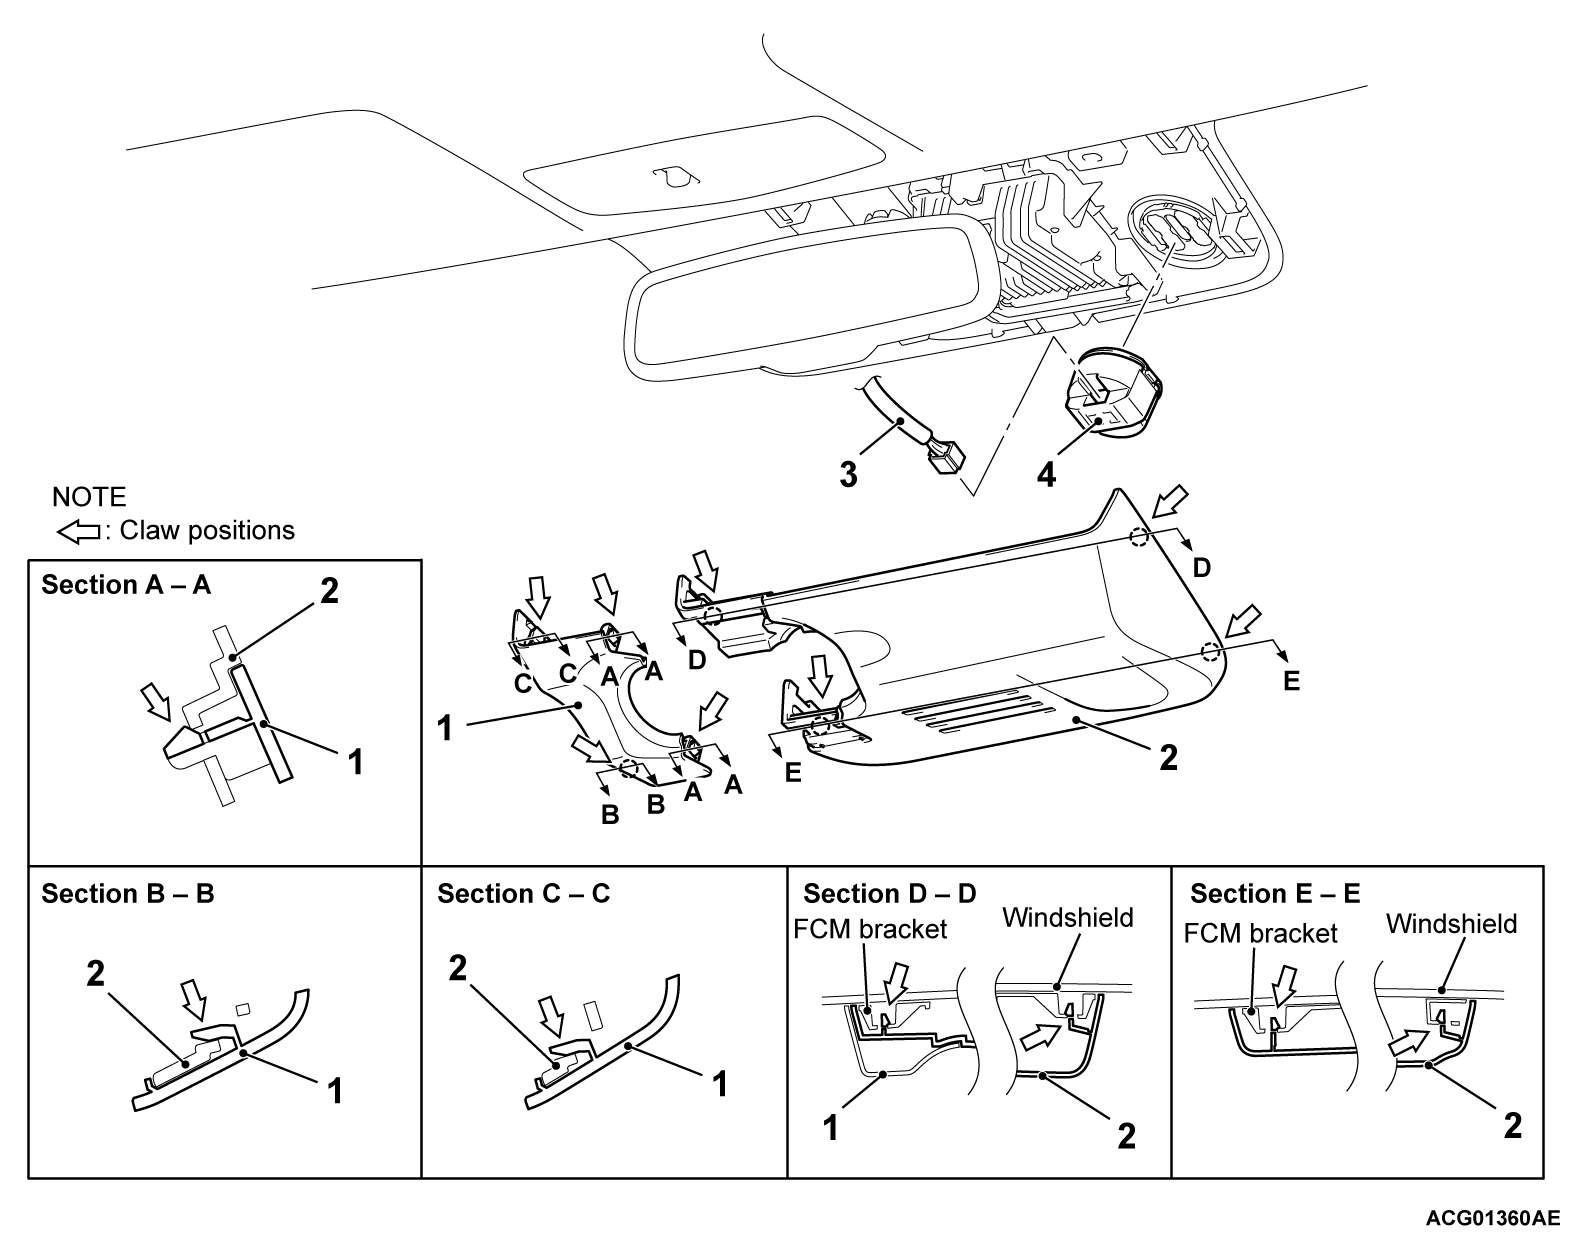
<Vehicles with FCM/LDW/AHB-ECU>
REMOVAL SERVICE POINT
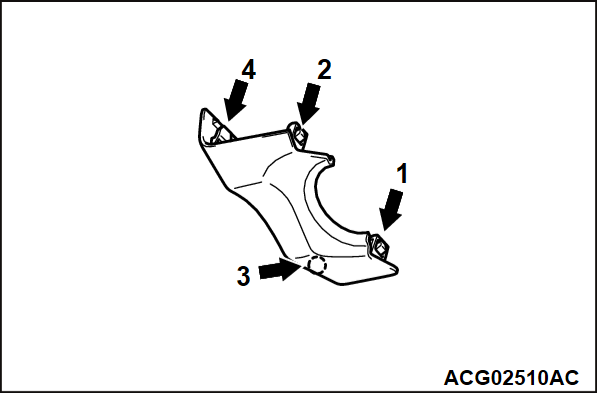
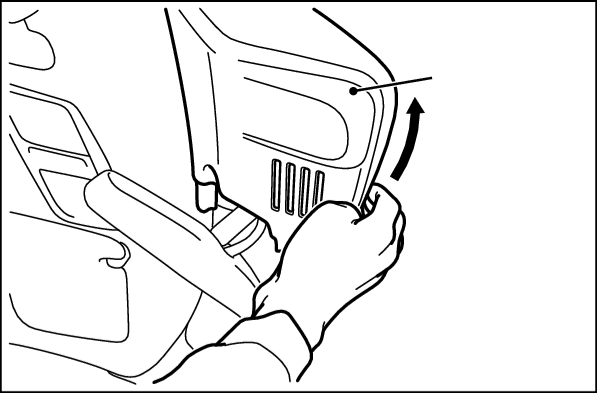
<<A>>FCM CAP REMOVAL
1. Disengage the tabs on the cover in the order shown.
| caution | Slide off the fourth tab vertically along the windshield as it may be broken easily. |
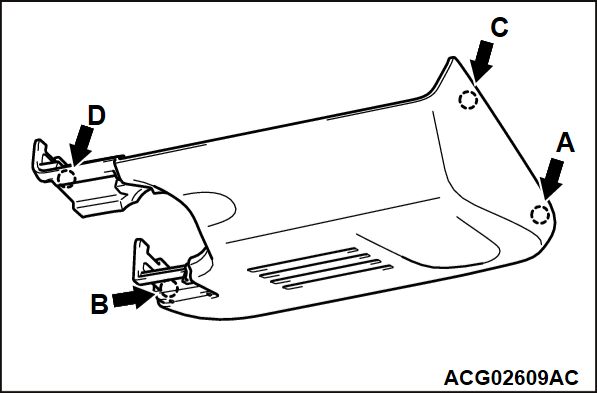
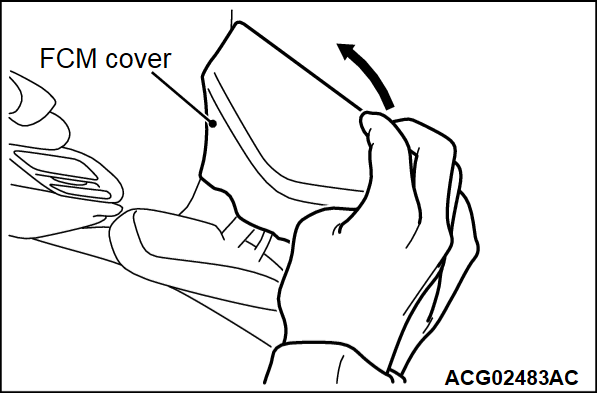
<<B>>FCM COVER REMOVAL
1. Insert your finger into the front opening on the cover as shown. Slide off tab A by moving your finger sideways to ensure the clearance between the windshield and the cover.
2. Repeat step 1 to disengage tab B.
3. Disengage tab C.
4. Disengage tab D to remove the cover.
| note | Tab D is broken easily. To improve access, we recommend that you should move the interior mirror. |
INSTALLATION SERVICE POINT
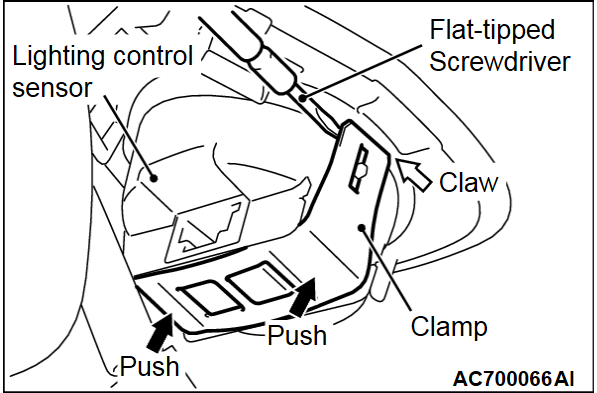
>>A<< LIGHTING CONTROL SENSOR INSTALLATION
1. Mount the lighting control sensor onto the optical coupler, and then connect the connector.
2.
| caution | After executing the lighting control sensor (rain sensor) adaptation, do not touch the lighting control sensor (or do not move it from the fixed position). |
When reusing the lighting control sensor or when the lighting control sensor is pushed to check the installation condition, install the connector and the lighting control sensor cover and wipe the windshield thoroughly. When the windshield is dry, execute the lighting control sensor (rain sensor) adaptation [Refer to GROUP 51 - Lighting Control Sensor (Rain Sensor) Adaptation  ].
].
 ].
].| note | Be careful not to touch the lighting control sensor receiver. (The lighting control sensor receiver has limited resistance to oil). |
![[Previous]](../../../buttons/fprev.png)
![[Next]](../../../buttons/fnext.png)
