INSPECTION
LIFTGATE LATCH CHECK
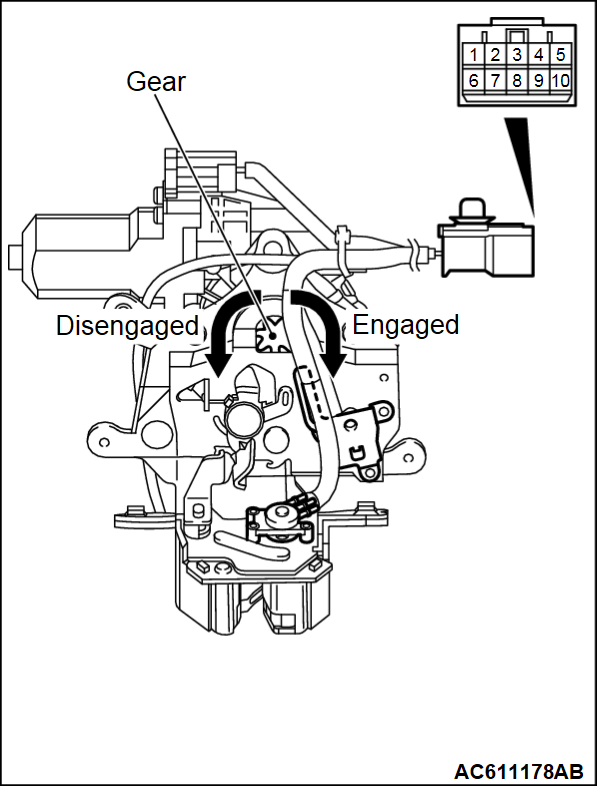
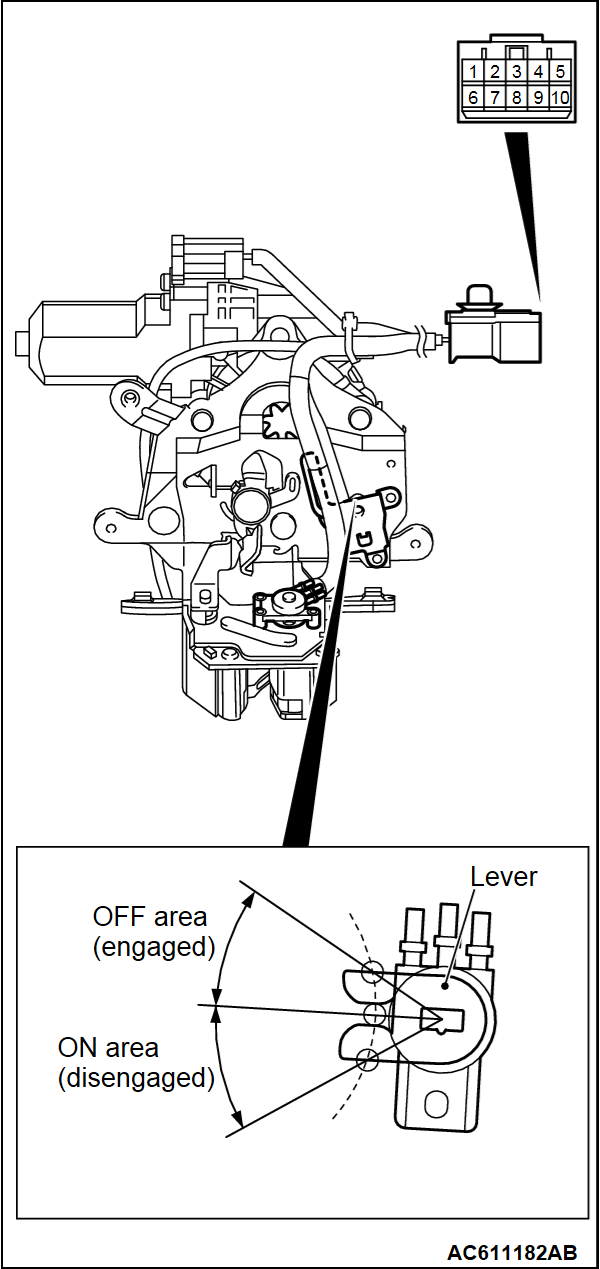
LATCH MOTOR OPERATION CHECK
|
| Battery connecting terminal number | Gear operation |
| 1 (negative battery terminal) - 9 (positive battery terminal) | Engaged → Disengaged |
| 1 (positive battery terminal) - 9 (negative battery terminal) | Disengaged → Engaged |
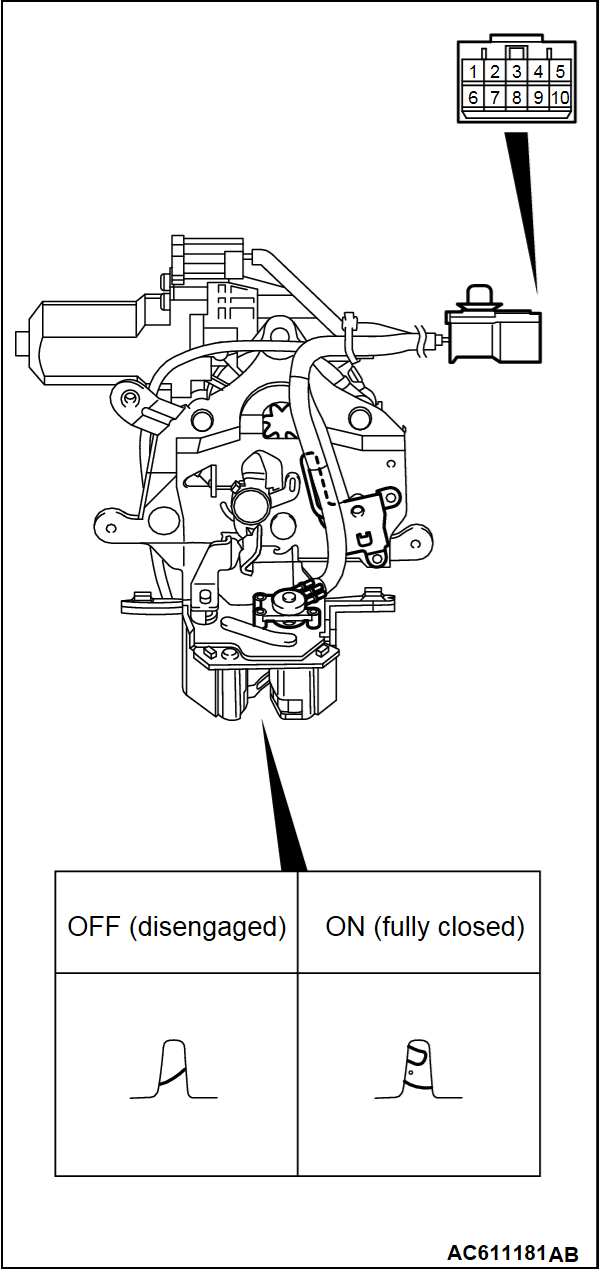
HALF LATCH SWITCH CHECK
|
| Claw position | Terminal number | Normal value |
| ON | 2 - 3 | Continuity exists (2 Ω or less). |
| OFF | 2 - 3 | No continuity |
FULL LATCH SWITCH CHECK
|
| Claw position | Terminal number | Normal value |
| ON | 2 - 4 | Continuity exists (2 Ω or less). |
| OFF | 2 - 4 | No continuity |
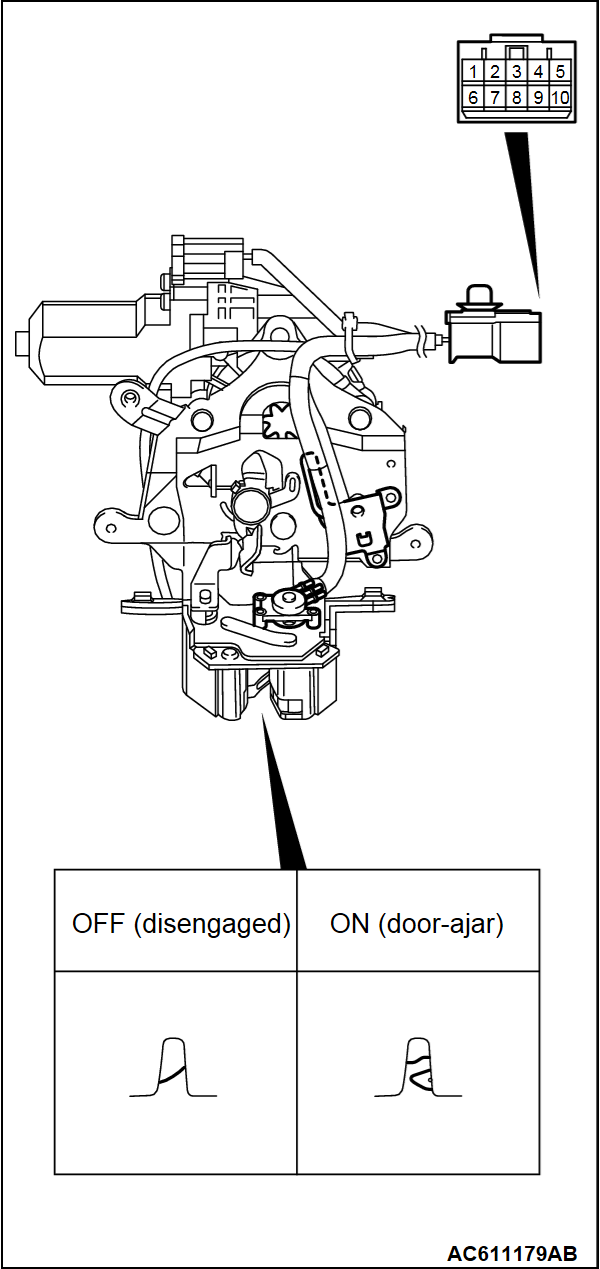
DOOR-AJAR SWITCH CHECK
|
| Claw position | Terminal number | Normal value |
| ON | 5 - 10 | Continuity exists (2 Ω or less). |
| OFF | 5 - 10 | No continuity |
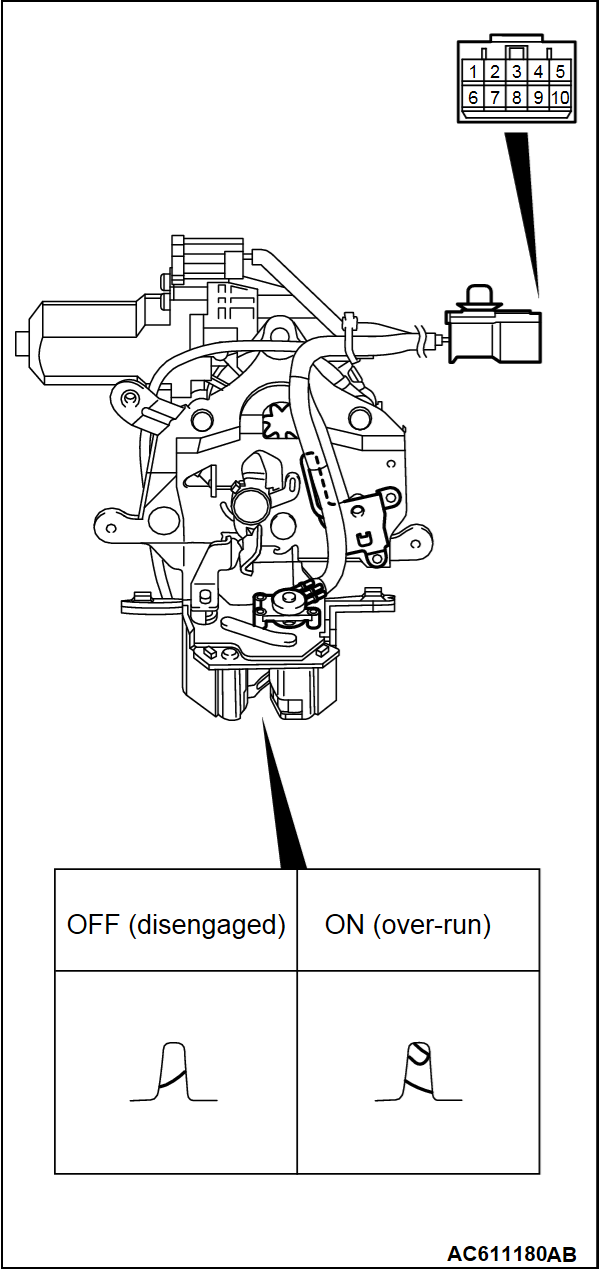
NEUTRAL SWITCH CHECK
| caution | After checking the neutral switch, operate the liftgate latch as follows to install it. This avoids damage to the liftgate latch switch.
|
|
| Lever position | Terminal number | Normal value |
| ON | 7 - 8 | Continuity exists (2 Ω or less). |
| OFF | 7 - 8 | No continuity |
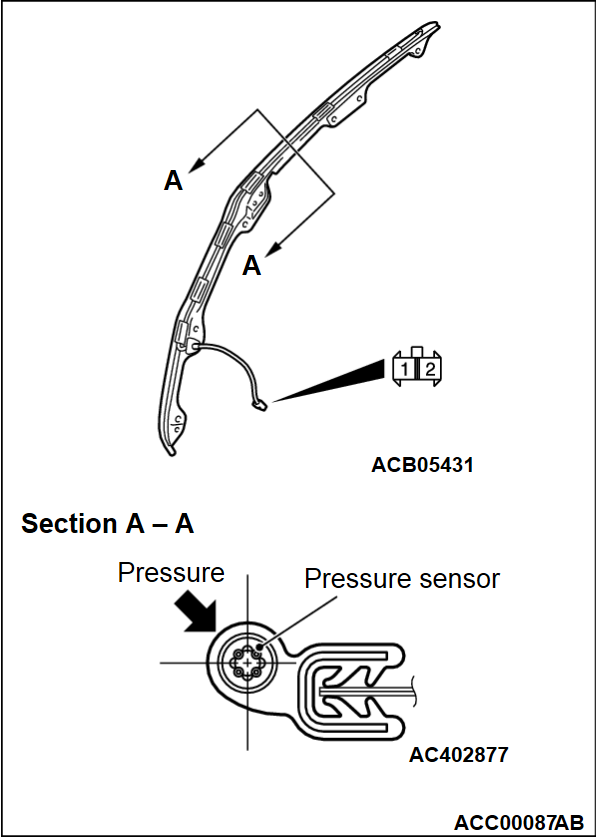
LIFTGATE SENSOR CHECK
When the load is applied to the pressure detection sensor towards the direction shown in the figure, and when the sensor is pushed approximately 2.2 mm, the liftgate sensor turns ON.
|
| Sensor position | Terminal number | Normal value |
| ON | 1 - 2 | 100 Ω or less |
| OFF | 1 - 2 | Approximately 1kΩ |
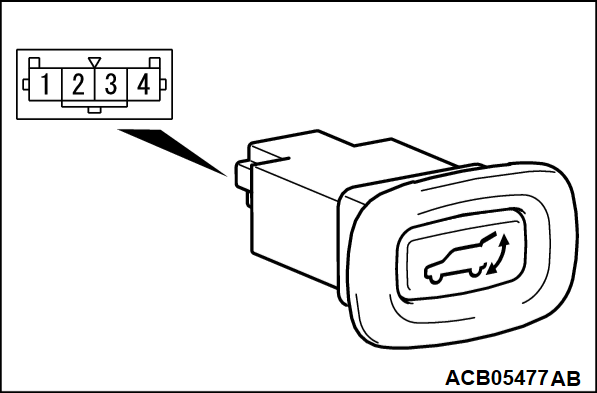
POWER LIFTGATE CLOSE SWITCH INSPECTION
|
| Switch position | Terminal number | Normal value |
| ON (Press) | 1 - 2 | Continuity exists (2 Ω or less) |
| OFF | 1 - 2 | No continuity |
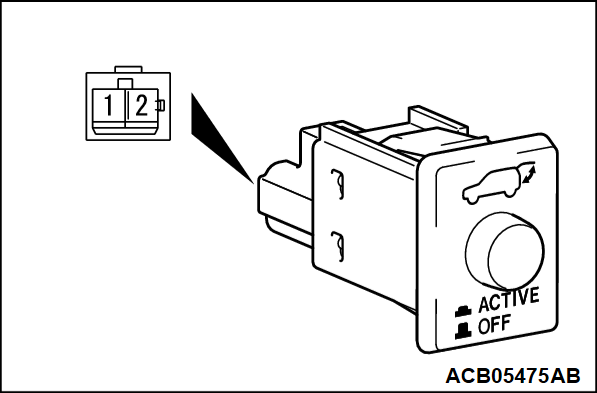
POWER LIFTGATE MAIN SWITCH CHECK
|
| Switch position | Terminal number | Normal value |
| ON (Press) | 1 - 2 | Continuity exists (2 Ω or less) |
| OFF | 1 - 2 | No continuity |
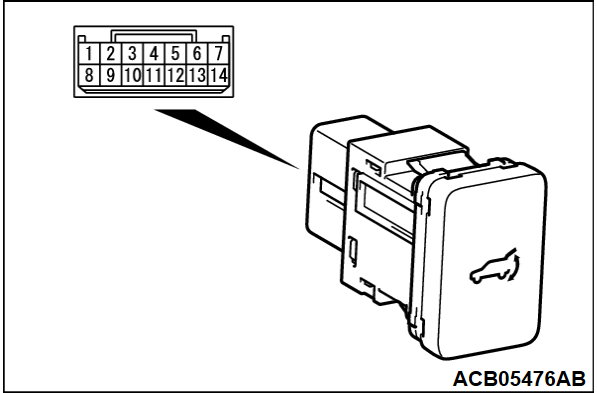
POWER LIFTGATE SWITCH CHECK
|
| Switch position | Terminal number | Normal value |
| ON (Press) | 10 - 13 | Continuity exists (2 Ω or less) |
| OFF | 10 - 13 | No continuity |
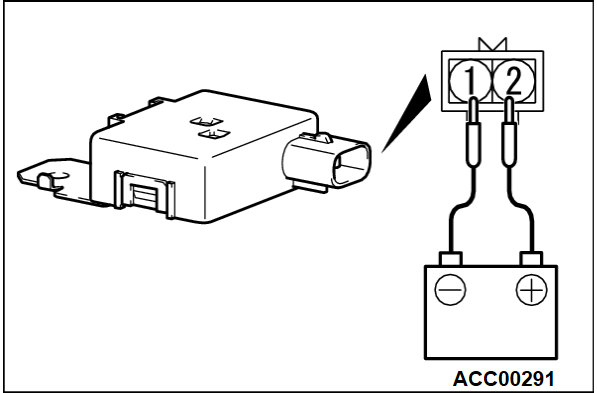
POWER LIFTGATE TONE ALARM INSPECTION
Check that the power liftgate tone alarm sounds once when the terminals are connected to the battery as shown.
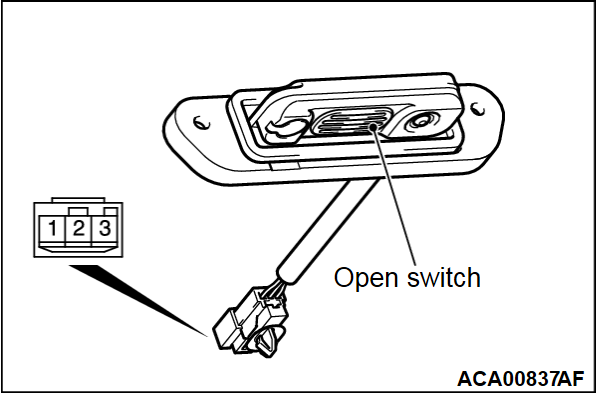
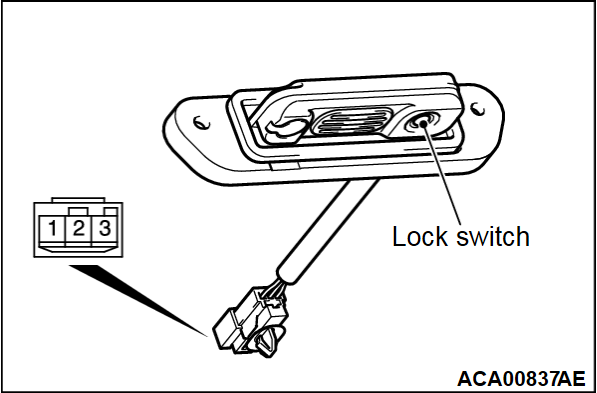
LIFTGATE LOCK RELEASE HANDLE (LIFTGATE OPEN SWITCH) CHECK
|
| Switch position | Terminal number | Normal value |
| Push (open) | 1 - 2 | Continuity exists (2 Ω or less) |
| Release | 1 - 2 | No continuity |
![[Previous]](../../../buttons/fprev.png)
![[Next]](../../../buttons/fnext.png)
