REMOVAL AND INSTALLATION
Required Special Tool:
- MB991396: Oil filter wrench
- MD998727: Oil pan FIPG cutter
- MB991448: Crankshaft front oil seal installer
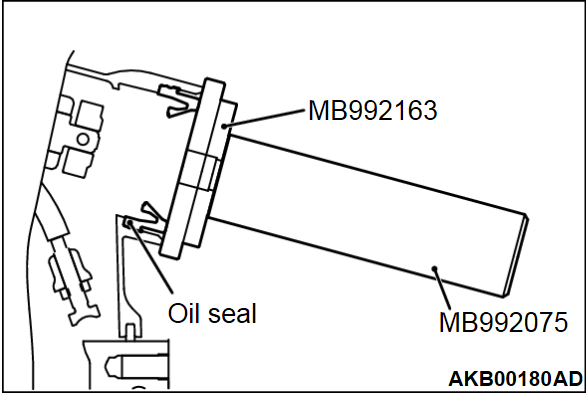
- MB992163: Oil seal installer
- MB992075: Handle
REMOVAL SERVICE POINTS
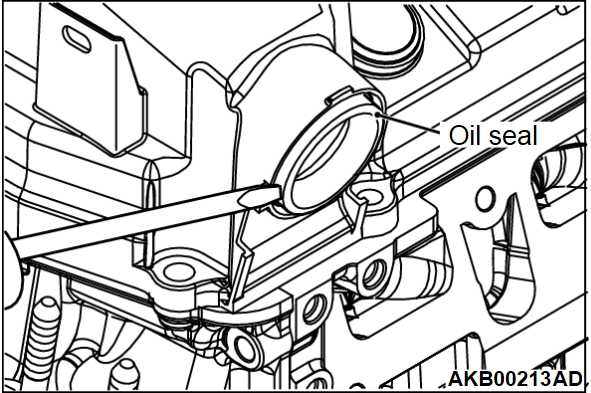
<<A>> OIL SEAL REMOVAL
| caution | Do not damage the resin rocker cover. |
By inserting the minus driver to the position shown in the illustration, remove the oil seal.
<<C>> OIL PAN REMOVAL
1. Remove oil pan tightening bolts.
2.
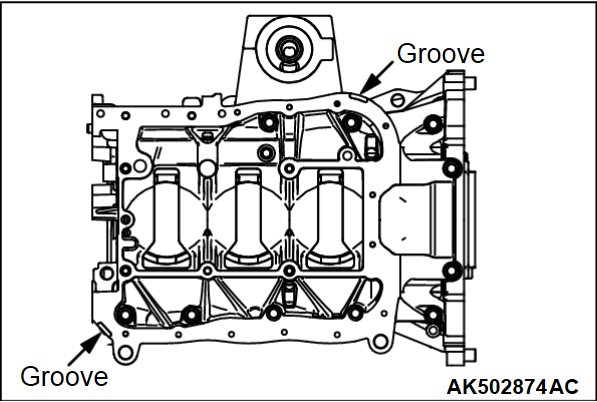
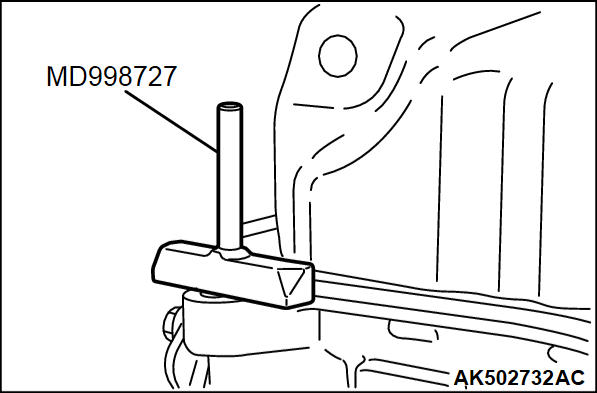
Lightly tap special tool Oil pan FIPG cutter (MD998727) to drive in the illustrated groove of the oil pan and ladder frame.
| caution | Lightly tap the oil pan FIPG cutter to drive in, taking care not to damage the ladder frame and oil pan sealed area. |
3. Lightly tap and slide special tool Oil pan FIPG cutter (MD998727) to remove the oil pan.
INSTALLATION SERVICE POINTS
>>A<< TIMING CHAIN CASE INSTALLATION
1.
| caution |
|
Completely remove the liquid gasket adhered to the timing chain case assembly, the cylinder block and the cylinder head, and then degrease using white gasoline.
2.
| caution | Install the timing chain case within ten minutes after applying the liquid gasket. |
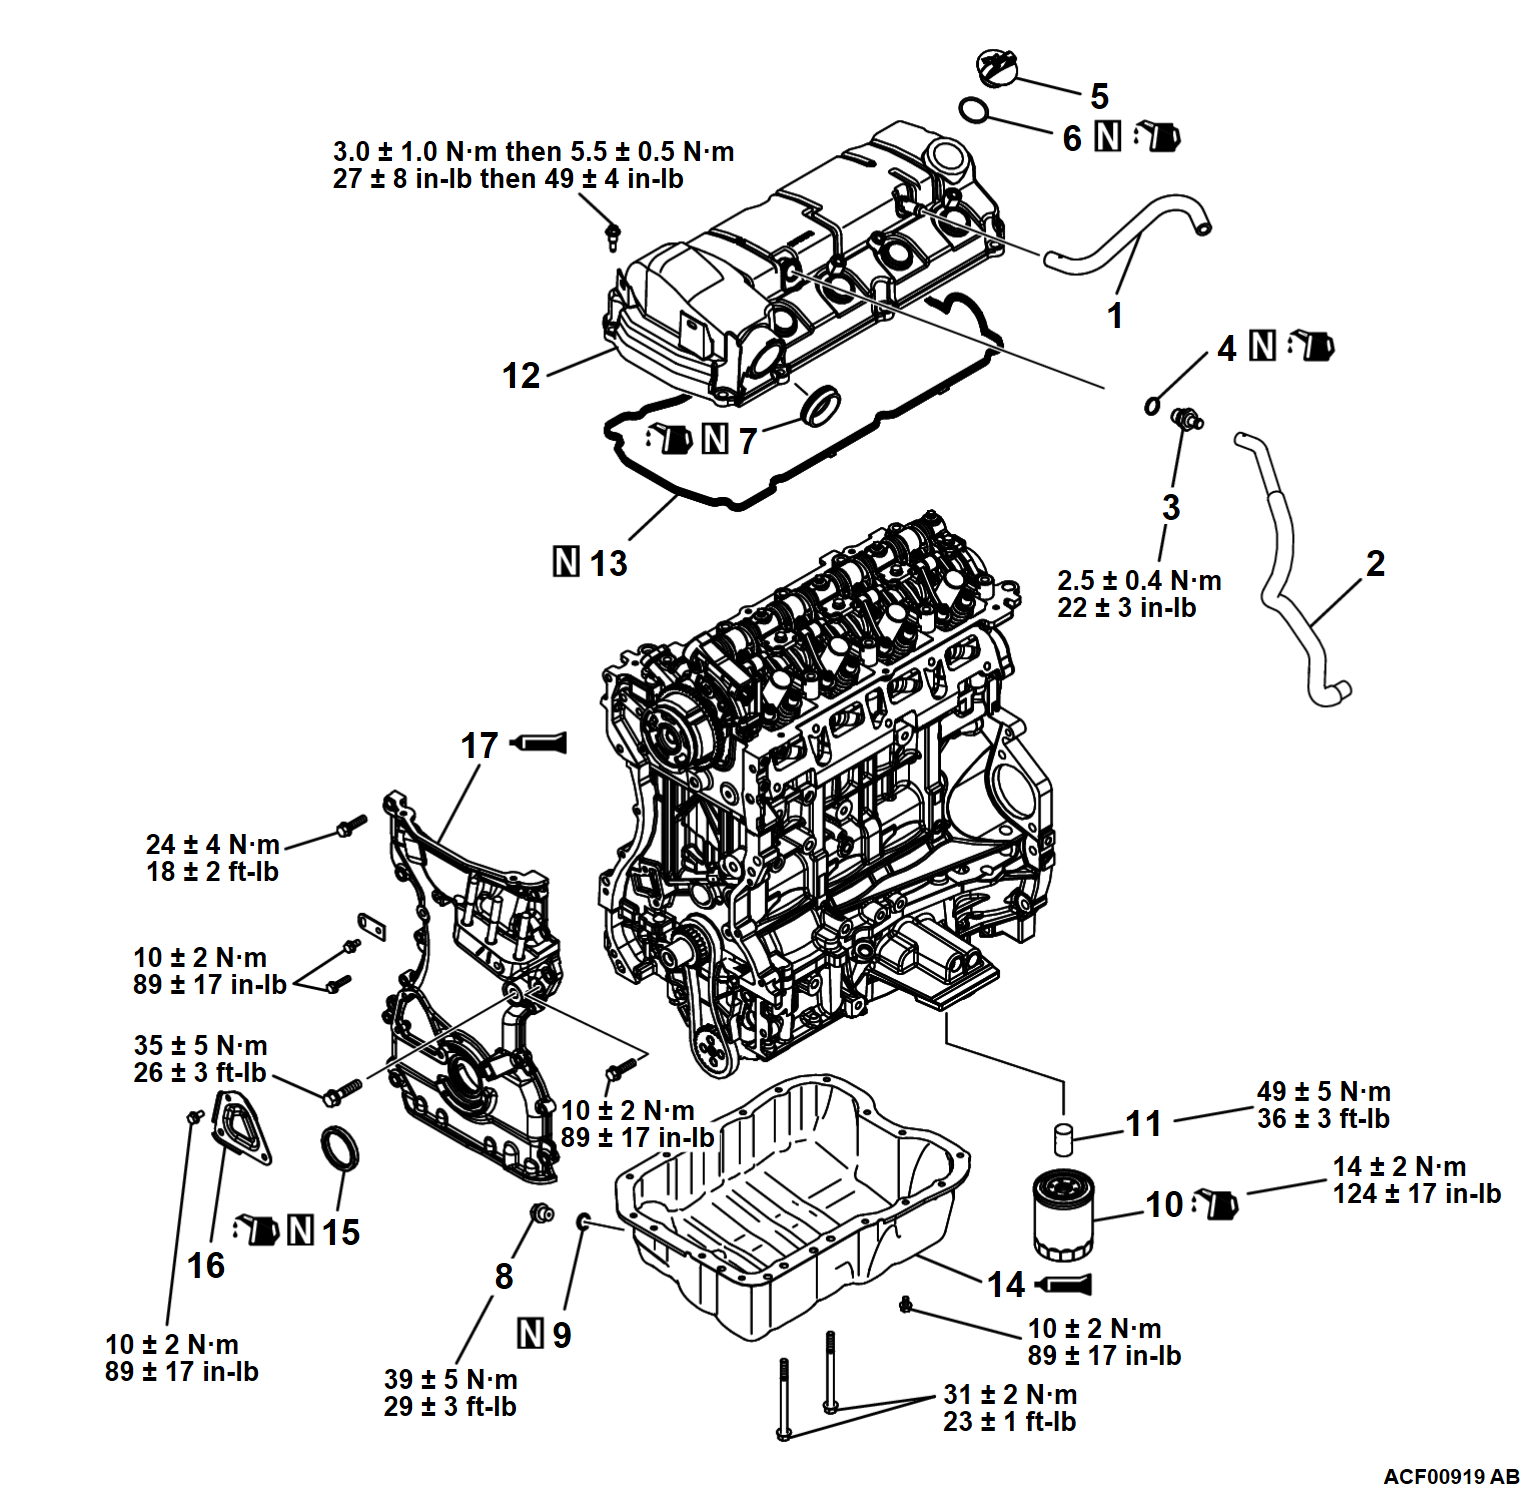
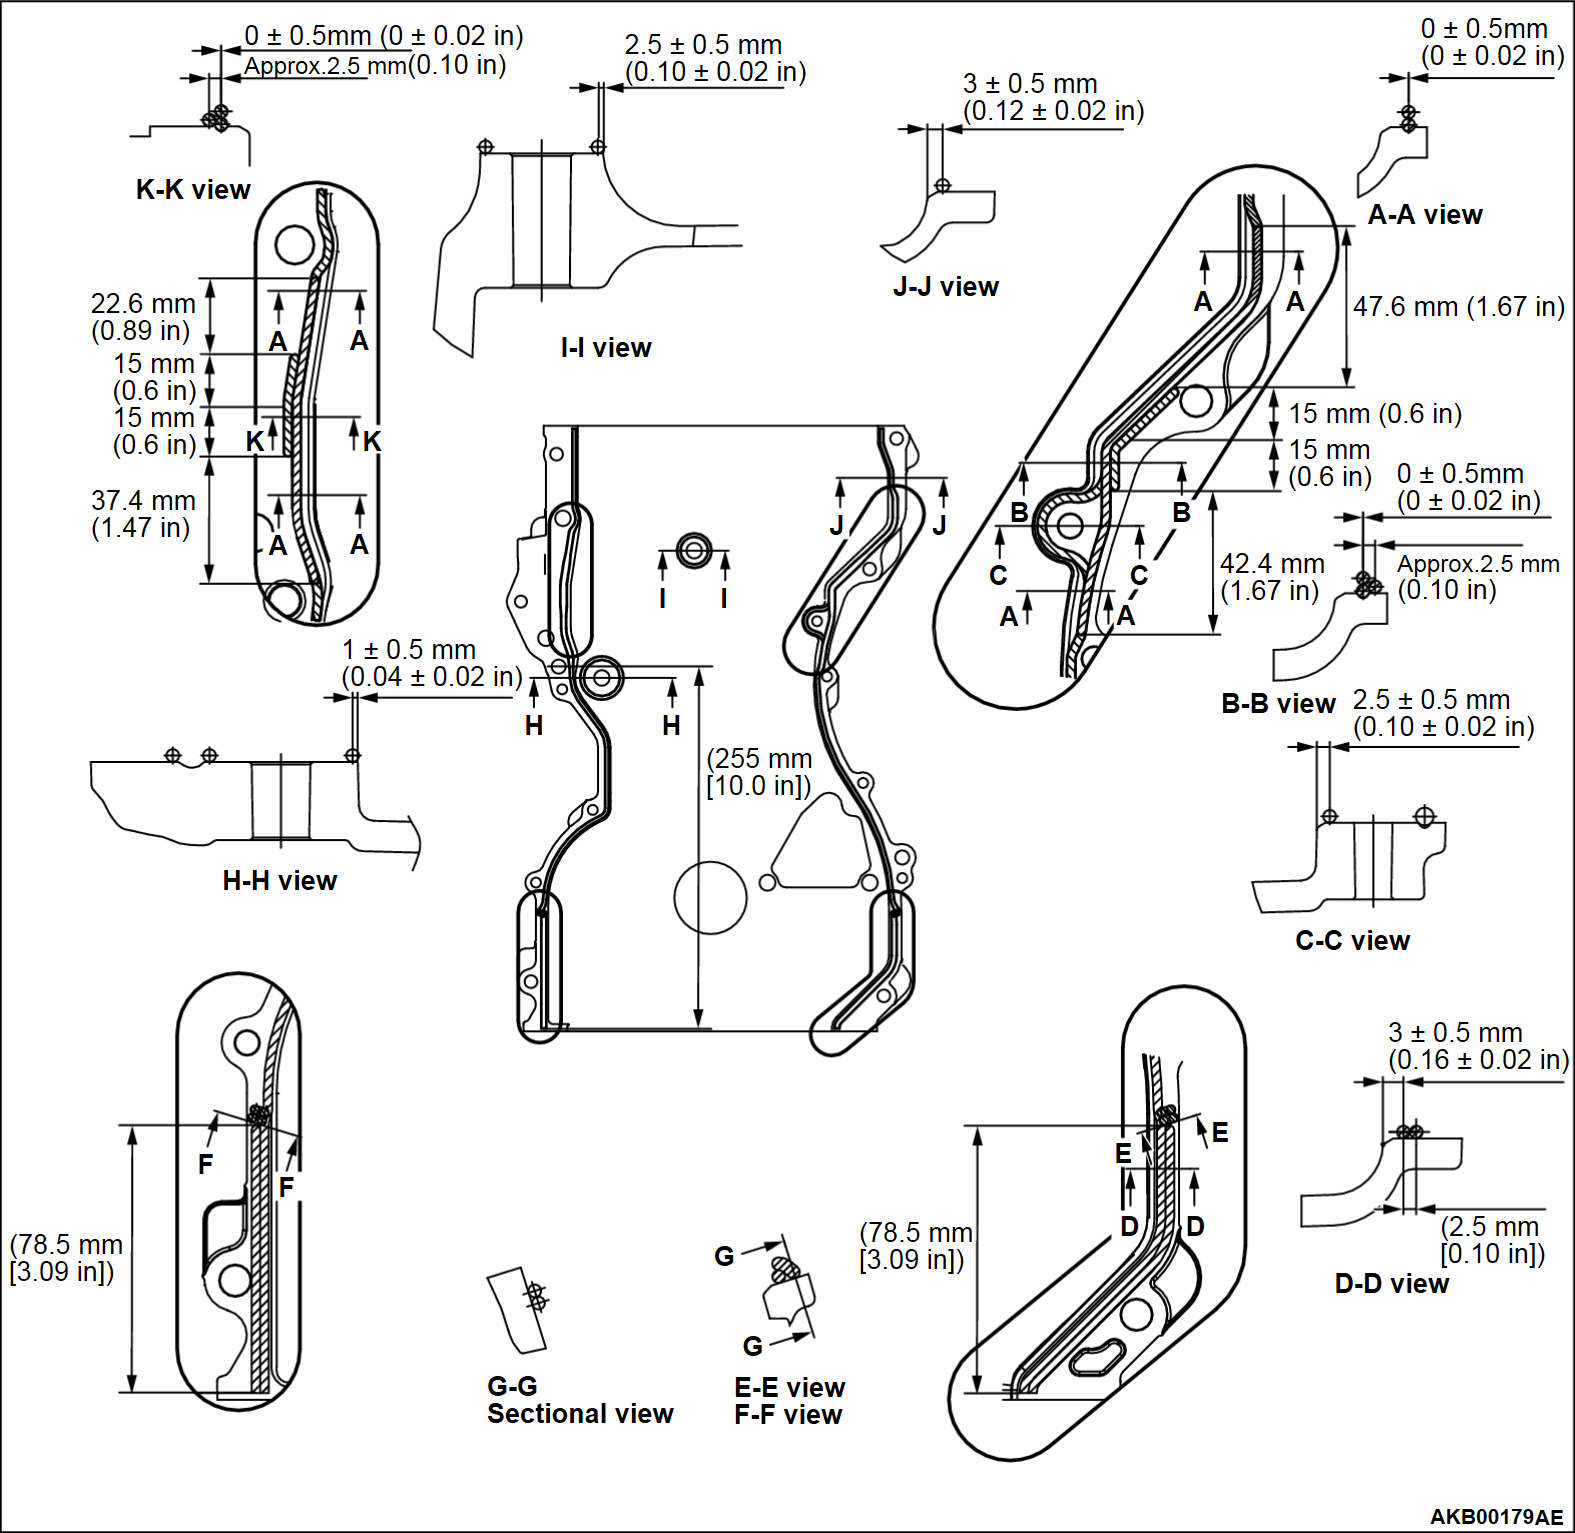
Apply liquid gasket of 2.5 ± 0.5 mm (0.10 ± 0.02 inch) in thickness to the timing chain case. Apply some beads of liquid gasket, 2.5 ± 0.5 mm (0.10 ± 0.02 inch), to the three mating faces between the cylinder head and the cylinder block, also to the three mating faces between the cylinder block and the ladder frame as shown in the illustration.
Specified sealant:
- ThreeBond 1217G or equivalent
3. Remove all the liquid gasket adhering to the gasket between the cylinder head and cylinder block (three-surface aligned part). Then, degrease the surfaces with white gasoline.
4. Engine oil, which is soaked in the cylinder head gasket, will emerge at the three-surface aligned part. Therefore, immediately after degreasing, apply liquid gasket.
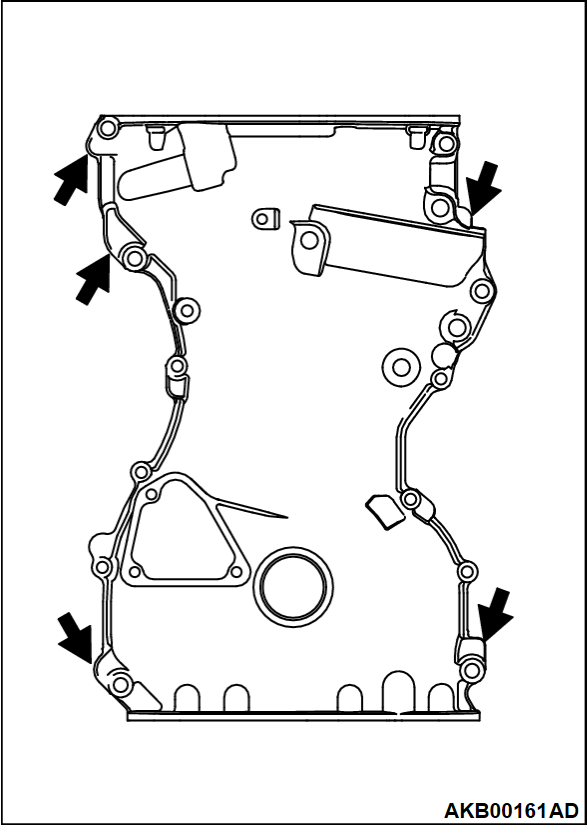
5. Install the timing chain case.
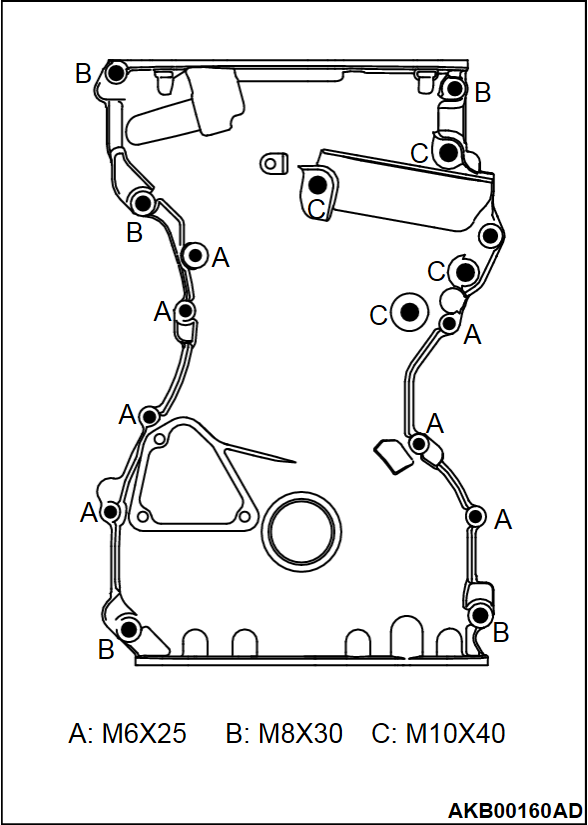
6. Tighten timing chain case mounting bolts to the specified torque.
Tightening torque
- A: 10 ± 2 N·m (89 ± 17 in-lb)
- B: 24 ± 4 N·m (18 ± 2 ft-lb)
- C: 35 ± 5 N·m (26 ± 3 ft-lb)
>>B<< TIMING CHAIN CASE COVER INSTALLATION
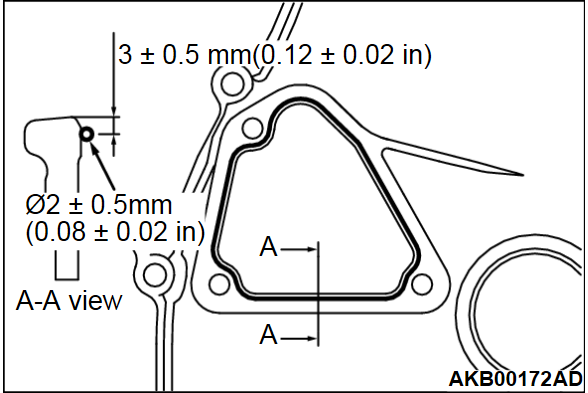
Apply liquid gasket of Φ2 ± 0.5 mm (0.08 ± 0.02 inch) of thickness in diameter to the timing chain case cover or the timing chain case.
Specified sealant:
- ThreeBond 1217G or equivalent
>>C<< FRONT OIL SEAL INSTALLATION
1. Apply a small amount of engine oil to the entire inner diameter of the front oil seal lip.
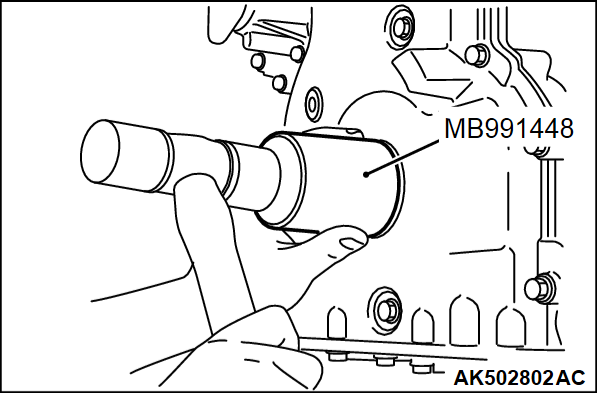
2. Use special tool Bush remover and installer base (MB991448) to press in the front oil seal into the recess of the timing chain.
>>D<< OIL PAN INSTALLATION
1. Completely remove liquid gasket adhering to the cylinder block and oil pan.
2.
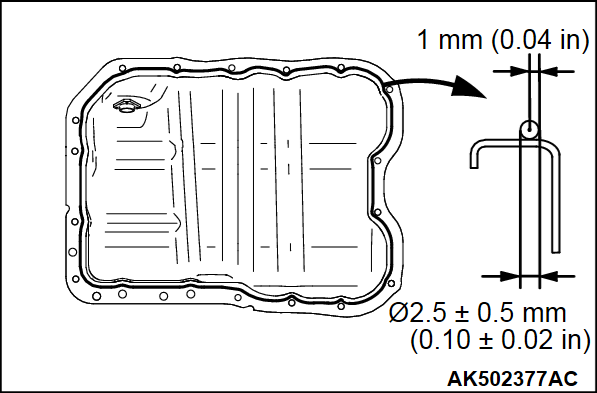
Apply liquid gasket of Φ2.5 ± 0.5 mm (0.10 ± 0.02 inch) of thickness in diameter to the illustrated area of the oil pan.
| caution | Install the oil pan within three minutes after liquid gasket is applied. |
Specified sealant:
- ThreeBond 1217G or equivalent
3. Tighten the oil pan to the specified torque of 10 ± 2 N·m (89 ± 17 in-lb) (M6) and 31 ± 2 N·m (23 ± 1 ft-lb)(M8).
>>E<< ROCKER COVER INSTALLATION
1. Completely remove liquid gasket adhering to the rocker cover, timing chain case and cylinder head.
2. Use white gasoline to degrease the surface and contact where the liquid gasket is applied.
3.
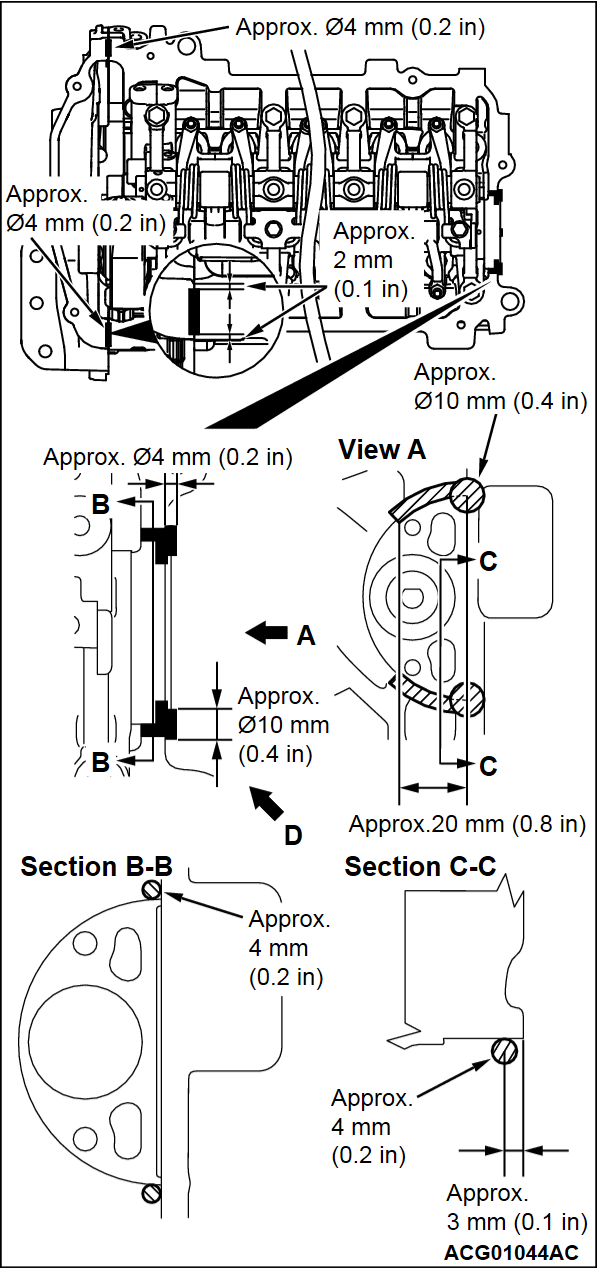
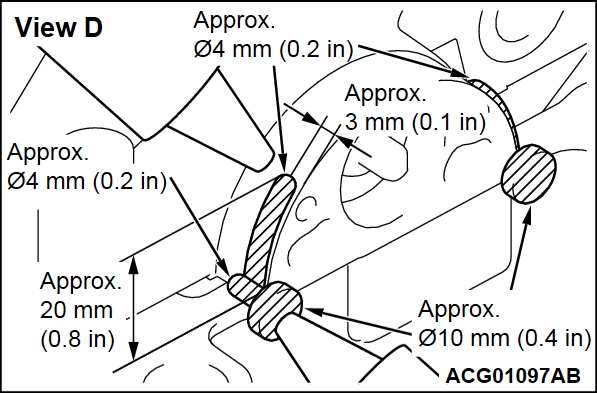
Appropriately use a minimum amount of sealant. Besides, be careful not to allow sealant to squeeze out from the application area. Apply liquid gasket of approximately 4 mm (0.2 inch) or approximately 10 mm (0.4 inch) of thickness in diameter.
| caution | Install the rocker cover immediately after liquid gasket is applied. |
Specified sealant:
- ThreeBond 1217G or equivalent
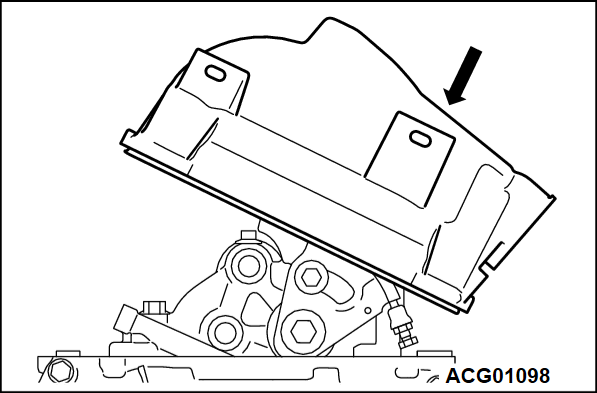
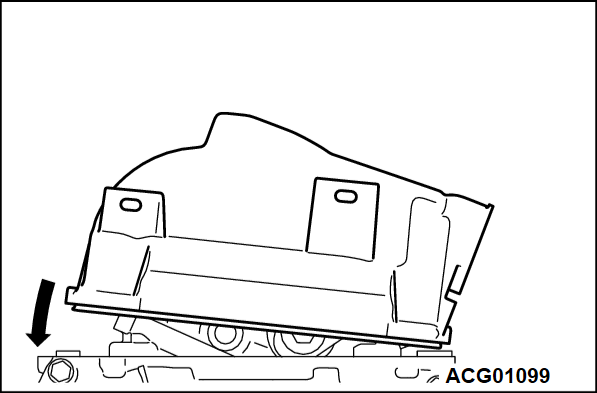
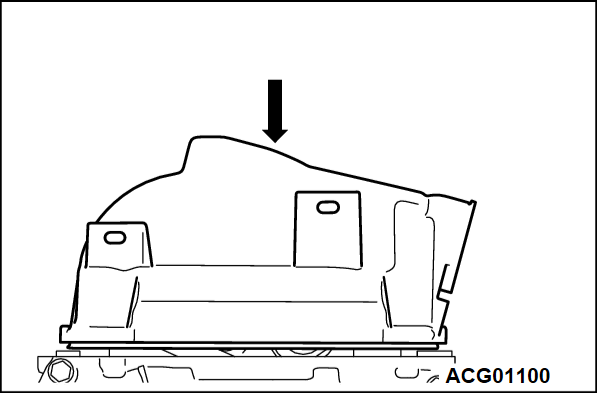
4. Install the rocker cover to the cylinder head by the following procedures:
(1)
Raise the exhaust side of the rocker cover, and insert it at an angle along the spark plug guide.
| caution | Install along the spark plug guide while being to careful not to damage the spark plug guide oil seal. |
(2)
Hold the rocker cover horizontally right before seating it on the cylinder head.
| caution | When the rocker cover is seated on the cylinder head at a slight diagonal along the spark plug guide, the sealant, which is applied at the joint between the cylinder head and the timing chain case, will be misaligned. This may cause oil leakage. |
(3) Lower the rocker cover vertically to seat it on the cylinder head.
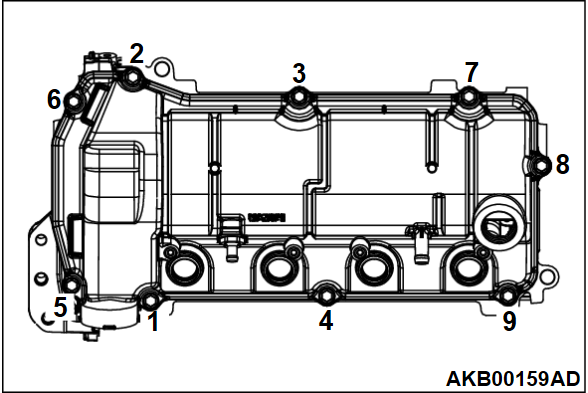
5. Tighten the cylinder head cover to the tightening torque of 3.0 ± 1.0 N·m (27 ± 8 in-lb) in the order shown in the illustration.
6. Then, tighten it to the specified torque of 5.5 ± 0.5 N·m (49 ± 4 in-lb) in the same order.
>>F<< OIL FILTER INSTALLATION
1. Clean the oil filter mounting surface of the ladder frame.
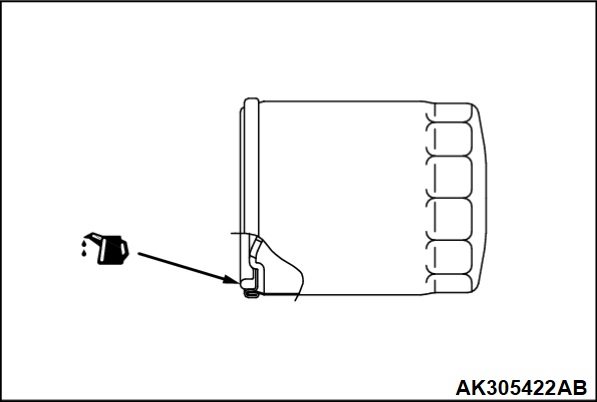
2. Apply engine oil to the O-ring of the oil filter.
3.
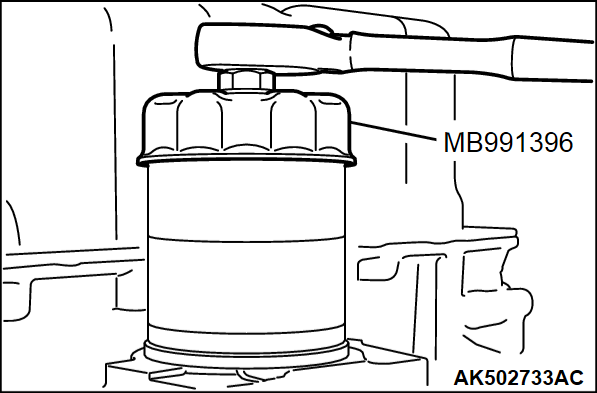
Screw in the oil filter. When the O-ring contacts the mounting surface, use a filter wrench to tighten it 1 turns [14 ± 2 N·m (124 ± 17 in-lb)].
| caution | Use special tool Filter wrench (MB991396) to install the oil filter. Tightening it by hand causes oil leakage due to lack of torque. |
![[Previous]](../../../buttons/fprev.png)
![[Next]](../../../buttons/fnext.png)
