[Previous][Next]
REMOVAL AND INSTALLATION
 
 
<Front door>
Post-installation Operation
  • Door Inside Handle Check (Refer to GROUP 42A, Door Inside Handle Check ).
  • Learning Procedures of Power Window Fully Closed Position (Refer to GROUP 42A, On-vehicle Service ).
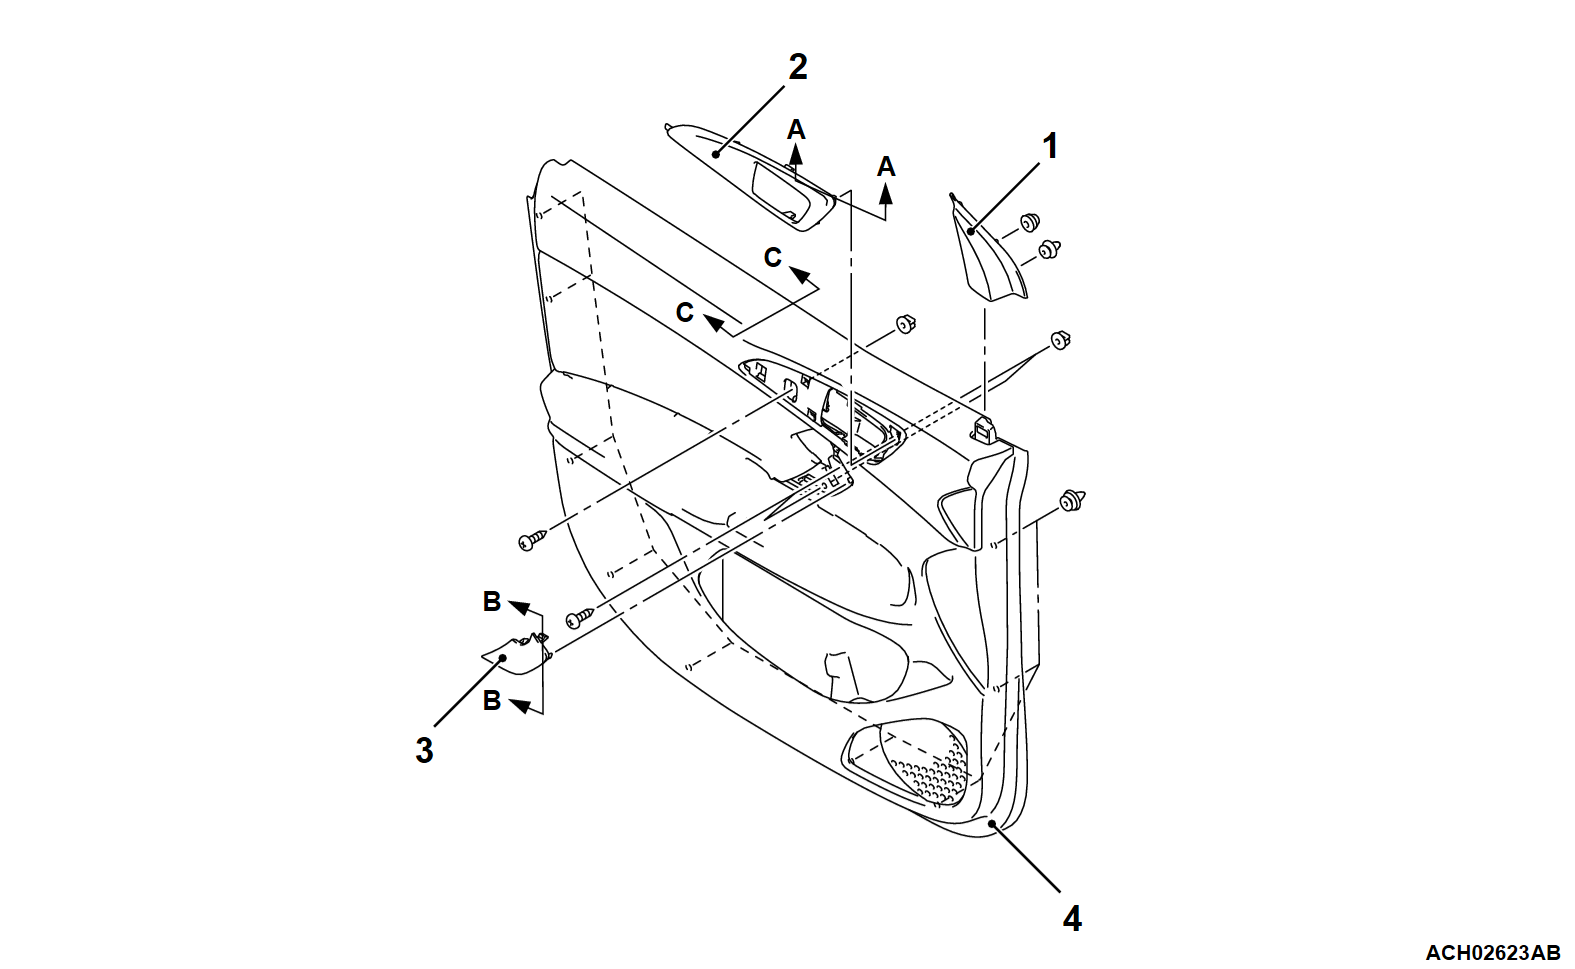
Removal steps
1.Front door sash trim
<<A>>2.Front door inside handle cover
<<B>>3.Front door trim cap
<<C>>>>A<<4.Front door trim assembly
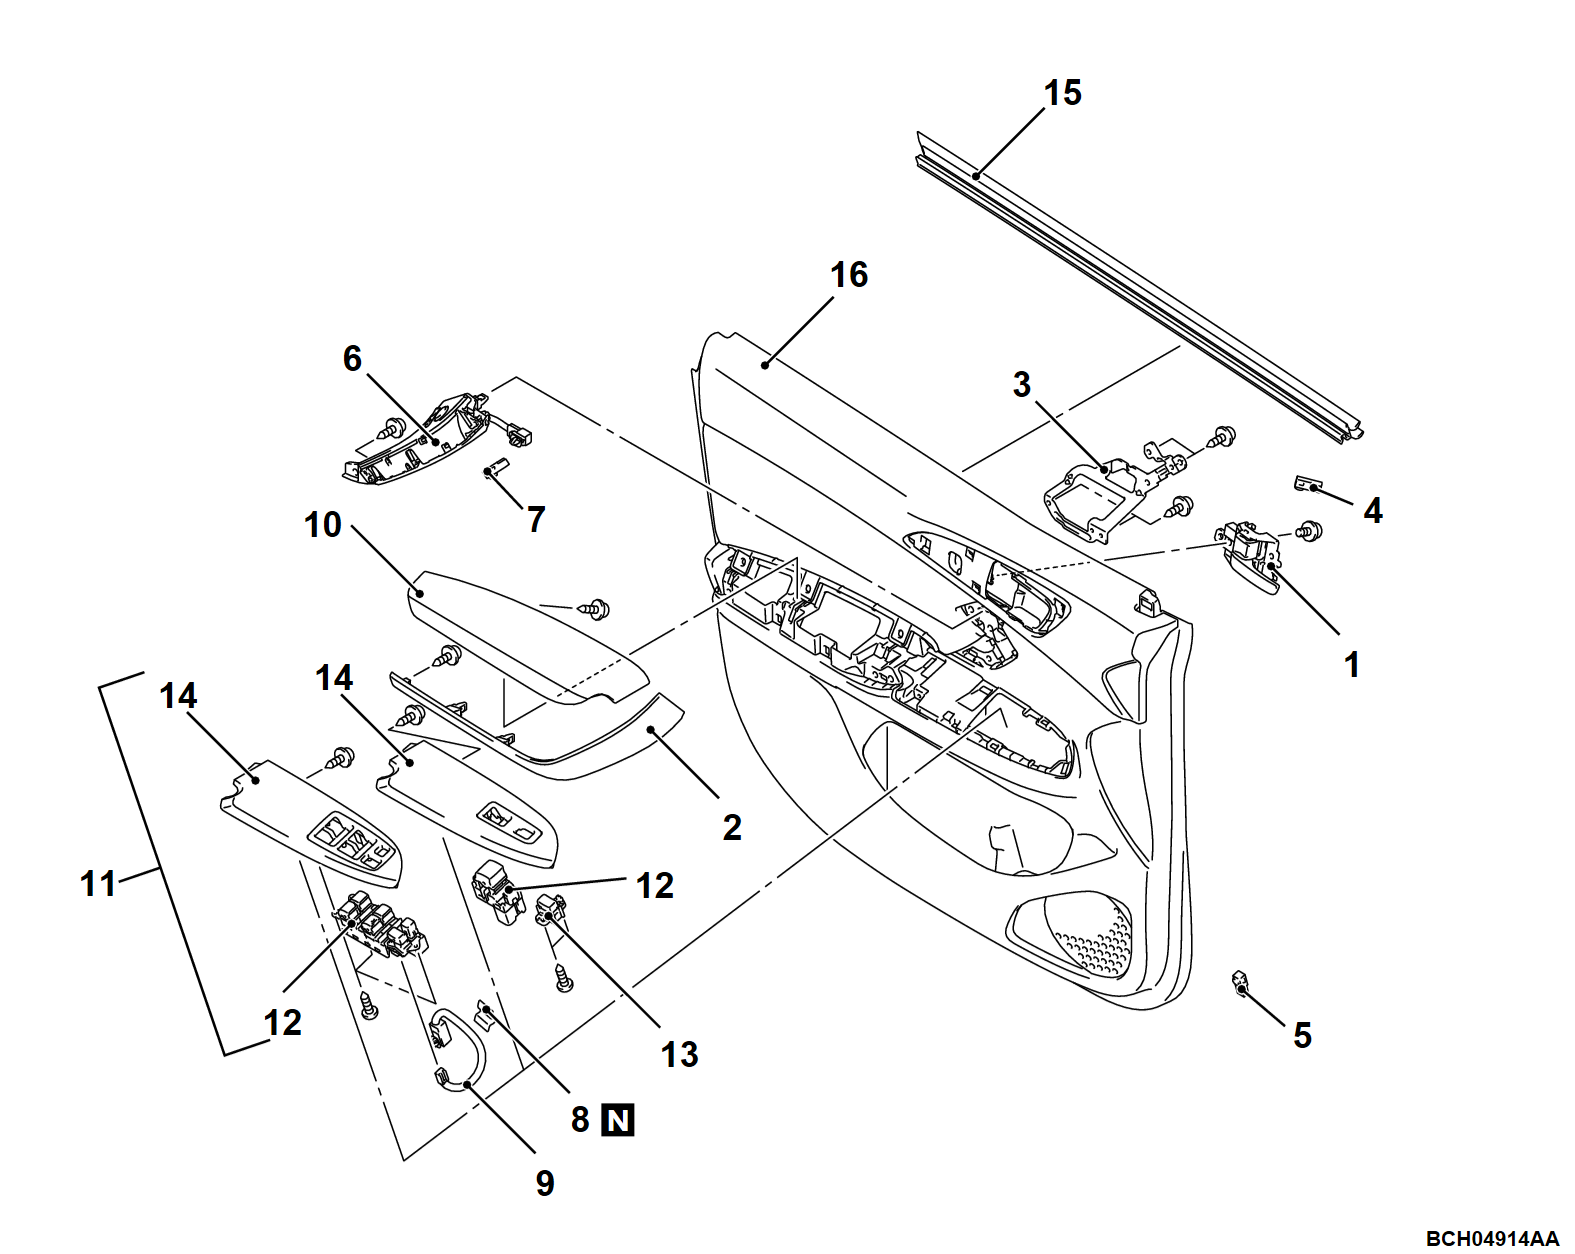
Removal steps
1.Front door inside handle
2.Front door garnish
3.Front door bracket
4.Spot light <From 22 Model year>
5.Spot light <From 22 Model year>
6.Front door assist grip
7.Spot light <From 22 Model year>
8.Front door wiring tape
9.Front door power window switch wiring harness
10.Front door armrest
11.Front door power window switch panel assembly
12.Front door power window switch
13.Door lock switch
14.Front door power window switch panel
15.Front door belt line weatherstrip inner
16.Front door trim
 
 
<Rear door>
Post-installation Operation
  • Door Inside Handle Check (Refer to GROUP 42A, Door Inside Handle Check ).
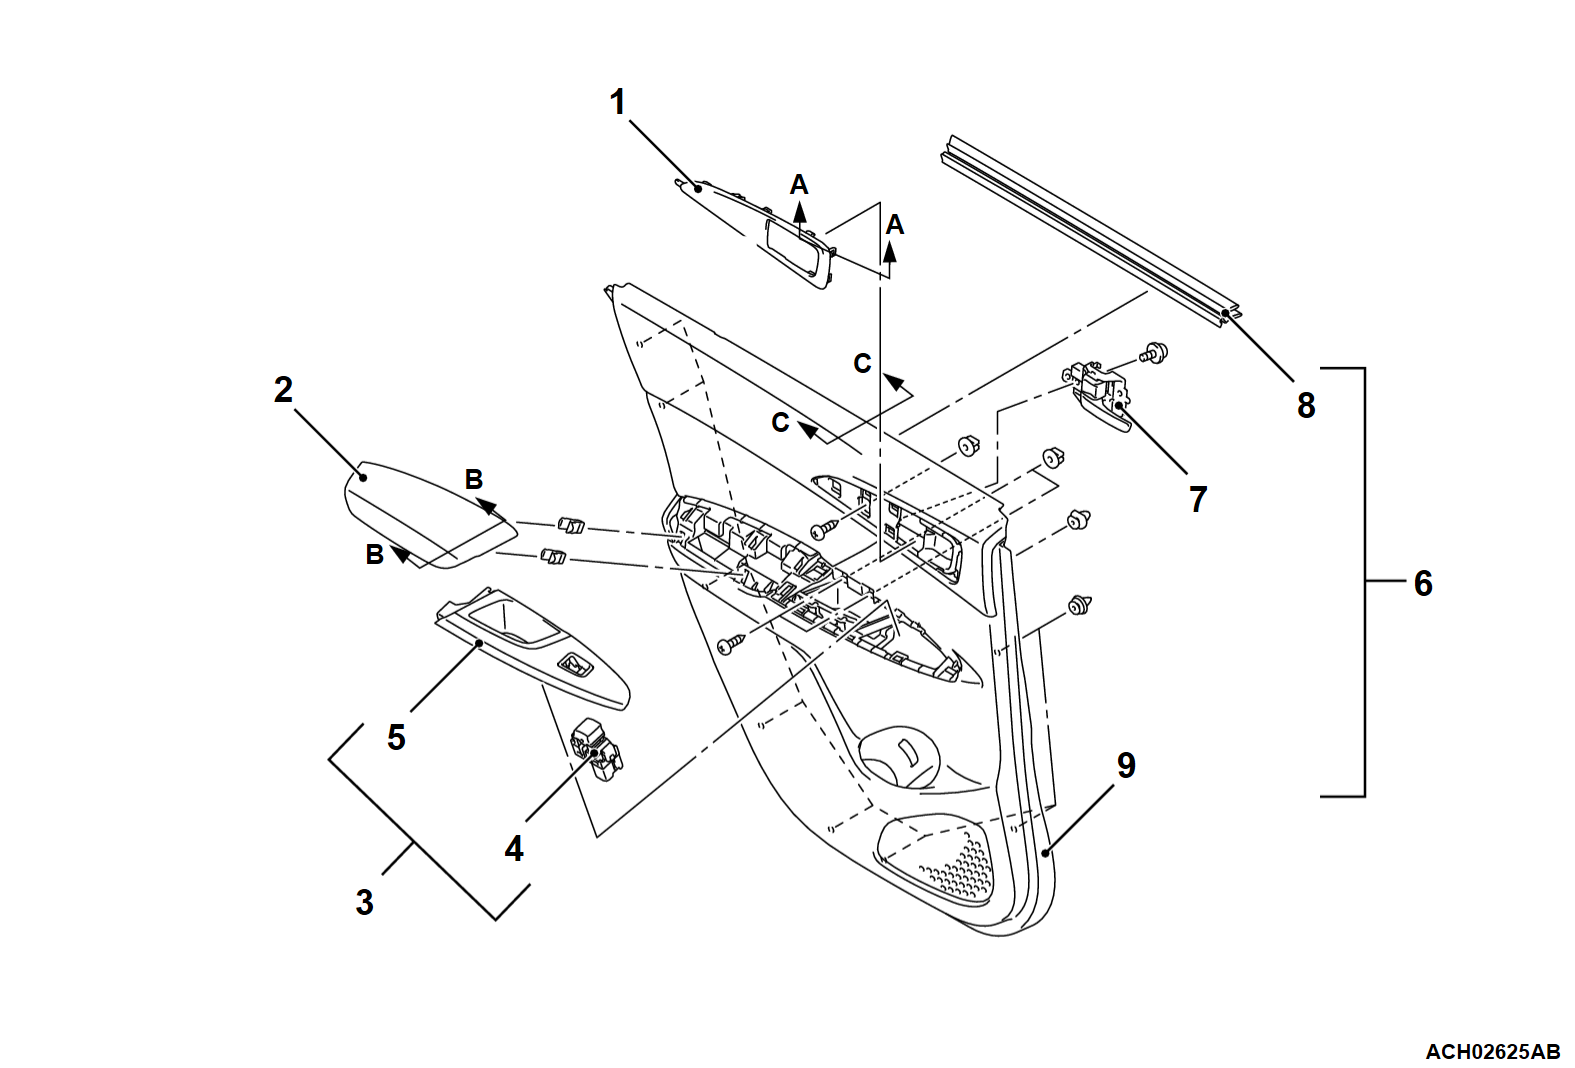
Removal steps
<<D>>1.Rear door garnish
<<E>>2.Rear door armrest
<<F>>3.Rear door power window switch panel assembly
4.Rear door power window switch
5.Rear door power window switch panel
<<G>>>>A<<6.Rear door trim assembly
7.Rear door inside handle
8.Rear door belt line weatherstrip inner
9.Rear door trim

Required Special Tool:
  • MB990784: Ornament Remover
 
 
REMOVAL SERVICE POINTS
 
 
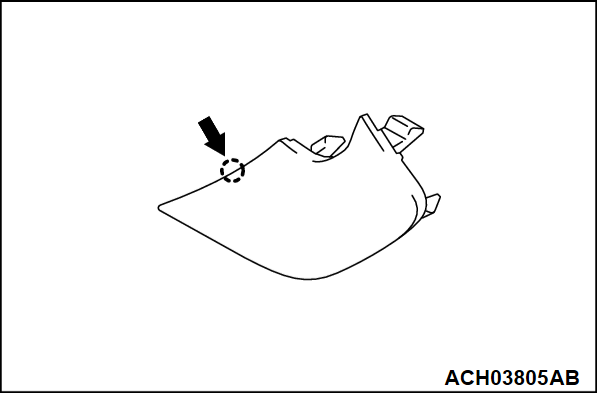
<<A>> FRONT DOOR INSIDE HANDLE COVER REMOVAL
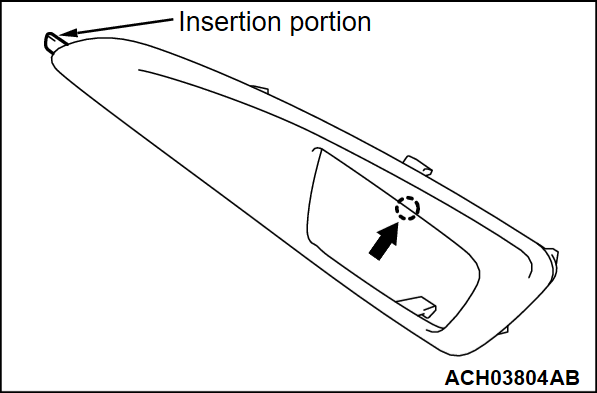
cautionBe careful not to damage the insertion portion of the front door inside handle cover.
Insert the special tool MB990784 into notch of the front door inside handle cover to remove it.


<<B>> FRONT DOOR TRIM CAP REMOVAL
Insert the special tool MB990784 into notch of the front door trim cap to remove it.


<<C>> FRONT DOOR TRIM ASSEMBLY REMOVAL
1. Remove the three screws.
2. Pull the front door trim assembly to the inside of the vehicle to remove it.


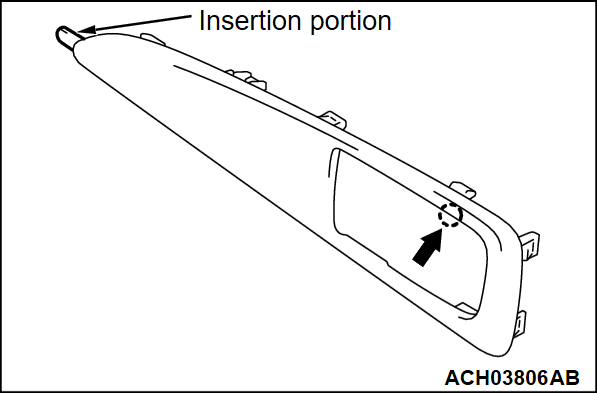
<<D>> REAR DOOR GARNISH REMOVAL
cautionBe careful not to damage the insertion portion of the rear door garnish.
Insert the special tool MB990784 into notch of the rear door garnish to remove it.


<<E>> REAR DOOR ARMREST REMOVAL
Pull the rear door arm rest obliquely upward inside the vehicle to remove it.


<<F>> REAR DOOR POWER WINDOW SWITCH PANEL ASSEMBLY REMOVAL
Pull the rear door power window switch panel assembly upward to remove it.


<<G>> REAR DOOR TRIM ASSEMBLY REMOVAL
1. Remove the three screws.
2. Pull the rear door trim assembly to the inside of the vehicle and remove it.


INSTALLATION SERVICE POINT
 
 
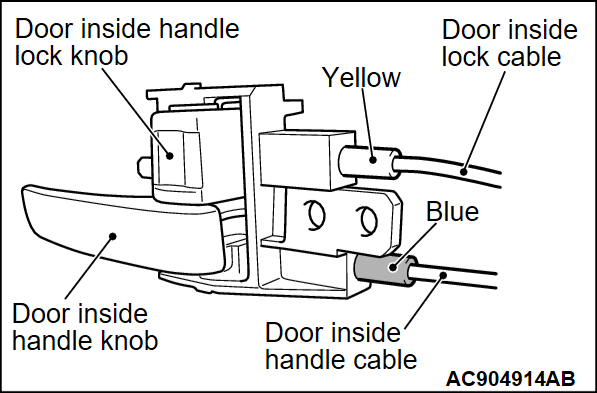
>>A<< DOOR TRIM ASSEMBLY INSTALLATION
Connect the door inside lock cable and door inside handle cable to the door inside handle according to the identification color marked on the cables as shown in the illustration.