REMOVAL AND INSTALLATION
<Up to 18 Model year>
INSTALLATION SERVICE POINTS <Up to 18 Model year>
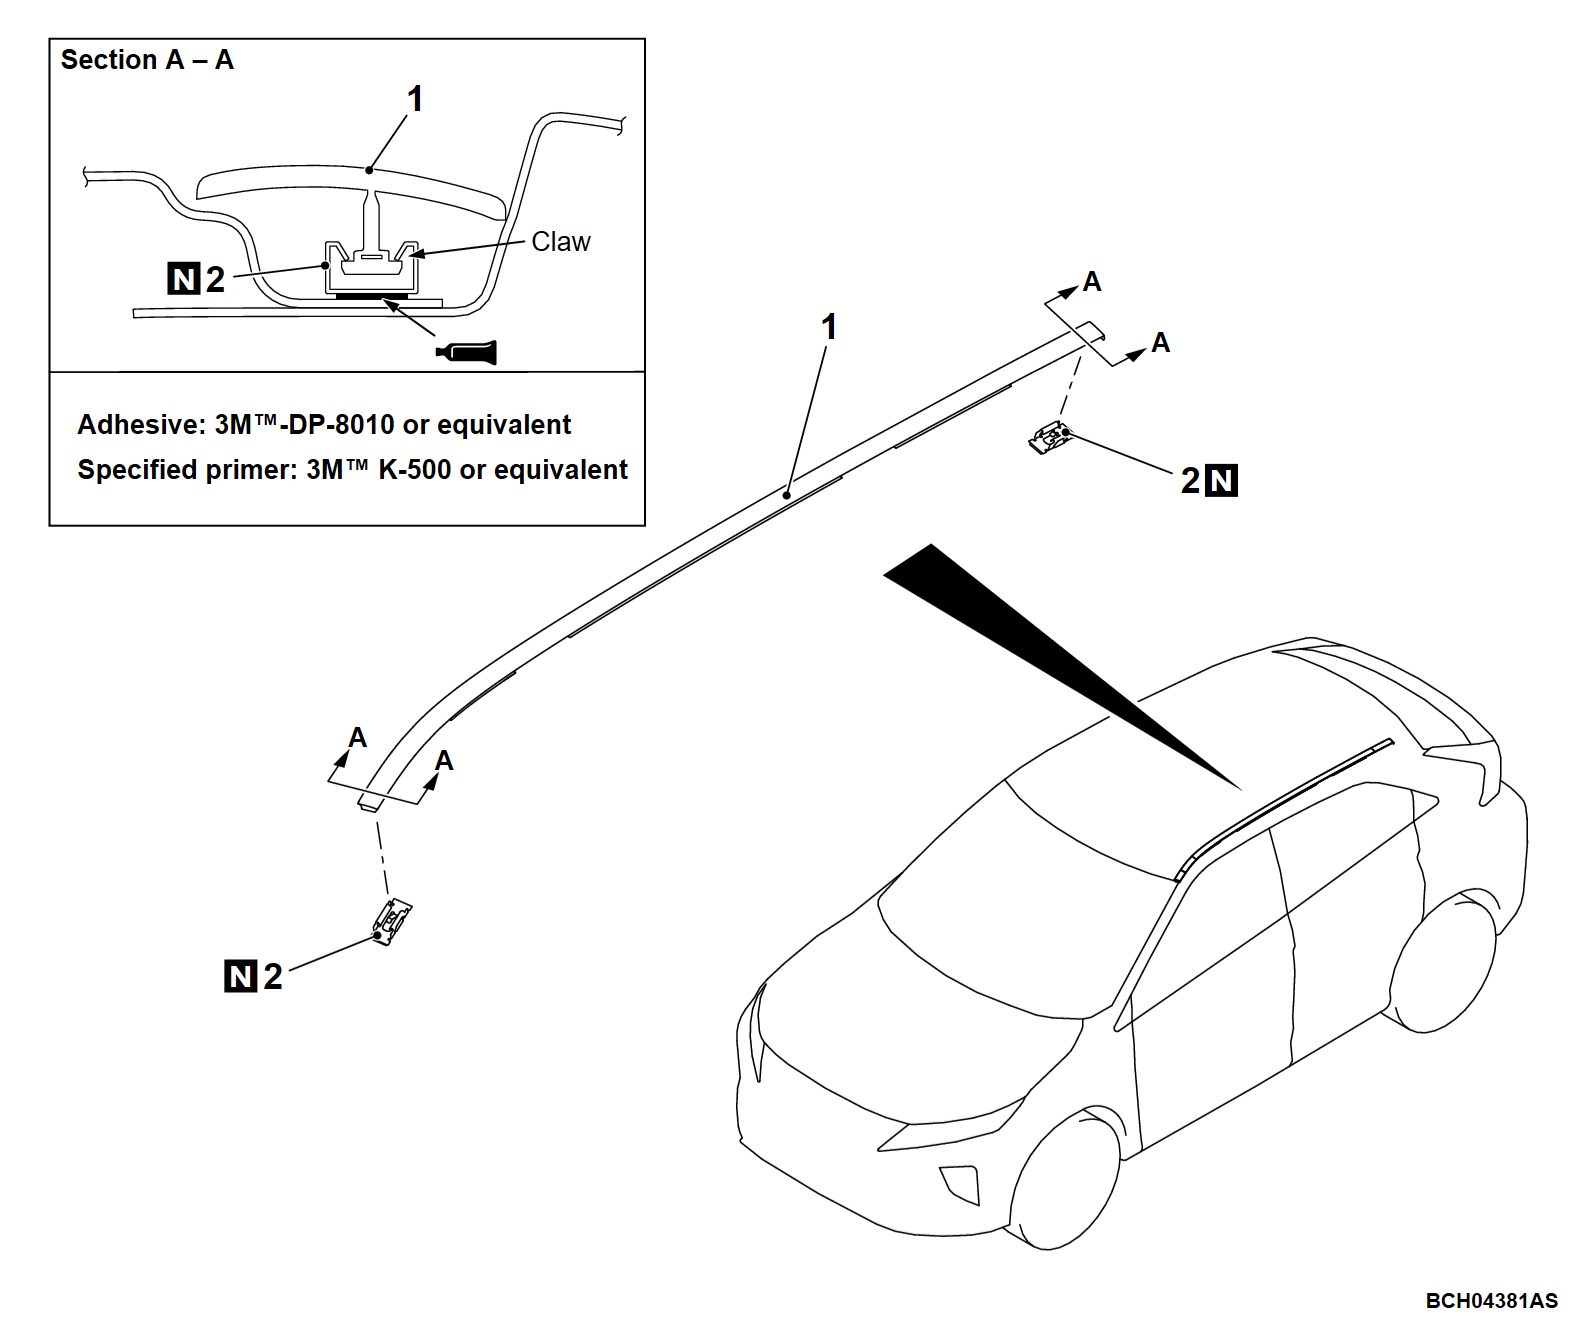
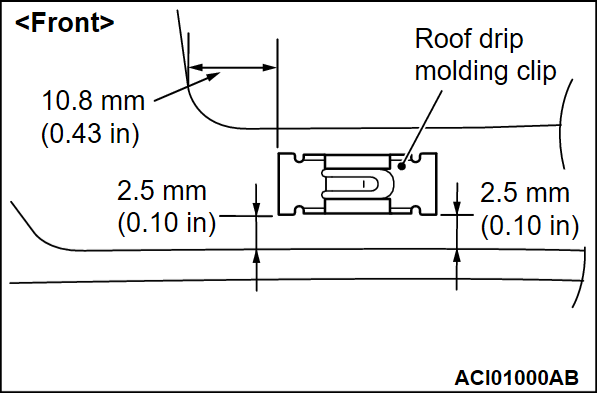
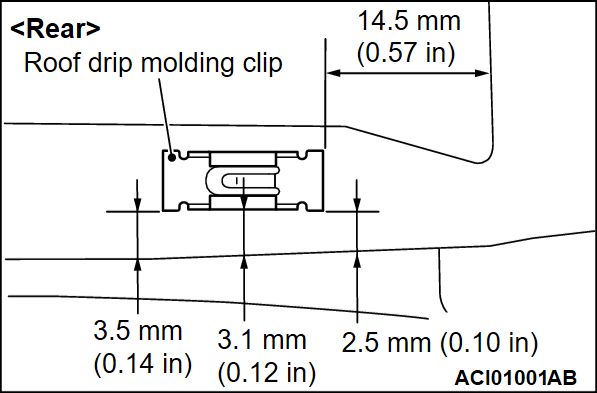
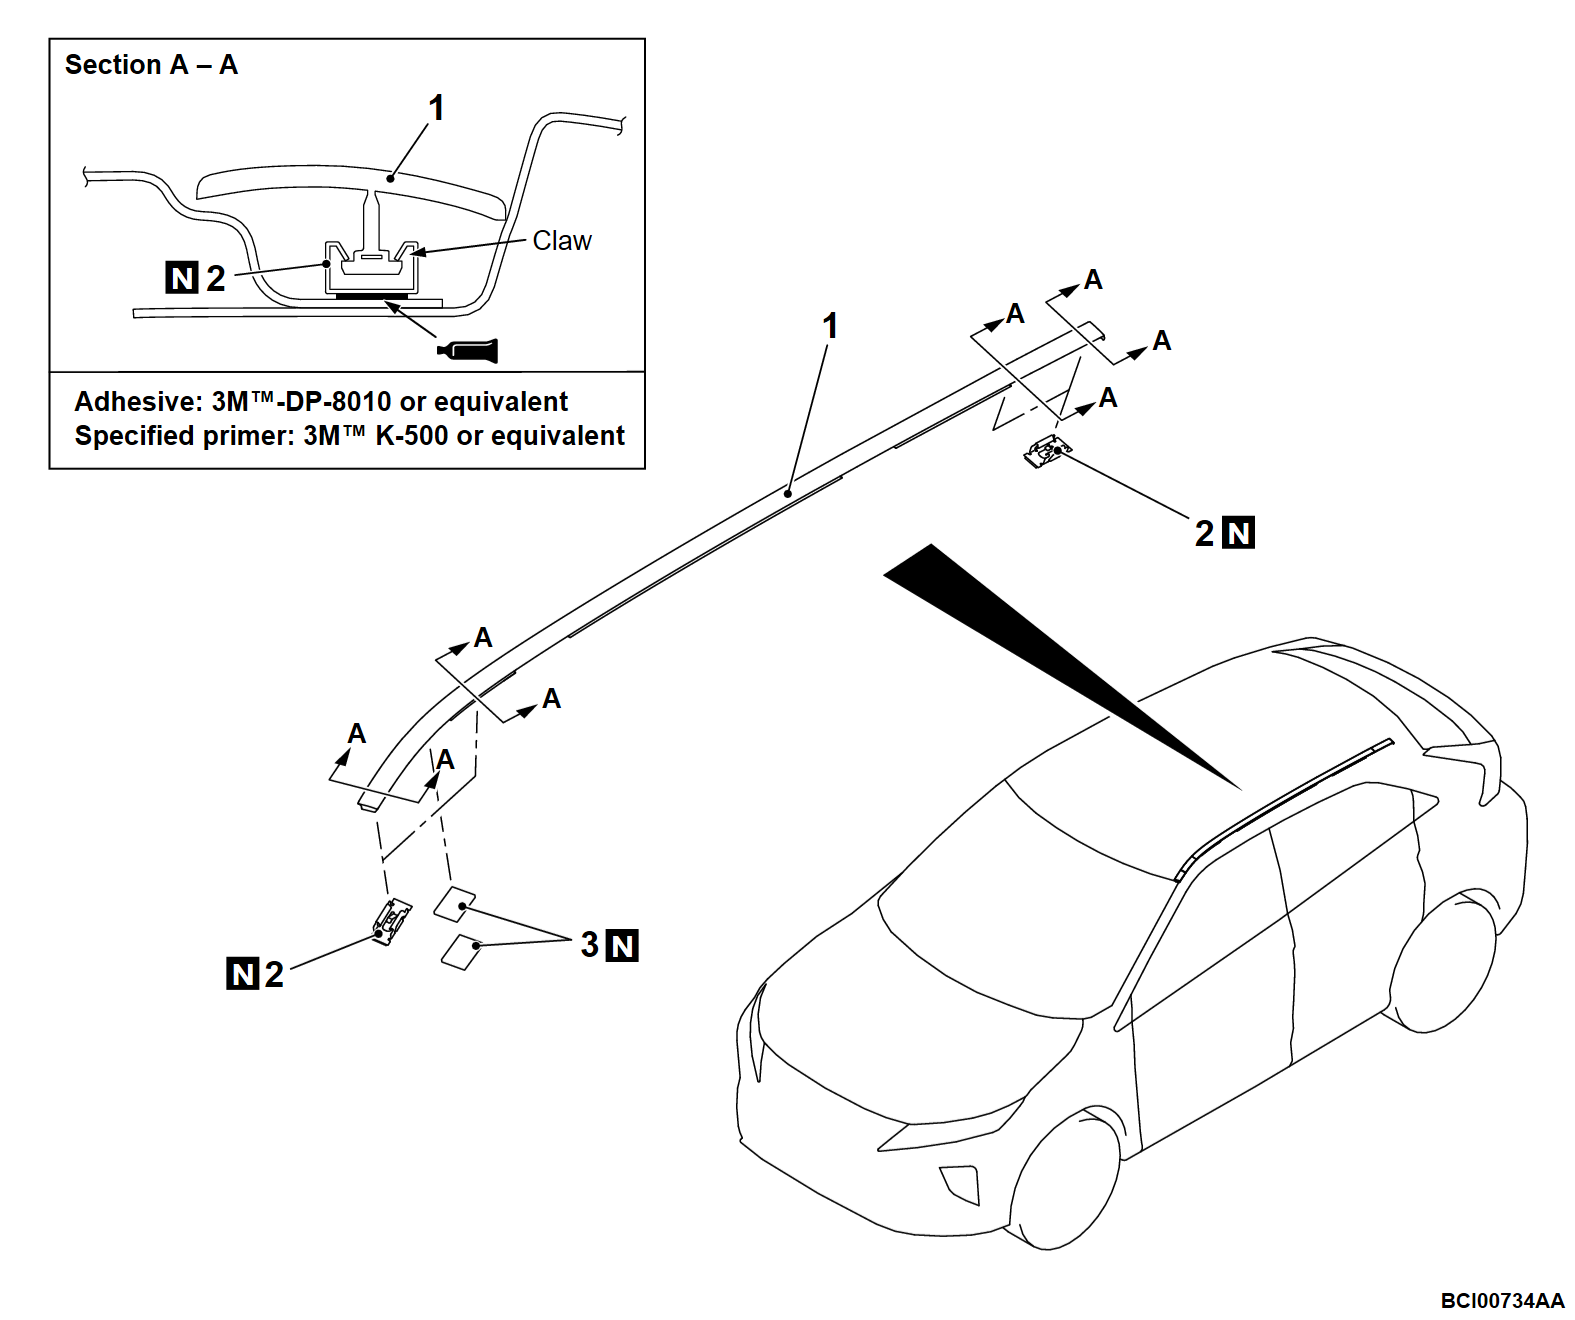
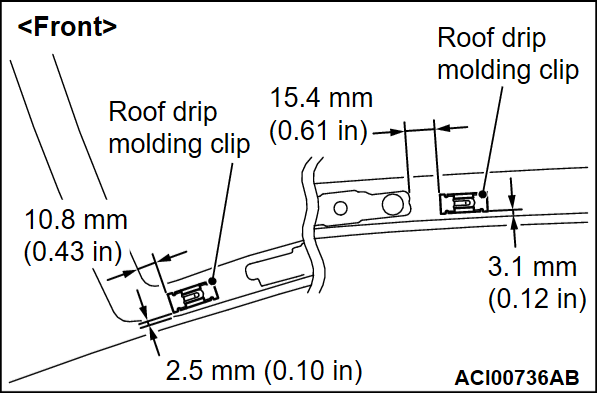
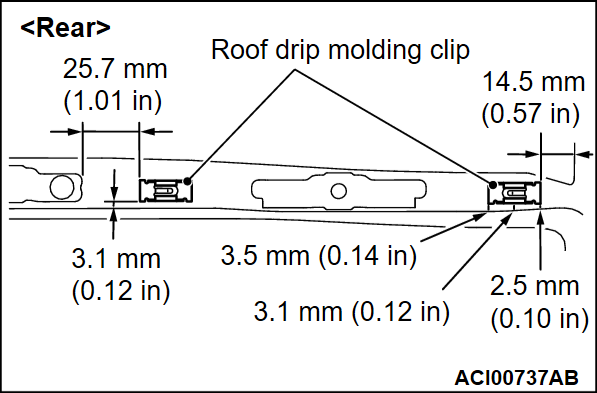
>>A<< ROOF DRIP MOLDING CLIP INSTALLATION
1. Remove any remnants of the old tape. Then degrease the adhesion surface by using a cloth moistened with Mitsubishi Motors Genuine Parts cleaner (MZ100387) or equivalent.
2. Apply the specified adhesive to the adhesion surface of the roof drip molding clip.
Specified adhesive: 3M™ DP-8010 or equivalent
3. Adhere the roof drip molding clip as shown.
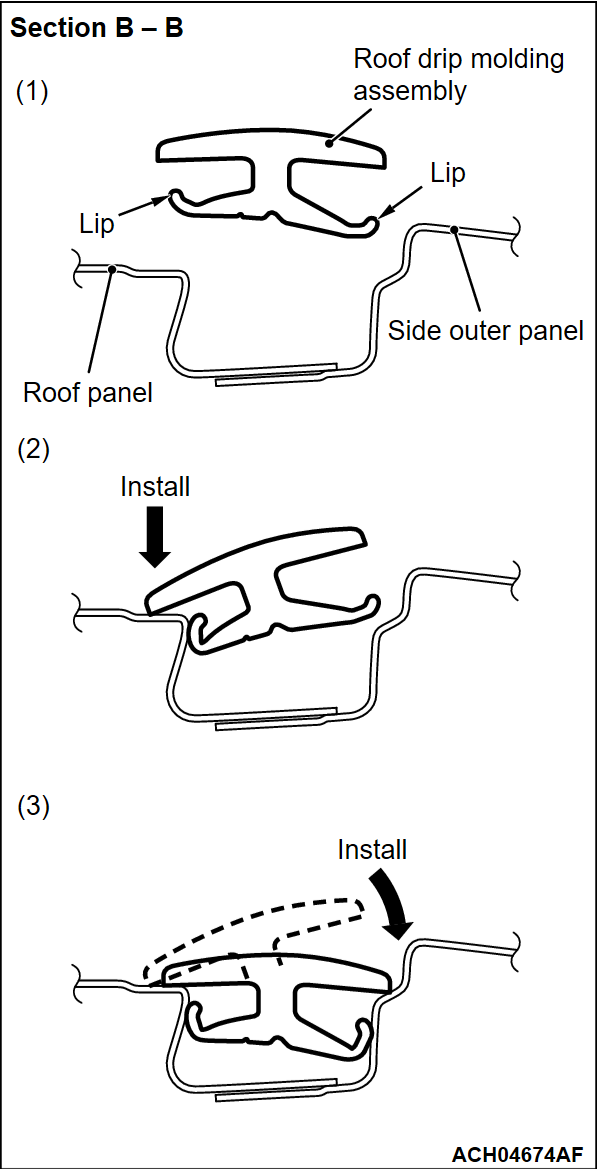
4. Wait for at least 10 minutes. Then install the roof drip molding assembly.
<19 and 20 Model year>
INSTALLATION SERVICE POINTS <19 and 20 Model year>
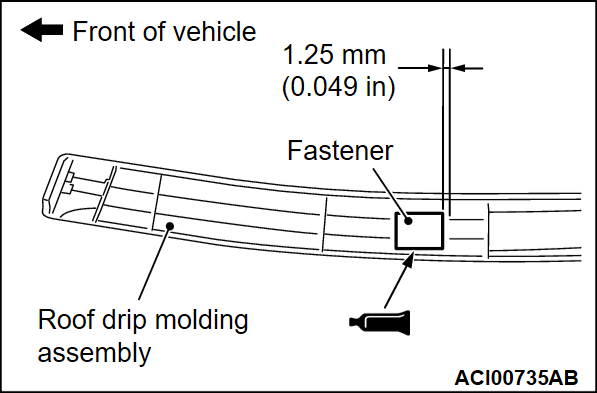
>>A<< FASTENER INSTALLATION
1. Remove any remnants of the old tape. Then degrease the adhesion surface by using a cloth moistened with Mitsubishi Motors Genuine Parts cleaner (MZ100387) or equivalent.
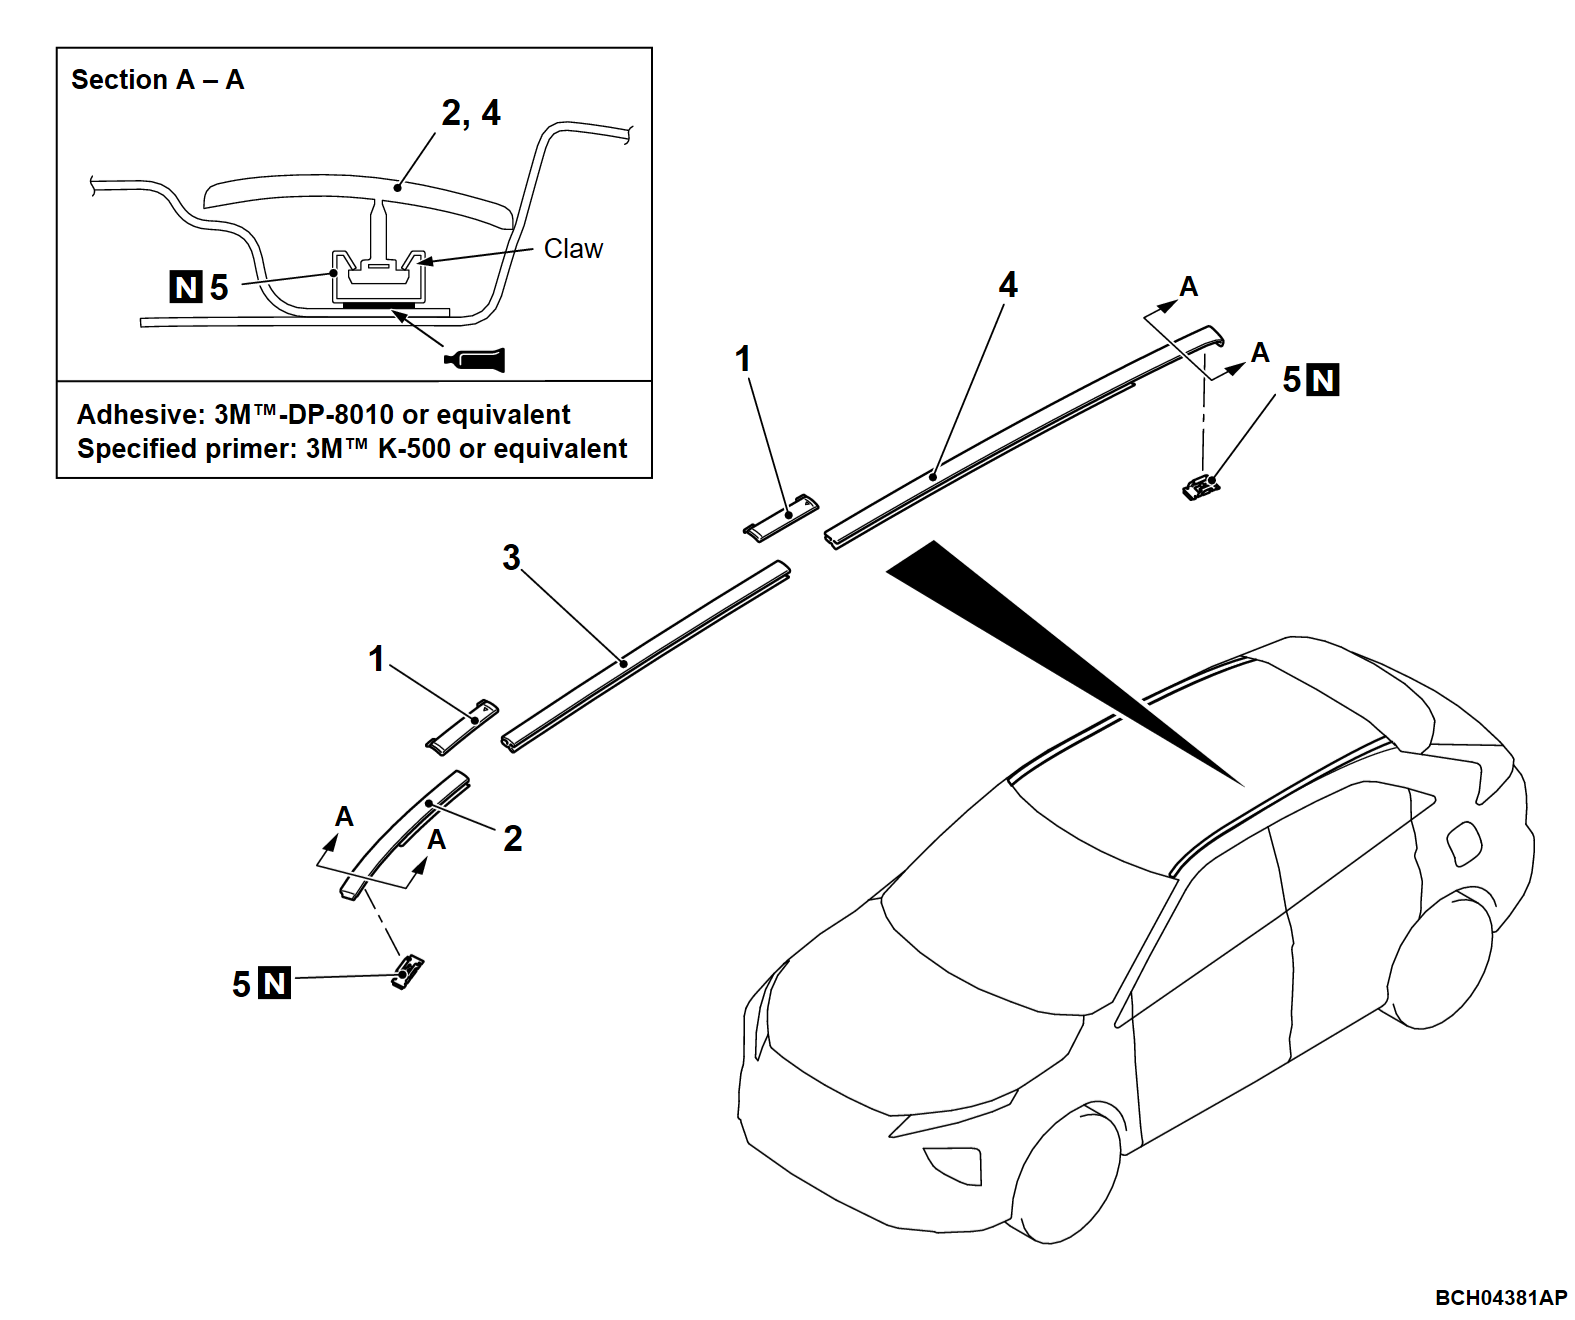
2. Apply the specified primer to the fastener attaching surface of the roof drip molding assembly and dry it completely and attach the fastener to the roof drip molding.
Specified primer: 3M™ K-500 or equivalent
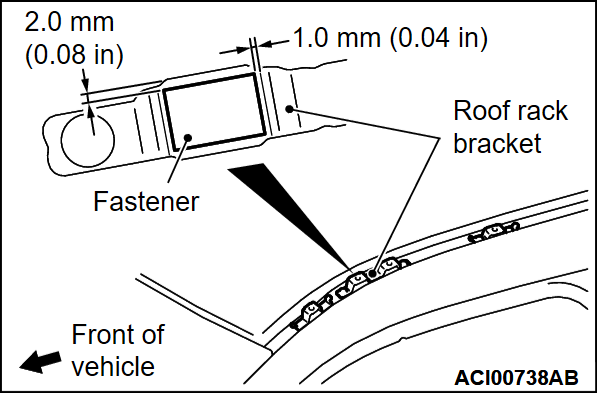
3. Attach the fastener to the roof rack bracket shown in figure.
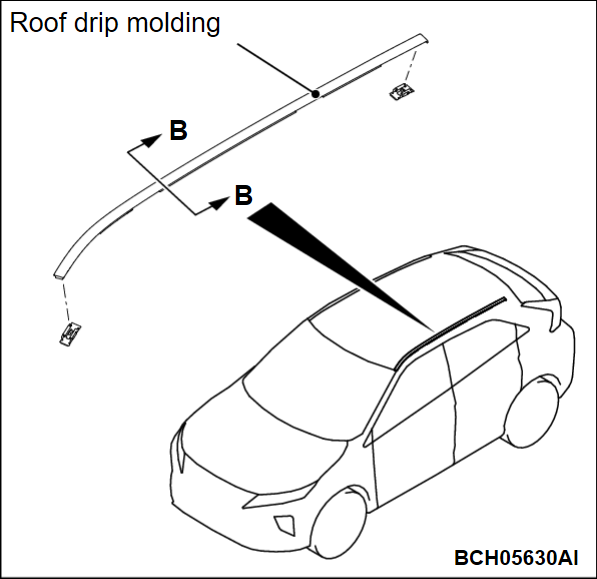
>>B<< ROOF DRIP MOLDING CLIP INSTALLATION
1. Remove any remnants of the old tape. Then degrease the adhesion surface by using a cloth moistened with Mitsubishi Motors Genuine Parts cleaner (MZ100387) or equivalent.
2. Apply the specified adhesive to the adhesion surface of the roof drip molding clip.
Specified adhesive: 3M™ DP-8010 or equivalent
3. Adhere the roof drip molding clip as shown.
4. Wait for at least 10 minutes. Then install the roof drip molding assembly.
>>C<< ROOF DRIP MOLDING ASSEMBLY INSTALLATION
The procedure is the same as that for Up to 18 Model Year.
<From 22 Model year>
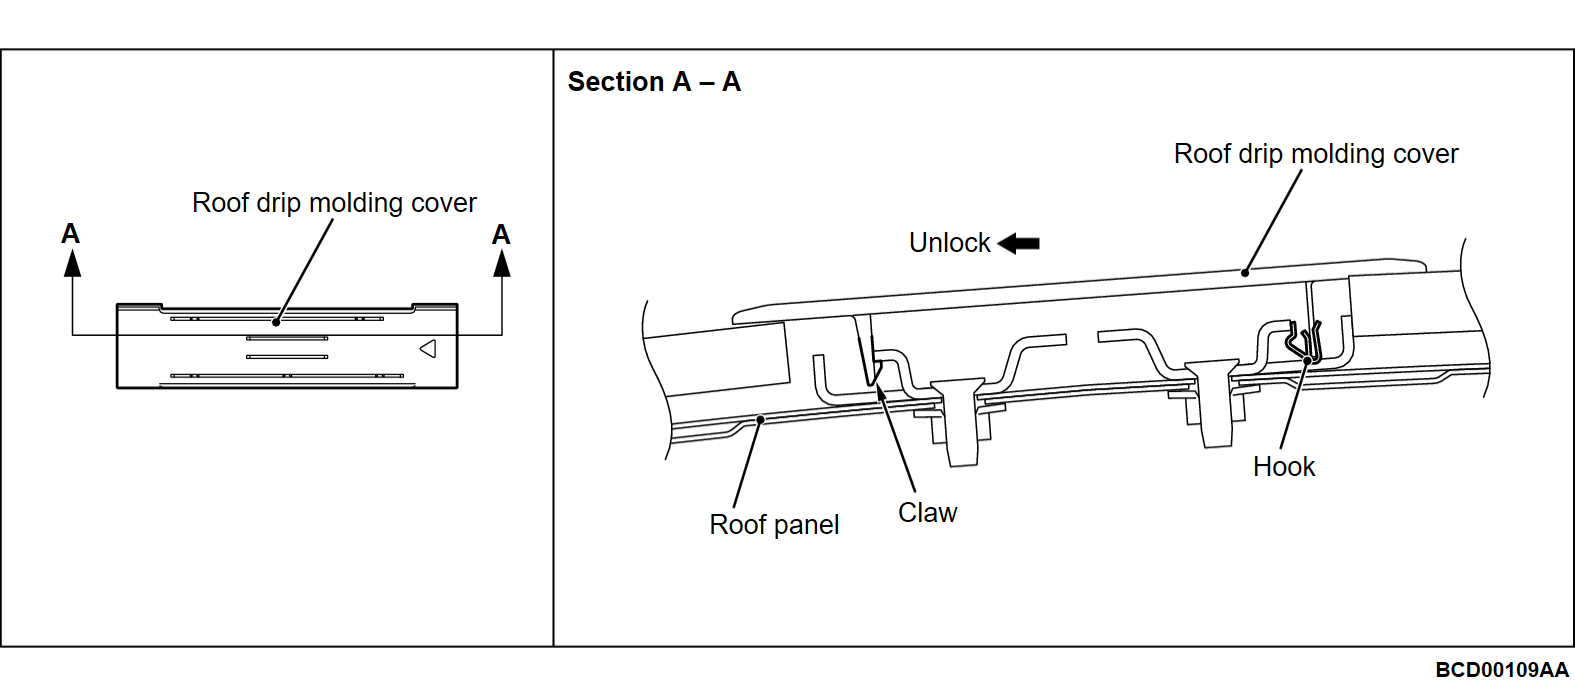
REMOVAL SERVICE POINT <From 22 Model year>
INSTALLATION SERVICE POINTS <From 22 Model year>
>>A<< ROOF DRIP MOLDING CLIP INSTALLATION
The procedure is the same as that for Up to 18 Model Year.
>>B<< ROOF DRIP MOLDING ASSEMBLY INSTALLATION
The procedure is the same as that for Up to 18 Model Year.
![[Previous]](../../../buttons/fprev.png)
![[Next]](../../../buttons/fnext.png)
