[Previous] [Next]

REMOVAL AND INSTALLATION


caution
  • The part indicated by * is the bolt with friction coefficient stabilizer. In removal, ensure there is no damage, clean dust and soiling from the bearing and thread surfaces, and tighten them to the specified torque.
Pre-removal operation
  • Gear oil draining (Refer to .)
  • Rear driveshaft assembly removal (Refer to .)

Post-installation operation
  • Rear driveshaft assembly installation (Refer to .)
  • Gear oil filling (Refer to .)
  • AYC air bleeding (Refer to .)


Removal steps
<<A>>

1.
Propeller shaft connection


2.
Filler plug


3.
Gasket


4.
Drain plug


5.
Gasket


6.
AYC pressure tube connection


7.
Differential support bracket and rear suspension crossmember connecting bolt


8.
Stay mounting bolt


9.
Differential mount bracket assembly (LH/RH) and stay


10.
Stay


11.
Lower stopper


12.
Upper stopper


13.
Differential mount bracket (LH/RH)


14.
Differential carrier assembly


·
Rear suspension crossmember bushing (for rear differential mount) replacement


15.
Differential mount bracket


16.
Differential support bracket
Required Special Tools:

REMOVAL SERVICE POINT


<<A>> PROPELLER SHAFT DISCONNECTION


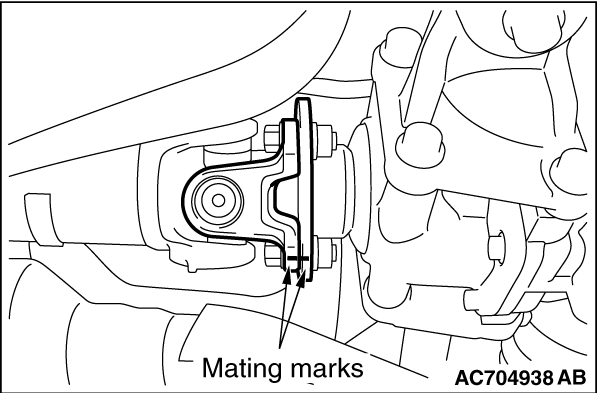
1.Put mating marks on the flange yoke and the differential companion flange and remove the connecting nuts.
2.Suspend the disconnected propeller shaft from the body with a wire to prevent bending.

REAR SUSPENSION CROSSMEMBER BUSHING (FOR REAR DIFFERENTIAL MOUNT) REPLACEMENT


1.Remove the rear differential

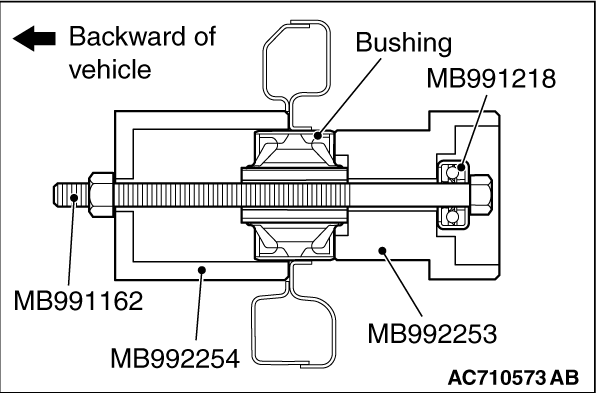
2.Use special tools MB991162, MB991218, MB992253 and MB992254 to remove the bushing.
note When removing the bushing, insert special tool MB991162 from the forward of vehicle and fix the nut with a wrench.

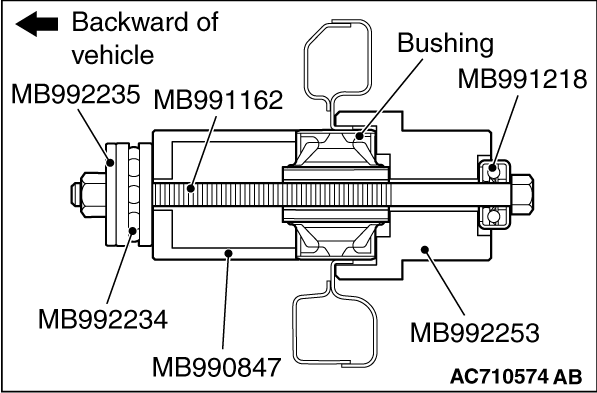
3.Use special tools MB990847, MB991162, MB991218, MB992234, MB992235 and MB992253 to press-fit the bushing.
note When installing the bushing, insert special tool MB991162 from the forward of vehicle and fix the nut with a wrench.
4.Install the rear differential.