FUEL TANK PUMP OPERATION CHECK
Required Special Tools:
- MB992744: Vehicle communication interface-Lite (V.C.I.-Lite)
- MB992745: V.C.I.-Lite main harness A
- MB992747: V.C.I.-Lite USB cable short
- MB992748: V.C.I.-Lite USB cable long
- MB991958: Scan Tool (M.U.T.-III Sub Assembly)
- MB991824: Vehicles Communication Interface (V.C.I.)
- MB991827: M.U.T.-III USB Cable
- MB991910: M.U.T.-III Main Harness A (Vehicles with CAN communication system)
1. Remove the fuel tank cap.
2. Check the operating of the fuel tank pump by scan tool (M.U.T.-III) to force-drive the fuel tank pump.
| note | As the fuel tank pump is an in-tank type, the fuel tank pump sound is hard to hear. Then check the sound from the tank inlet. |
3. Install the fuel tank cap.
4. If the fuel tank pump will not operate, check by using the following procedure. If normal, check the fuel tank pump drive circuit.
(1) Turn the ignition switch to the "LOCK" (OFF) position.
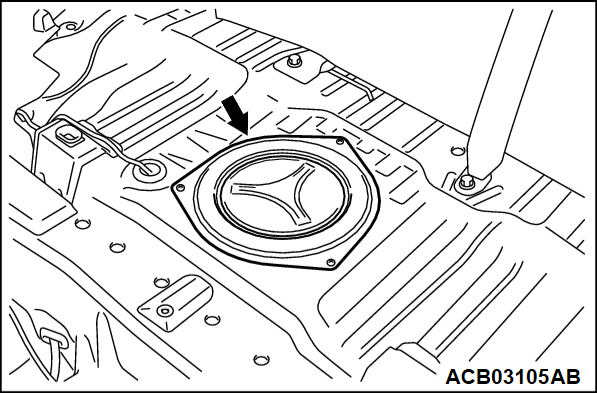
(3) Remove the inspection lid.
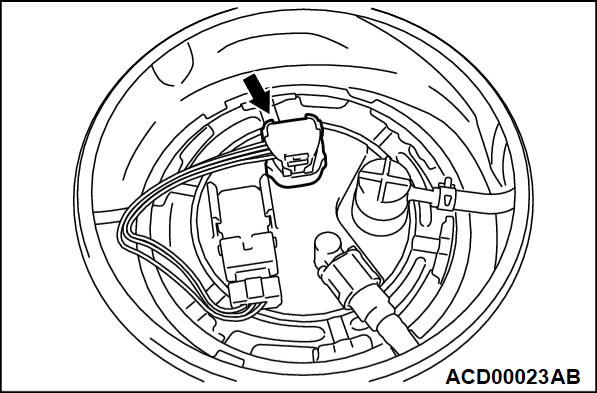
(4) Disconnect the fuel tank pump and gauge assembly connector.
(5) Remove the fuel tank cap.
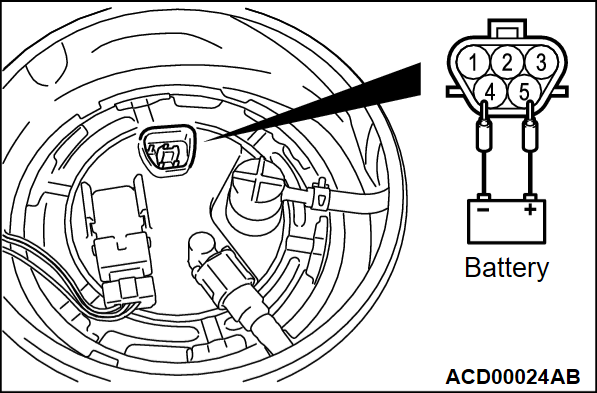
(6) When the fuel tank pump and gauge assembly connector terminal is connected directly to the battery, check if the sound of the fuel tank pump operation can be heard. If no operating sound is heard, replace the fuel tank pump (Refer to GROUP 13B - On-vehicle Service, Fuel Tank Pump and Gauge Assembly Replacement  ).
).
 ).
).| note | As the fuel tank pump is an in-tank type, the fuel tank pump sound is hard to hear. Then check the sound from the tank inlet. |
(7) Install the fuel tank cap.
(8) Check for fuel pressure by pinching the fuel hose with fingertips.
(9) Connect the fuel tank pump and gauge assembly connector.
(10) Install the inspection lid.
![[Previous]](../../../buttons/fprev.png)
![[Next]](../../../buttons/fnext.png)


