IGNITION TIMING CHECK
1. Before inspection, set the vehicle to the pre-inspection condition.
2.
| caution | To prevent damage to scan tool (M.U.T.-III), always turn the ignition switch to the "LOCK" (OFF) position before connecting or disconnecting scan tool (M.U.T.-III). |
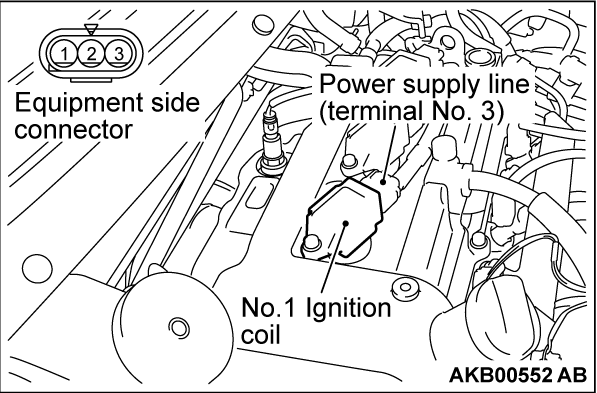
3. Set the timing light to the power supply line (terminal No. 3) of the ignition coil No. 1.
| note | The power supply line is looped and also longer than the other ones. |
4. Start the engine and let it run at idle.
5. Select the item No. 2 on scan tool (M.U.T.-III) and measure engine idle speed and check that it is approximately 700 r/min.
6. Select No. 11 (actuator test function) of the scan tool (M.U.T.-III), and set the ignition timing to the basic ignition timing.
7. Check that basic ignition timing is within the standard value.
Standard value: 5° BTDC ± 3°
8. If the basic ignition timing is outside the standard value, inspect the MFI system (Refer to GROUP 13A - Diagnosis, Symptom Chart  ).
).
 ).
).| caution | If the test is not cancelled, a forced driving will continue for 27 minutes. Driving under this condition may damage the engine. |
9. Cancel the actuator test function item No. 11, Basic ignition timing set mode, on scan tool (M.U.T.-III)
10. Check that ignition timing is at the standard value.
Standard value: Approximately 8° BTDC
11. Remove the timing light.
12. Turn the ignition switch to the "LOCK" (OFF) position and then disconnect the scan tool (M.U.T.-III).
![[Previous]](../../../buttons/fprev.png)
![[Next]](../../../buttons/fnext.png)
