REMOVAL AND INSTALLATION
REMOVAL SERVICE POINT
<<A>> CRANKSHAFT REMOVAL
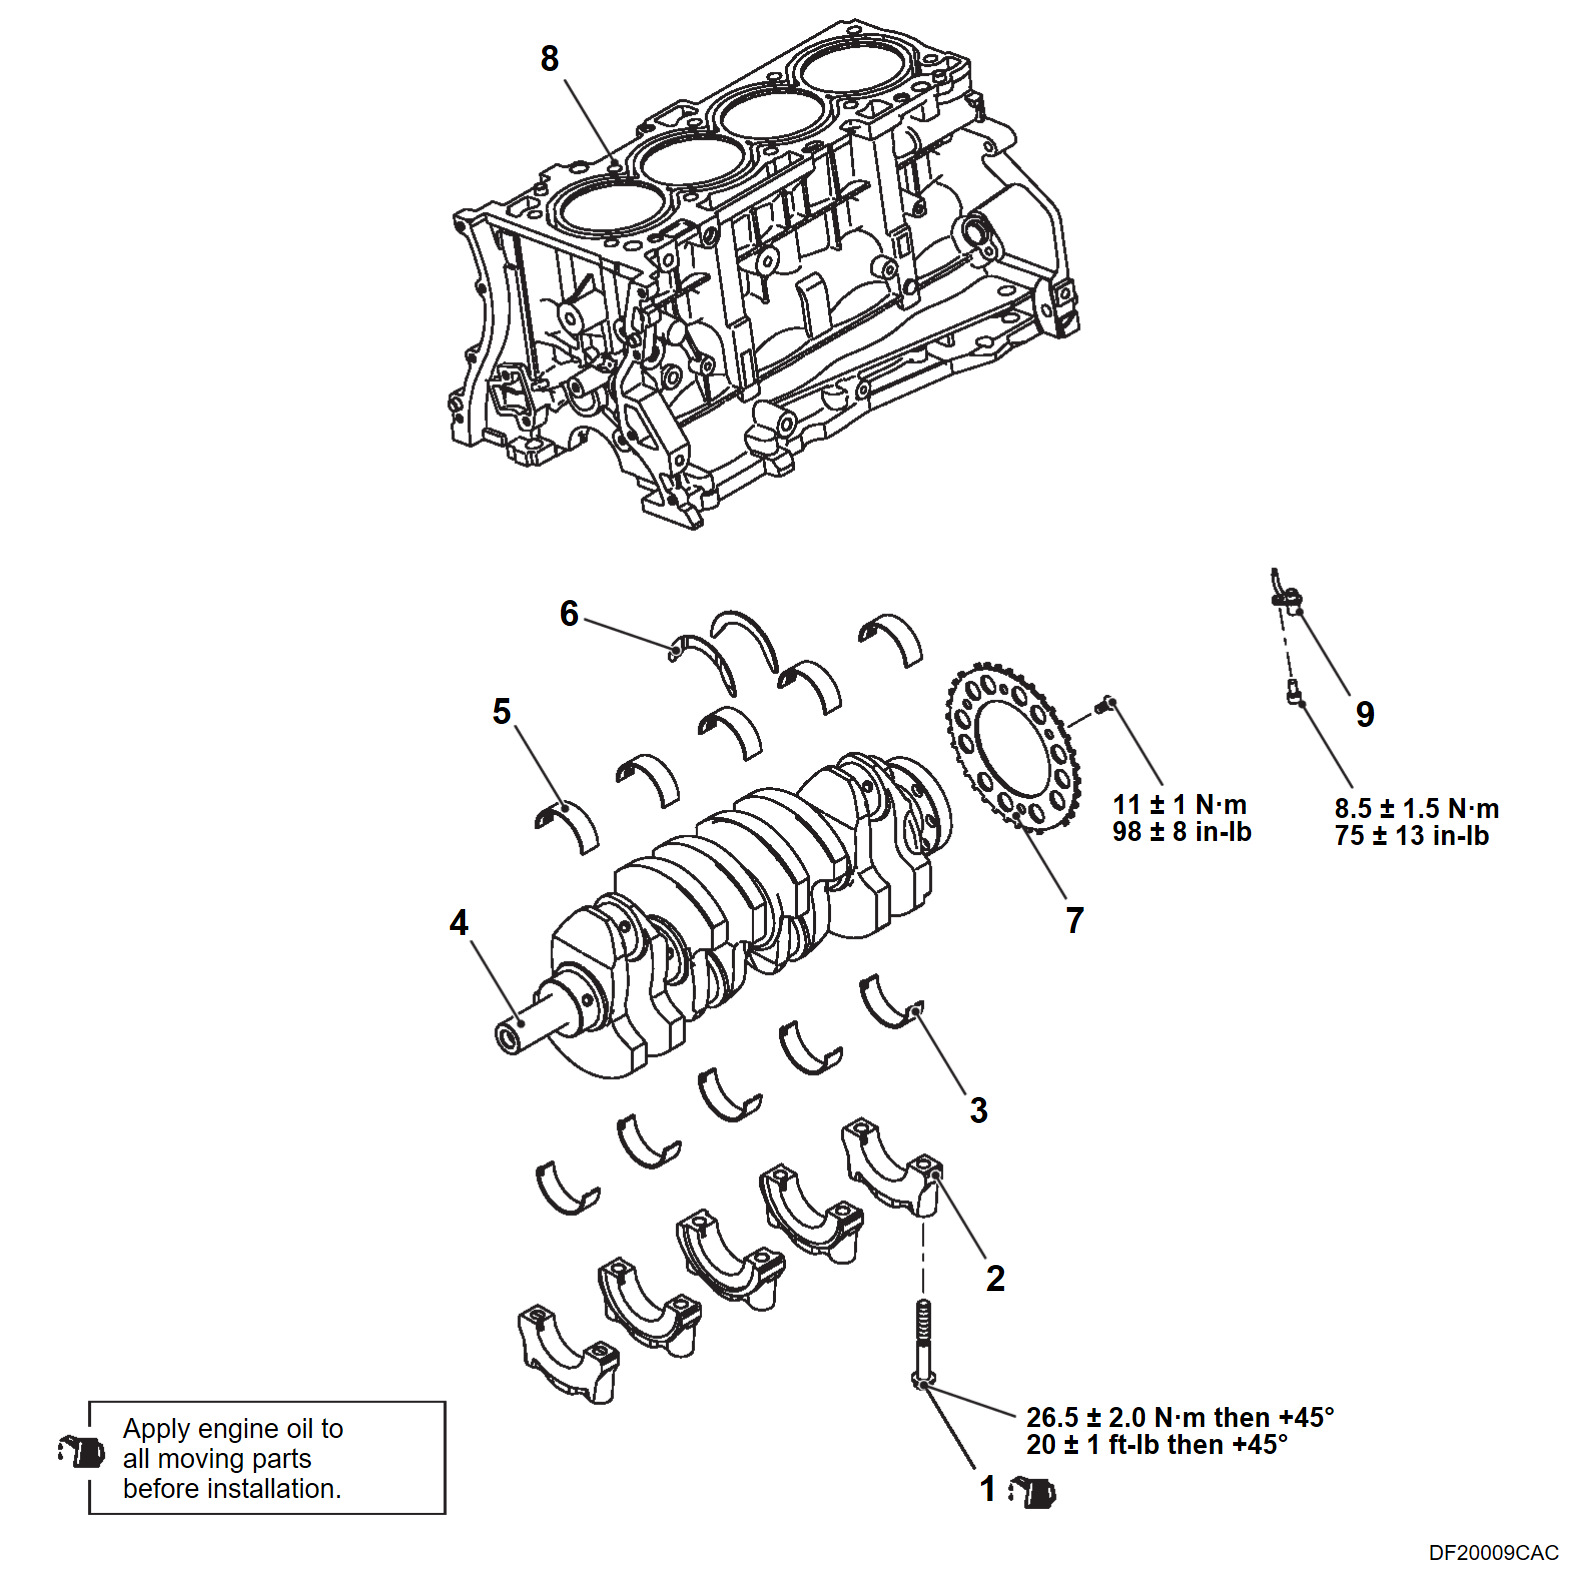
When temporarily placing the crankshaft with the crankshaft sensing ring attached, temporarily place it on a V-block to prevent teeth of the sensing ring from deforming.
| note | If a tooth bends, be sure to replace the crankshaft sensing ring with a new one. |
INSTALLATION SERVICE POINTS
>>A<< CRANKSHAFT SENSING RING INSTALLATION
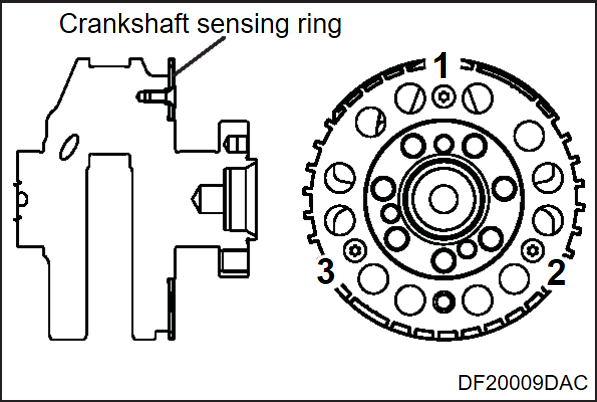
Tighten crankshaft sensing ring bolts to the specified torque in the tightening order shown in the illustration.
Tightening torque: 11 ± 1 N·m (98 ± 8 in-lb)
>>B<< CRANKSHAFT THRUST PLATE INSTALLATION
1. Install the crankshaft thrust plate on the No. 3 bearing on the cylinder block side. Application of engine oil makes the installation easy.
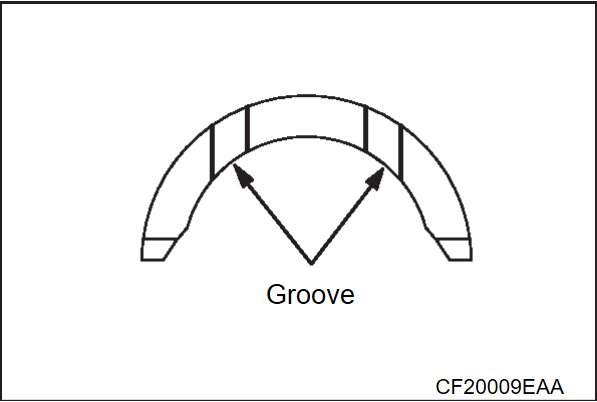
2. Install the crankshaft thrust plate so that the grooved side is on the crankshaft weight side.
>>C<< CRANKSHAFT BEARING UPPER INSTALLATION
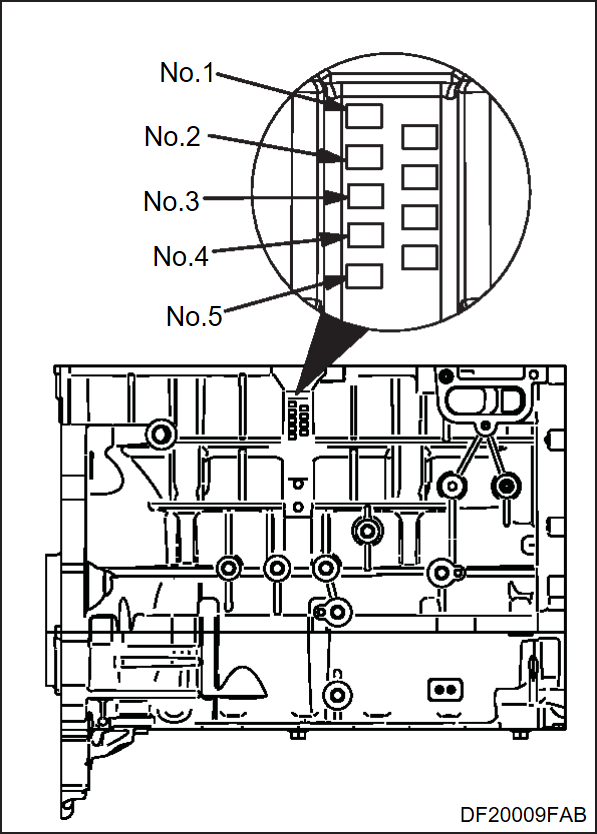
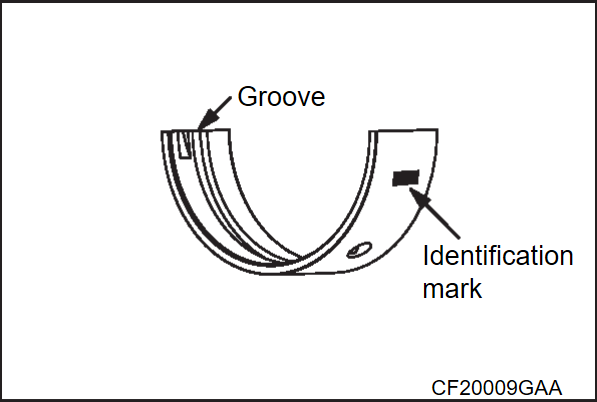
1. When replacing the crankshaft bearing upper, select a bearing with the size corresponding to the cylinder block journal diameter in the table below.
2. The crankshaft bearing upper has an identification mark at the illustrated position.
| ||||||||||||||||
3. Install the selected crankshaft bearing upper.
>>D<< CRANKSHAFT BEARING LOWER INSTALLATION
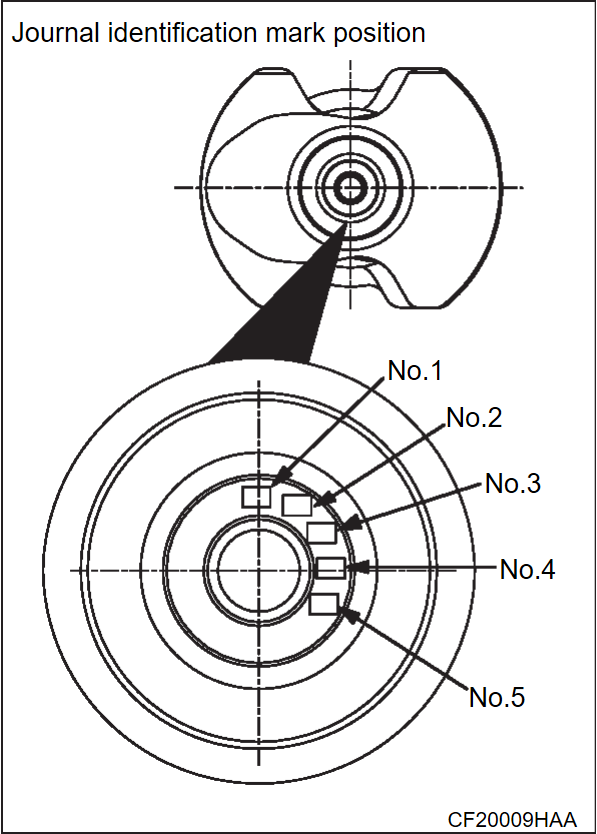
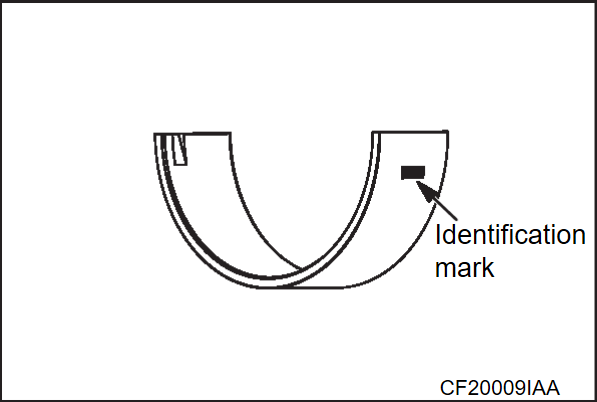
1. When replacing the crankshaft bearing lower, select a bearing with the size corresponding to the crankshaft journal diameter in the table below.
2.
| ||||||||||||||||||||||
3. Install the selected crankshaft bearing lower.
>>E<< CRANKSHAFT BEARING CAP / CRANKSHAFT BEARING BOLT INSTALLATION
1. Install the crankshaft bearing cap with reference to the identification mark as illustrated.
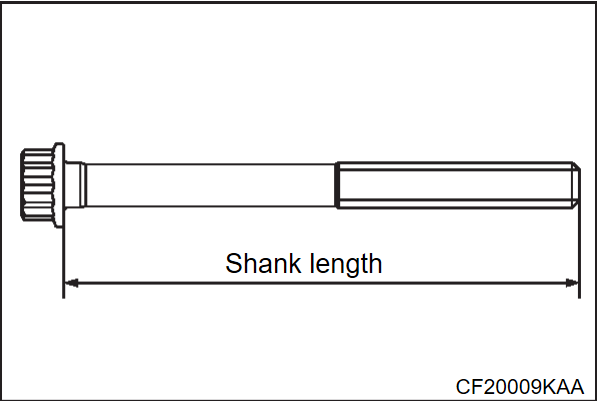
2. Before installing the crankshaft bearing bolts, check that the threads of the bolts are not damaged. If the bolt threads are excessively damaged, replace the bolts with new ones.
The standard shank length of a new bolt is as follows:
Standard value: 75.5 – 76.5 mm (2.97 – 3.01 inches)
3. Apply engine oil to the threaded portion and seat surface of the bolt.
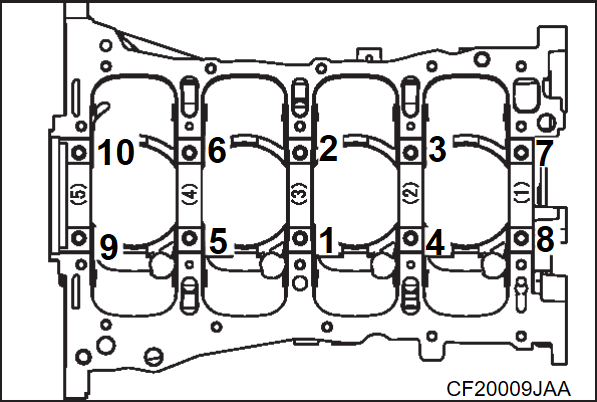
4. Tighten the crankshaft bearing cap bolts to the specified torque in the tightening order indicated.
Tightening torque: 26.5 ± 2.0 N·m (20 ± 1 ft-lb)
| caution |
|
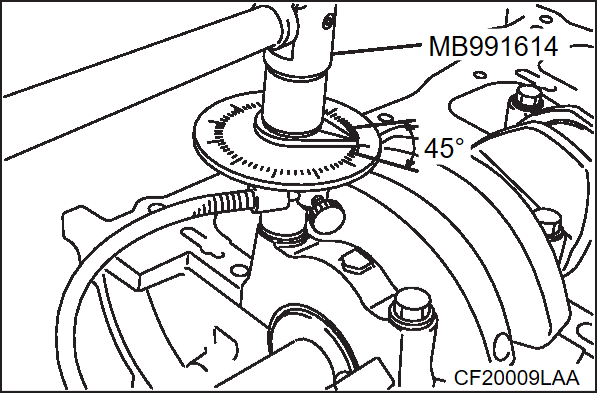
5. Use special tool Angle gauge (MB991614) to tighten bolts 45 degrees according to the tightening order.
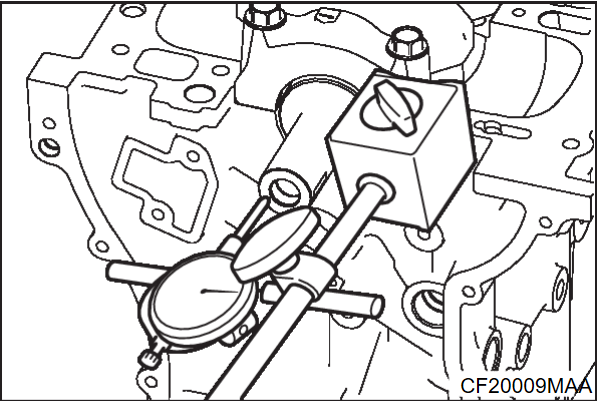
6. Check end play of the crankshaft after installing the crankshaft bearing cap. If the end play exceeds the limit, replace the thrust bearing.
Standard value: 0.05 – 0.25 mm (0.001 – 0.009 inch)
Limit: 0.4 mm (0.015 inch)
![[Previous]](../../../buttons/fprev.png)
![[Next]](../../../buttons/fnext.png)
