[Previous][Next]
REMOVAL AND INSTALLATION
 
 
Pre-removal Operation
  • Rear Combination Light (Body Side) Removal (Refer to Rear Combination Lamp (Body Side) Removal and Installation).
  • Rear Fillet Molding Mount (Rear Bumper Side) Removal (Refer to REMOVAL AND INSTALLATION.)
  • Rear Wheel House Protector (Rear Bumper Side) Mount Clips Removal (Refer to REMOVAL AND INSTALLATION.)
  • Rear End Wiring Harness and Rear Bumper Wiring Harness Combination Connector Disconnect
Post-installation Operation
  • Side Radar Alignment <Vehicles with Side Radar> (Refer to Side Radar Alignment Work Procedure)
  • Rear End Wiring Harness and Rear Bumper Wiring Harness Combination Connector Connection
  • Rear Wheel House Protector (Rear Bumper Side) Mount Clips Installation (Refer to REMOVAL AND INSTALLATION.)
  • Rear Fillet Molding Mount (Rear Bumper Side) Installation (Refer to REMOVAL AND INSTALLATION.)
  • Rear Combination Light (Body Side) Installation (Refer to Rear Combination Lamp (Body Side) Removal and Installation).
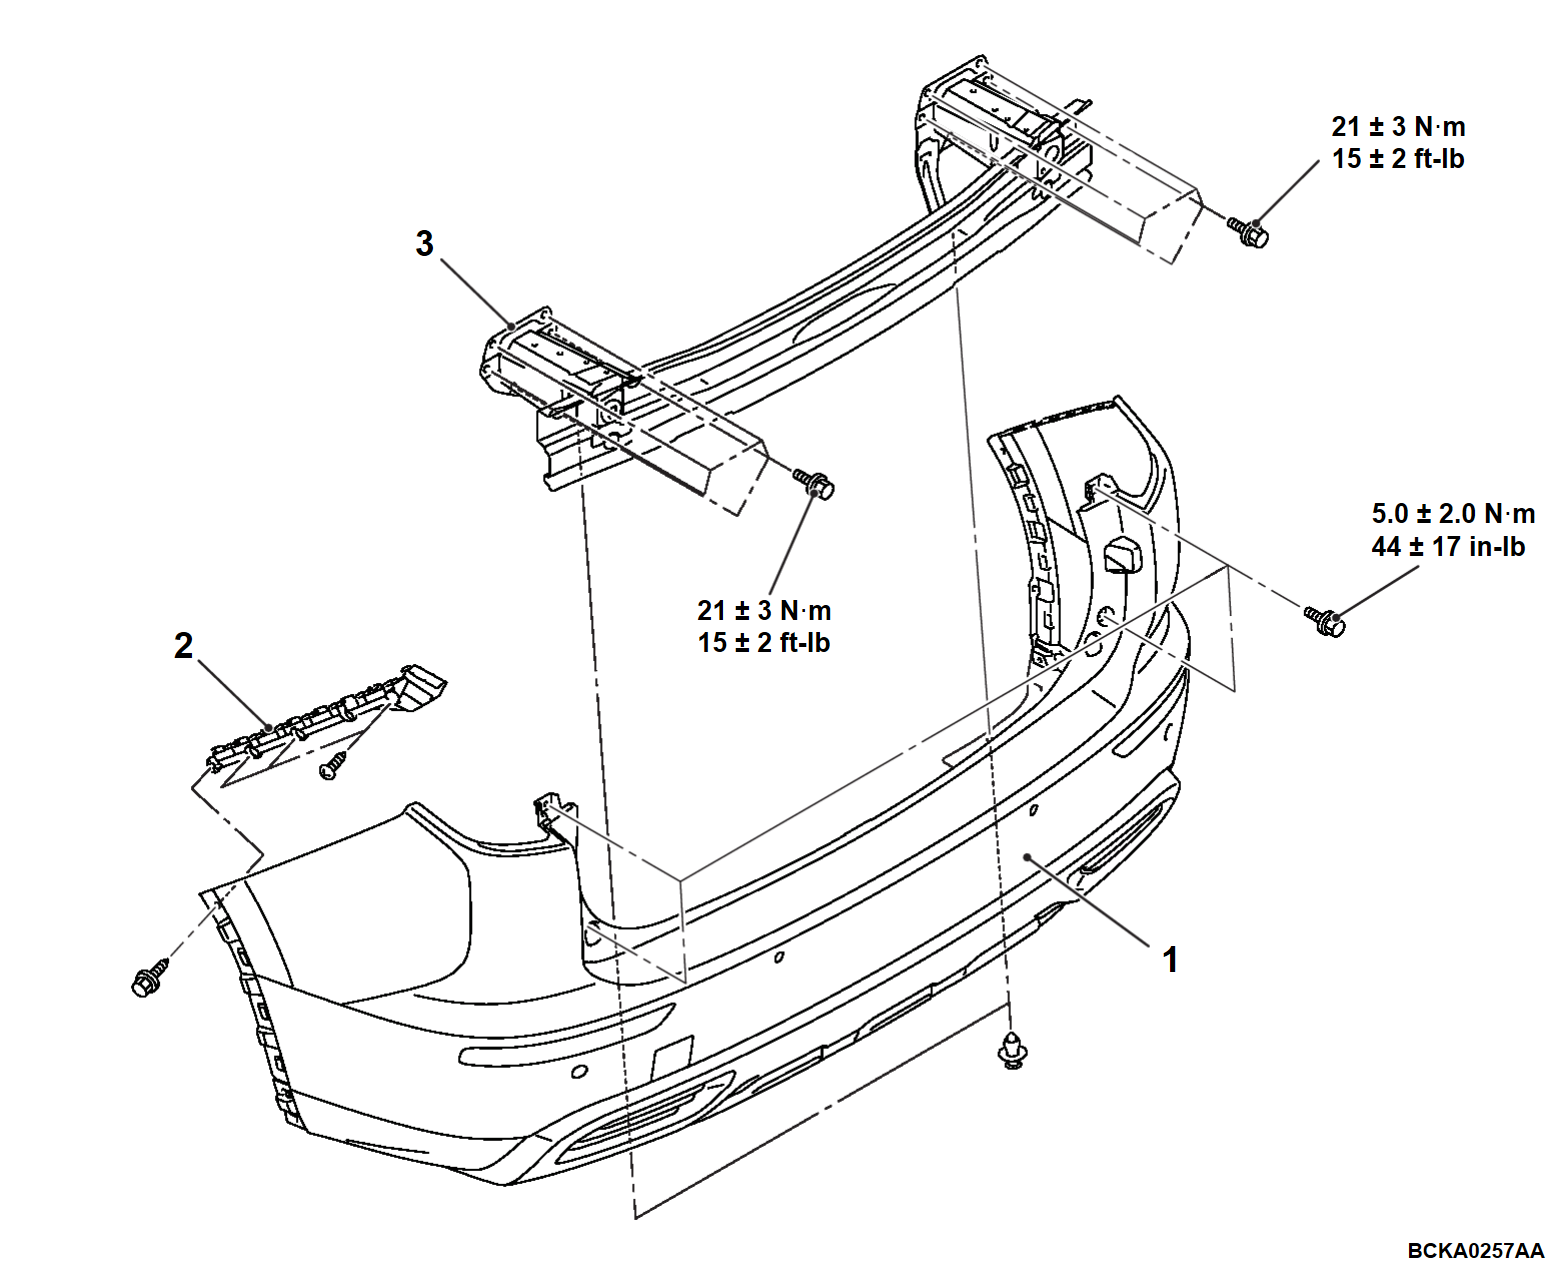
Removal steps
1.Rear bumper assembly
2.Rear bumper face support bracket
3.Rear bumper reinforcement
 
 
INSTALLATION SERVICE POINT
 
 
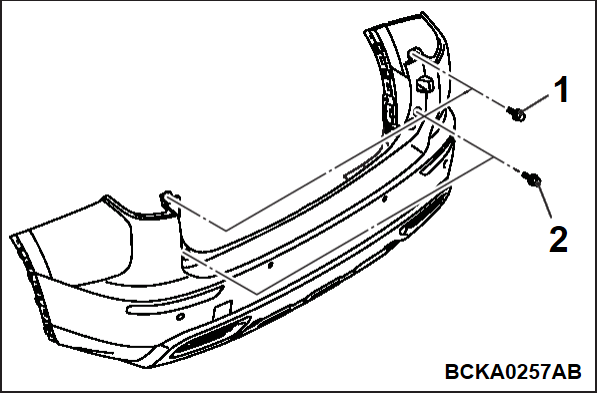
>>A<< REAR BUMPER ASSEMBLY INSTALLATION
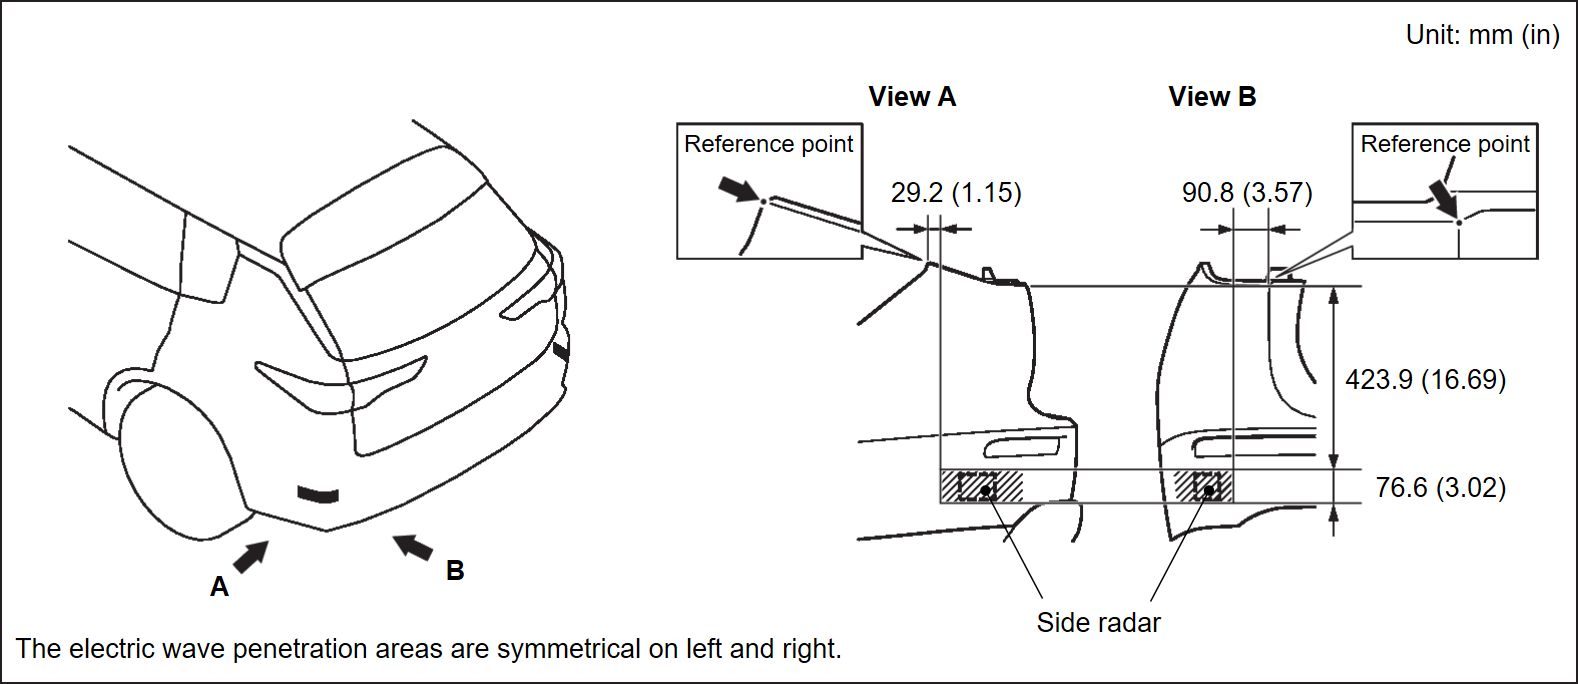
cautionAs for vehicles with side radar, pay attention to the following cautions.
  • Do not apply any sticker, paint or putty to the radar electric wave penetration area (shaded portion). However, only for Mitsubishi motors genuine color, paint can be repaired.
  • Avoid any shocks or scratches.
Tightening the rear bumper bolts in the numerical order to 5.0 ± 2.0 N·m (44 ± 17 in-lb).