Work Procedure
TPMS REGISTRATION WITH TIRE PRESSURE SENSOR ACTIVATION TOOL (J-45295-A)
 With M.U.T.-III SE
| caution | Always use M.U.T.-III SE when tire pressure sensor ID registration. (It cannot be ID registration other than with M.U.T.-III SE.) |
- Turn the ignition switch ON.
- Select "Special Function" in "BCM". Then, select "TPMS ID Registration."
- Touch "OK" on "TPMS ID Registration" screen.
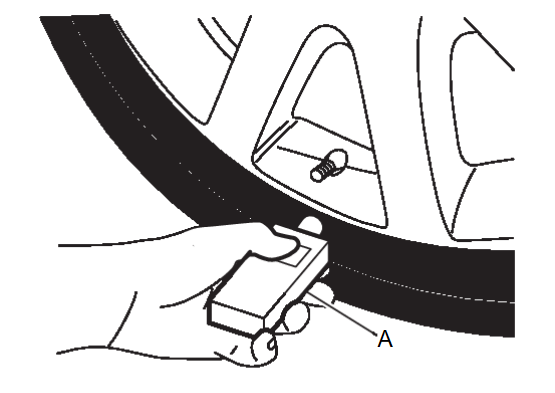
- Hold the tire pressure sensor activation tool (J-45295-A) (A) against the side of the left front tire, near the valve.
- With the tool held at a 0 to 15 degree angle to the tire, press and hold the tire pressure sensor activation tool button until the indicator light turns OFF (approximately 5 seconds).
- Repeat steps 4 and 5 for the remaining tires in this order: right front, right rear and left rear.
- When ID registration is complete, check the following pattern at each wheel.
Sequence ID registration position Turn signal light M.U.T.-III SE 1 Front LH 2 blinks “Yet” ↓“Done”2 Front RH 3 Rear RH 4 Rear LH - After the ID registration procedure for all wheels is complete, press “End” on the M.U.T.-III SE to finish ID registration.
TPMS REGISTRATION WITH SIGNAL TECH II TOOL (J-50190)
| note | The Signal Tech II must be updated with software version 1.1.48 or newer in order to perform the below procedures. The Signal Tech II software updates can only be downloaded from a M.U.T.-III SE unit with ASIST. Other versions of ASIST will not show the updates. |
 With M.U.T.-III SE
- Adjust the tire pressure for all tires to the recommended value. Refer to Tire Air Pressure
 .
. - Turn the ignition switch ON.
- Using M.U.T.-III SE, select "Special Function" in "BCM". Then, select "TPMS ID Registration".
- Select "OK" on "TPMS ID Registration" screen.
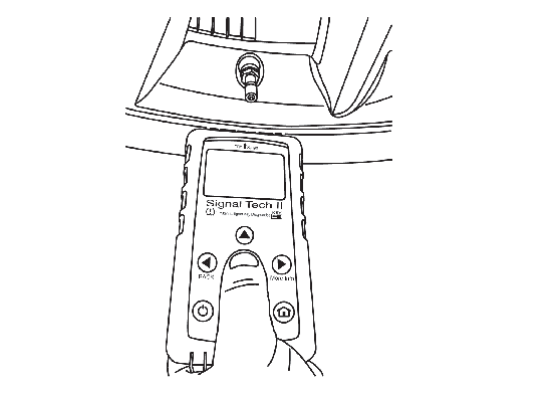
- Turn on the Signal Tech II tool (J-50190).
- Hold the Signal Tech II against the side of the left front tire, near the valve.
- With the tool held at a 0 to 15 degree angle to the tire, select “Activate Sensor” from the main menu, then press and release the “OK” button to activate the sensor. Once the sensor is activated, the vehicle parking lamps will flash and the sensor ID will appear on the M.U.T.-III SE screen.
- Repeat steps 6 and 7 for the remaining tires in this order: right front, right rear and left rear.
- When ID registration is complete, check the following pattern at each wheel.
Sequence ID registration position Turn signal light M.U.T.-III SE 1 Front LH 2 blinks “Yet” ↓“Done”2 Front RH 3 Rear RH 4 Rear LH - Once all sensors have been activated, select “End” on the M.U.T.-III SE to finish ID registration.
![[Previous]](../../../buttons/fprev.png)
![[Next]](../../../buttons/fnext.png)

