Removal and Installation
| caution | Perform the following items when replacing the control valve. |
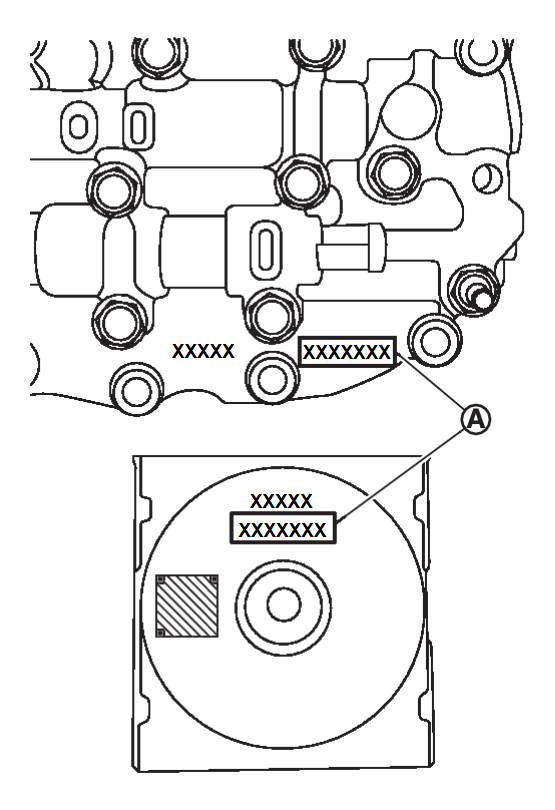
| note | The CD provided with the new control valve contains important calibration data that must be installed with M.U.T.-III SE after installation of the new control valve. Never discard the CD. |
REMOVAL
1. Disconnect battery negative terminal. Refer to Exploded View .
.
 .
.2. Remove engine under cover. Refer to Exploded View .
.
 .
.3. Remove drain plug from oil pan and then drain the CVT fluid.
4. Remove drain plug gasket.
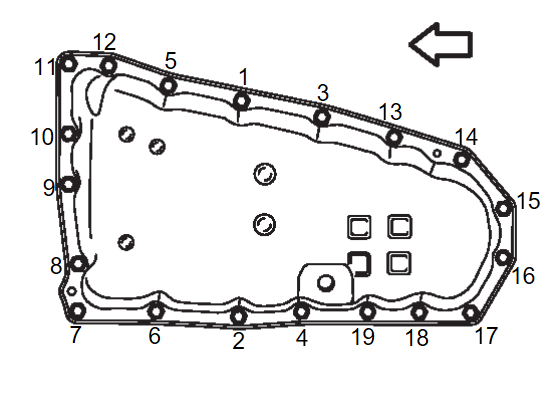
5. Remove the oil pan bolts, and then remove the oil pan and oil pan gasket.
6. Remove the magnets from the oil pan.
| note | Be sure to note the location of the magnets in the oil pan before removal. |
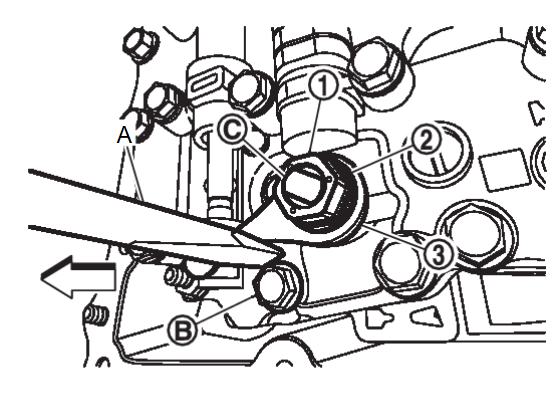
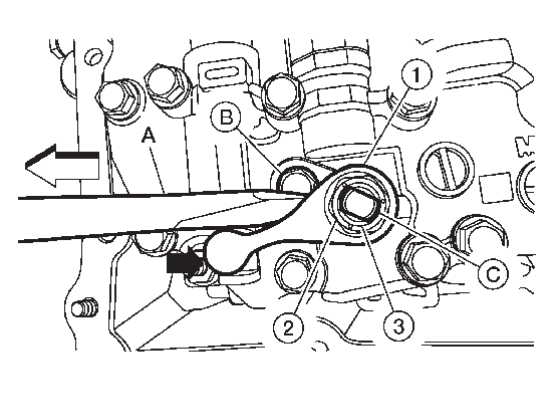
7. Use a suitable tool (A) between the manual plate  and bolt
  and remove lock nut
  . Remove spring washer
  and manual plate from manual shaft
  .
.
 and bolt
  and remove lock nut
  . Remove spring washer
  and manual plate from manual shaft
  .
.| caution |
|
 | :Vehicle front |
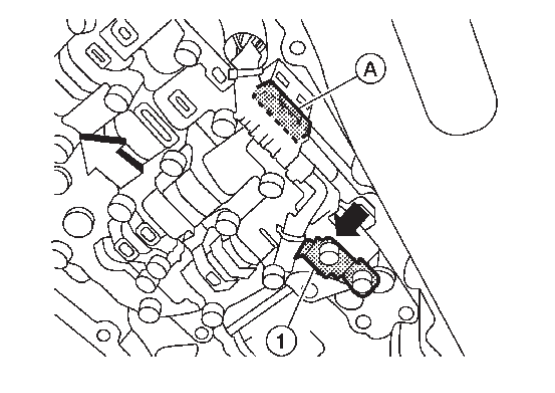
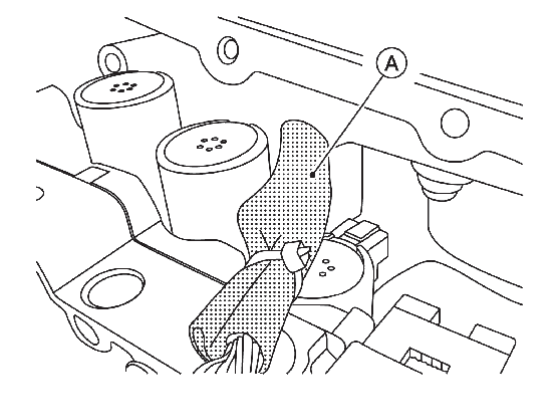
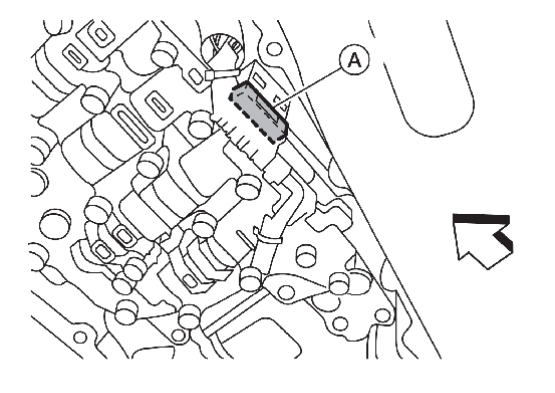
9. Remove CVT fluid temperature sensor bracket  , and disconnect control valve harness connector
  .
.
 , and disconnect control valve harness connector
  .
. | : Bolt |
 | : Vehicle front |
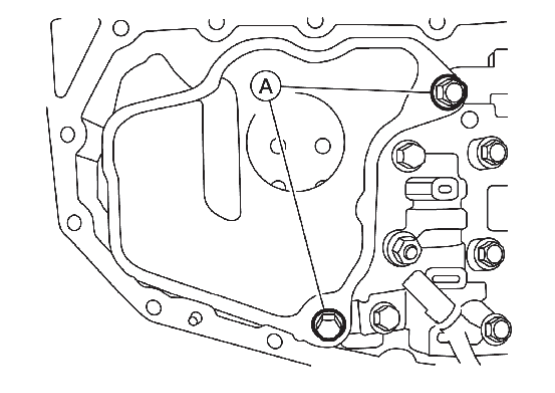
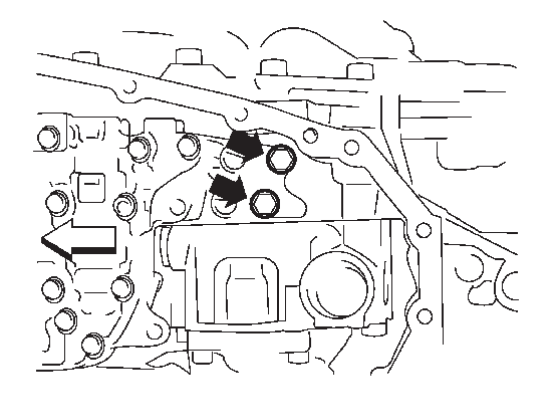
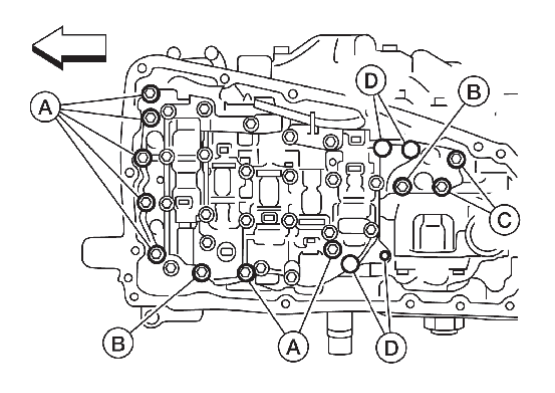
11. Remove the control valve bolts  and
and  , and then remove the control valve from the transaxle case.
 and
and  , and then remove the control valve from the transaxle case.
 | : Vehicle front |
| caution | Never drop the control valve, ratio control valve and manual shaft. |
| note | Control valve bolt heads may be marked with a number "7". Bolts marked as "7" are the bolts that need to be removed in order to remove the control valve. |
INSTALLATION
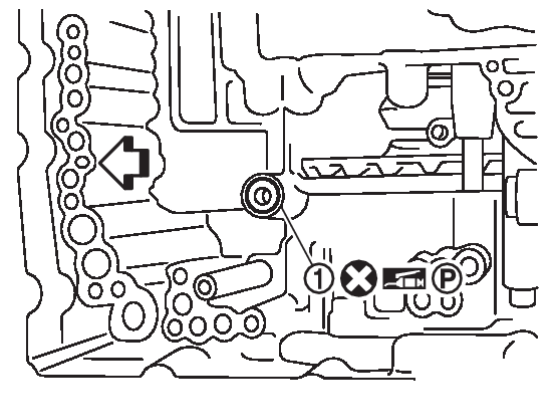
1. Install the lip seal  to the transaxle case.
 to the transaxle case.
| caution |
|
 | : Vehicle front |
2. Install the control valve to the transaxle case.
| caution |
|
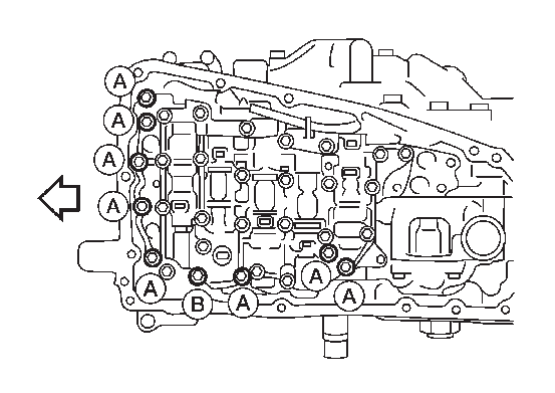
3. Secure the control valve using bolts  ,
,  and
and  .
.
 ,
,  and
and  .
.| caution | Ensure the harness is correctly routed and does not get pinched. |
| note | Leave bolt holes  blank at this step. blank at this step. |
| Bolt | Bolt length mm (in) | Number of bolt |
 | 54 (2.13) | 7 |
 | 44 (1.73) | 2 |
 | 25 (0.98) | 2 |
 | : Vehicle front |
4. Connect the control valve harness connector  .
.
 .
. | : Vehicle front |
| caution | Securely insert the harness connector until it clicks and locks. |
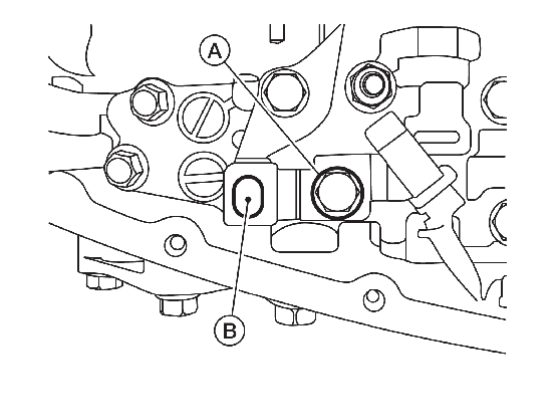
5. Install the CVT fluid temperature sensor bracket to the valve body with bolt  .
.
 .
.| note | Leave bolt hole  blank as it will be used to secure the oil strainer at a later step. blank as it will be used to secure the oil strainer at a later step. |
| Bolt | Bolt length mm (in) | Number of bolt |
 | 54 (2.13) | 1 |
6. Install new O-ring to oil strainer assembly.
| caution |
|
| note | New oil strainer come with a new O-ring already installed. |
8. Install the manual plate  using the steps below:.
 using the steps below:.
- Align the slot of the manual plate with the manual shaft
 .
. - Align the end of the manual plate with the cutout (
 ) of the manual valve.
caution Install the end of the manual plate into the cutout of the manual valve. - Install spring washer
 and lock nut
  .
. - Insert suitable tool (A) between manual plate and bolt
 and tighten lock nut.
caution Using suitable tool, be sure to hold the manual plate in a fixed position. Be sure not to damage control valve while using suitable tool.
 | : Vehicle front |
9. Install the magnets into the oil pan in their original location.
| caution | Completely clean the iron powder from the magnet area of oil pan and the magnet. |
10. Install the oil pan to the transaxle case with the following procedure.
(1) Install the oil pan gasket to the oil pan.
| caution |
|
(2) Install the oil pan assembly to the transaxle case, and then temporarily tighten the oil pan bolts.
(4) Tighten the oil pan bolts again clockwise from (1) shown to the specified torque.
11. Install drain plug gasket to drain plug.
| caution | Never reuse drain plug gasket. |
12. Install drain plug to oil pan.
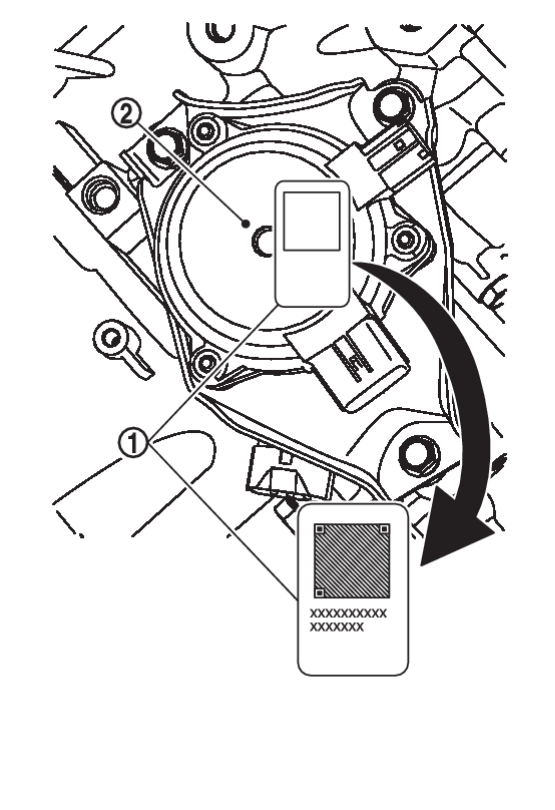
13. Install new QR code sticker  on shift actuator
  .
.
 on shift actuator
  .
.| note | If sticker is not included with parts, contact Powertrain Call Center to report. |
14. Flush the CVT fluid cooler and lines.
15. Connect battery negative terminal. Refer to Exploded View .
.
 .
.16. Fill the transaxle assembly with CVT fluid. Refer to Refilling .
.
 .
.17. Perform "ADDITIONAL SERVICE WHEN REPLACING CONTROL VALVE." Refer to Description .
.
 .
.![[Previous]](../../../buttons/fprev.png)
![[Next]](../../../buttons/fnext.png)
