Removal and Installation
| caution | Never damage the front door panel. |
REMOVAL
Driver Side
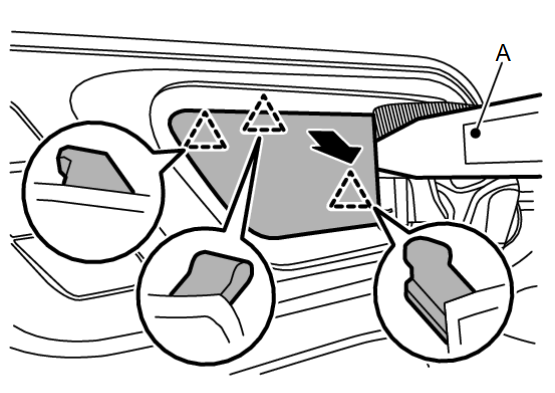
1. Fully open driver side front door.
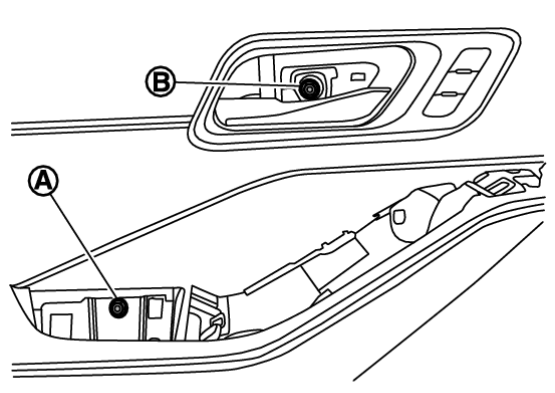
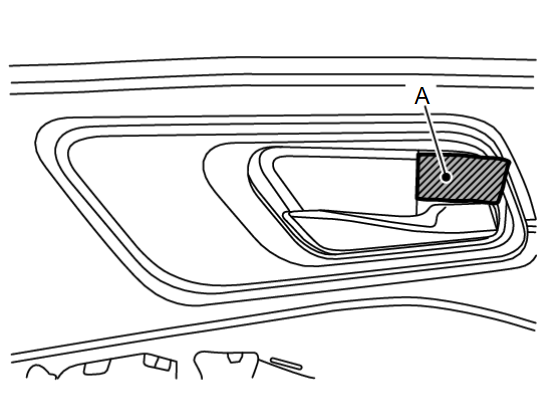
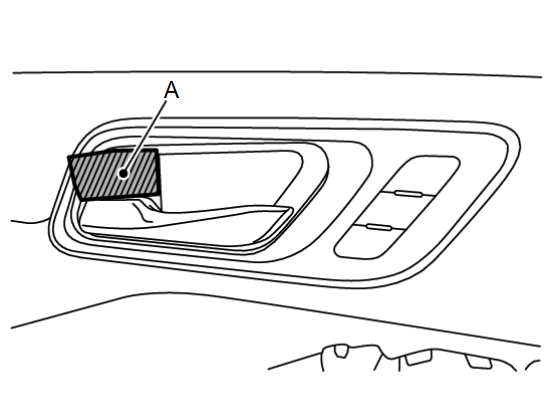
2. Remove pull handle cap.
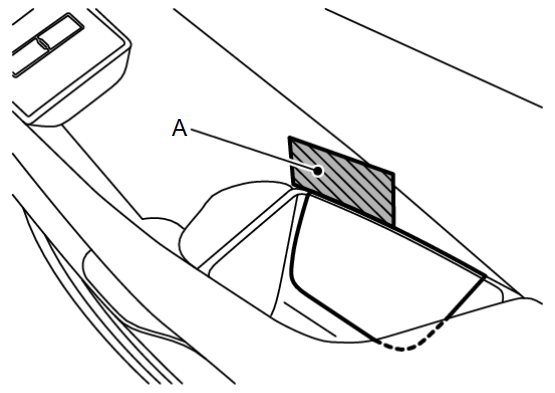
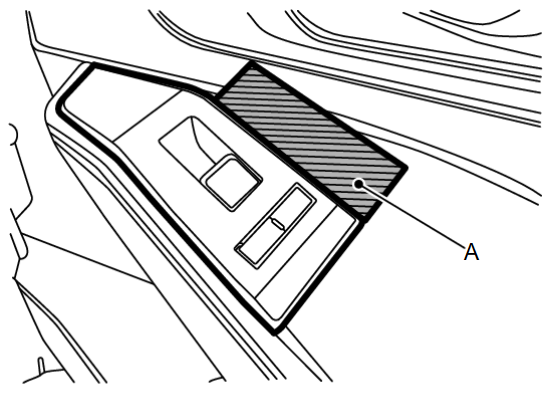
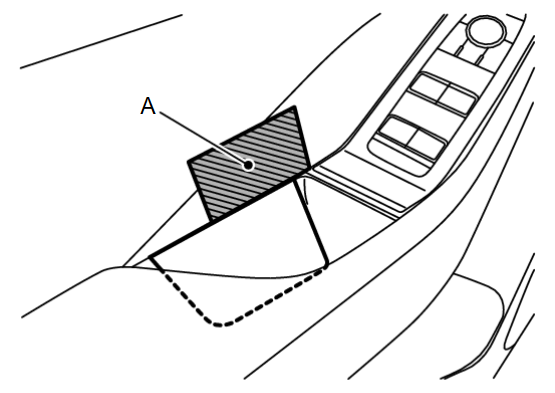
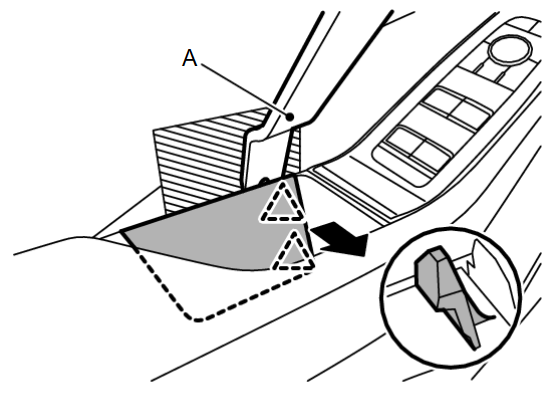
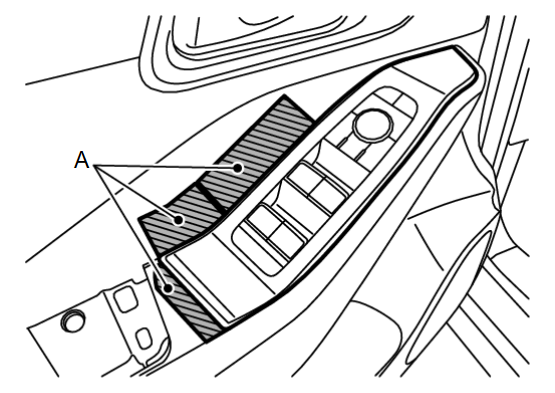
3. Remove power window switch finisher.
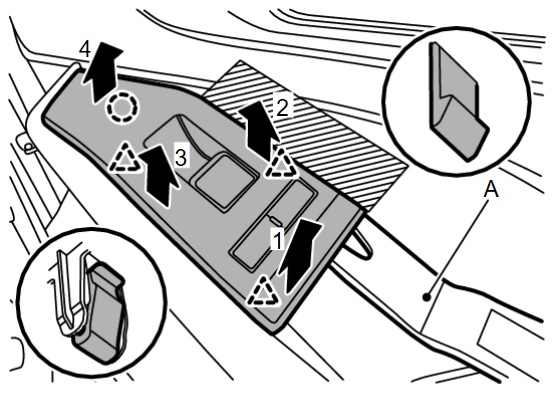
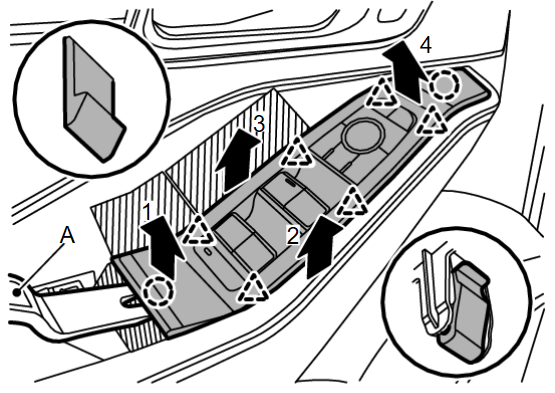
(2) Disengage fixing clips and pawls using a remover tool (A) according to numerical order 1→4 indicated by arrows as shown in the figure.
 | : Clip |
 | : Pawl |
(3) Disconnect harness connectors, and then remove power window switch finisher.
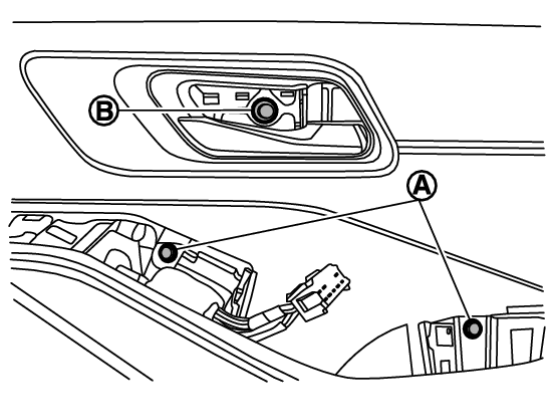
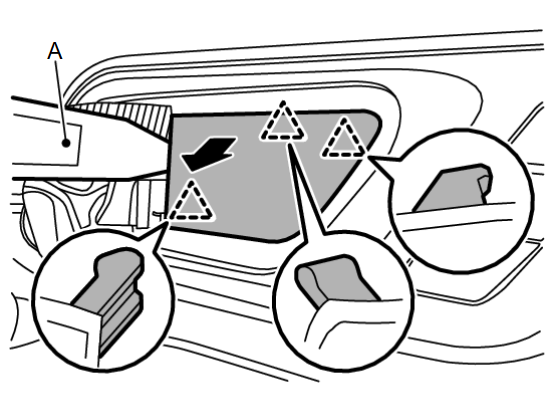
4. Remove inside handle cap.
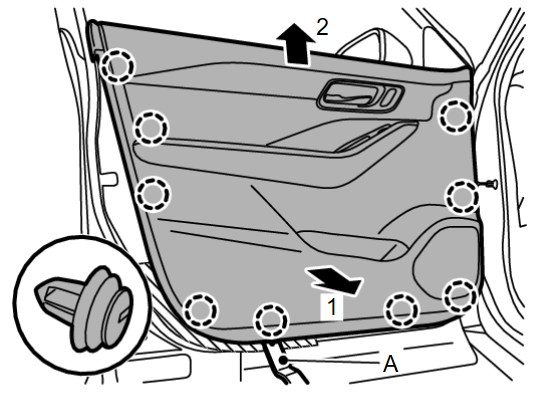
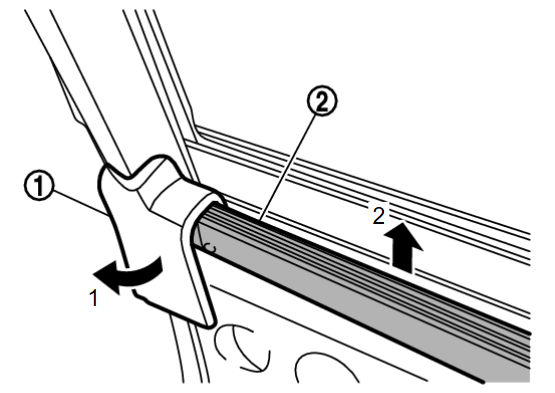
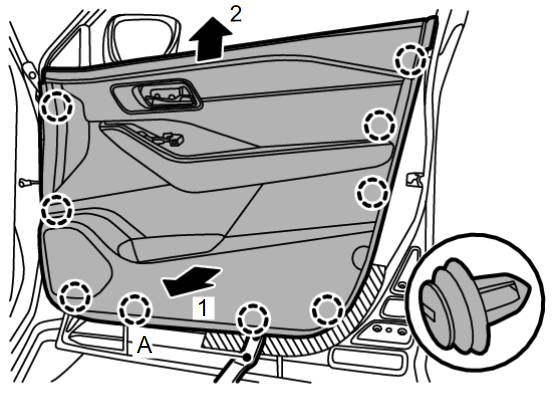
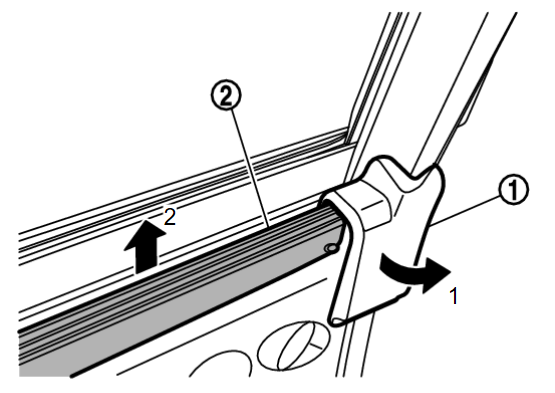
7. Disengage front door finisher fixing clips using a remover tool (A) according to numerical order 1→2 indicated by arrows as shown in the figure.
 | : Clip |
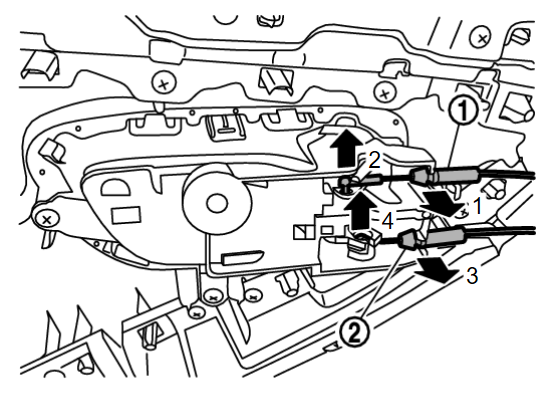
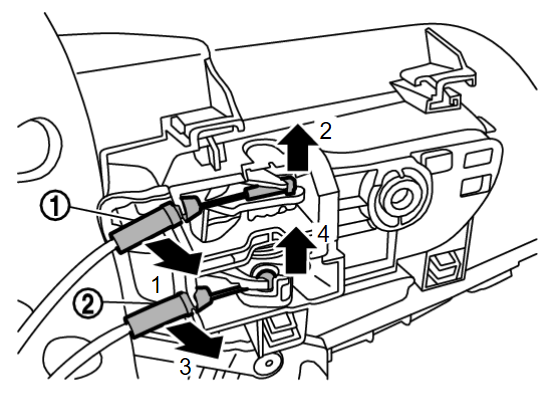
8. Disconnect lock knob cable  and inside handle cable
  from inside handle according to numerical order 1→4 indicated by arrows as shown in the figure.
 and inside handle cable
  from inside handle according to numerical order 1→4 indicated by arrows as shown in the figure.
9. Disconnect harness connectors, and then remove front door finisher.
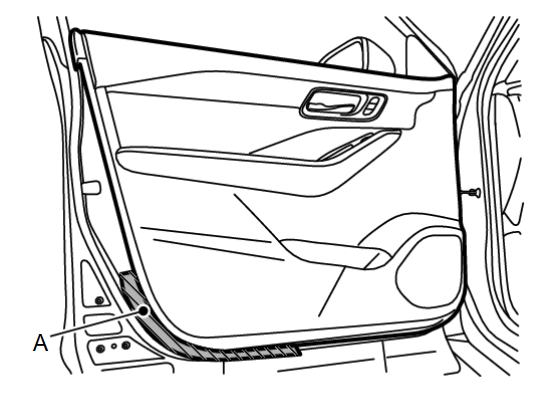
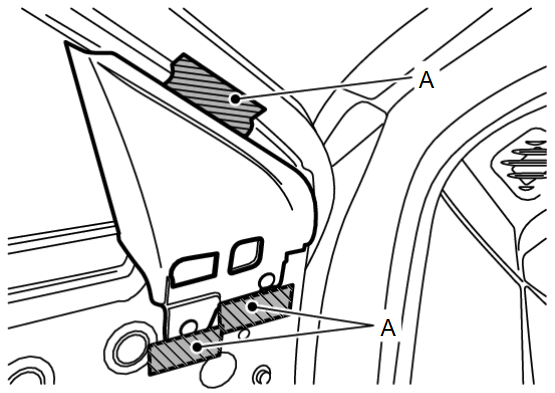
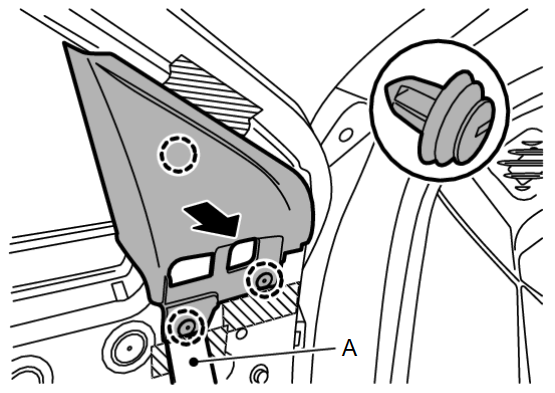
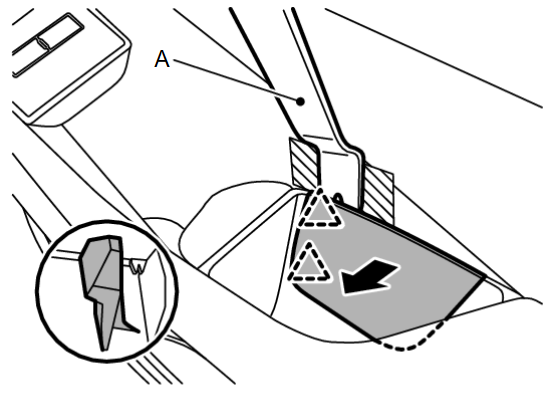
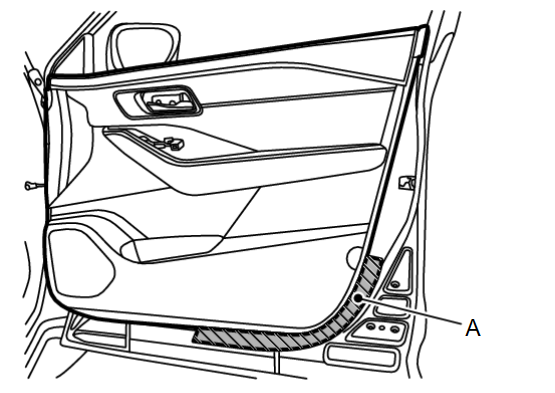
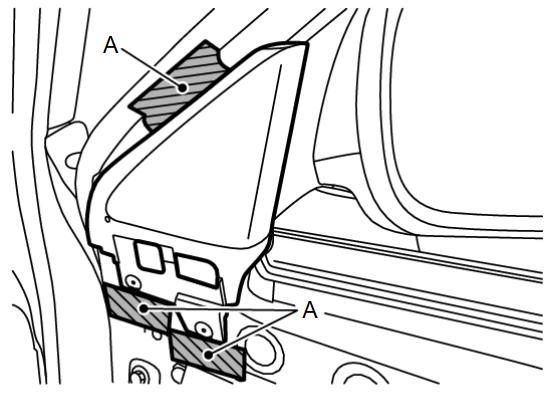
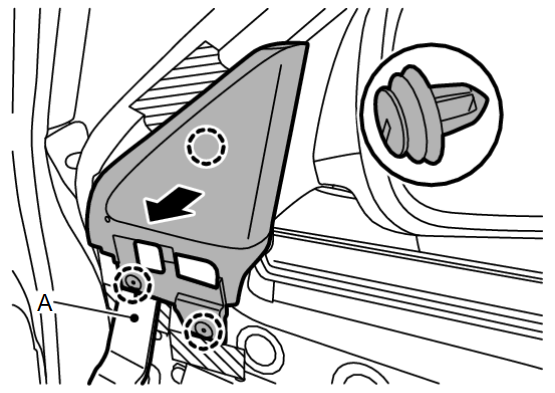
10. Remove door corner cover
Passenger Side
1. Fully open passenger side front door.
2. Remove pull handle cap.
3. Remove power window switch finisher.
(2) Disengage fixing clip and pawls using a remover tool (A) according to numerical order 1→4 indicated by arrows as shown in the figure.
 | : Clip |
 | : Pawl |
(3) Disconnect harness connectors, and then remove power window switch finisher.
4. Remove inside handle cap.
7. Disengage front door finisher fixing clips using a remover tool (A) according to numerical order 1→2 indicated by arrows as shown in the figure.
 | : Clip |
8. Disconnect lock knob cable  and inside handle cable
  from inside handle according to numerical order 1→4 indicated by arrows as shown in the figure, and then remove front door finisher.
 and inside handle cable
  from inside handle according to numerical order 1→4 indicated by arrows as shown in the figure, and then remove front door finisher.
10. Disengage door corner cover fixing clips using a remover tool (A), and then remove door corner cover.
 | : Clip |
INSTALLATION
Note the following items, and then install in the reverse order of removal.
| caution |
|
![[Previous]](../../../buttons/fprev.png)
![[Next]](../../../buttons/fnext.png)
 and mounting bolt
  .
.