Component Inspection
CVT BELT INSPECTION
| caution | Never allow any chemicals or fluids other than NS-3 CVT fluid or equivalent to enter the CVT assembly. Never allow any foreign debris, dust, dirt, etc. to enter the CVT assembly. |
| note | Before lifting the vehicle:
|
- Remove the control valve. Refer to Removal and Installation
 .
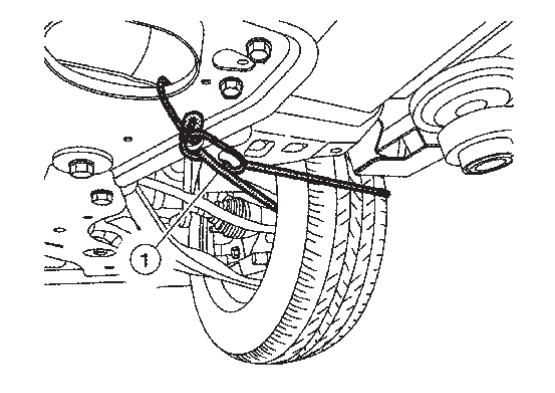
. - Secure the right front tire with a suitable strap
 . This will assist in making the belt turn.
 - Mark the left front tire with a suitable marking. This will ensure all 360° of the belt is inspected.
- Using borescope J-51951 with mirror attachment, visually inspect the entirety of the two sides of the belt
 that come in contact with the pulleys
  . Slowly and carefully turn the left front tire one full turn in the forward rotation to view all of the belt.
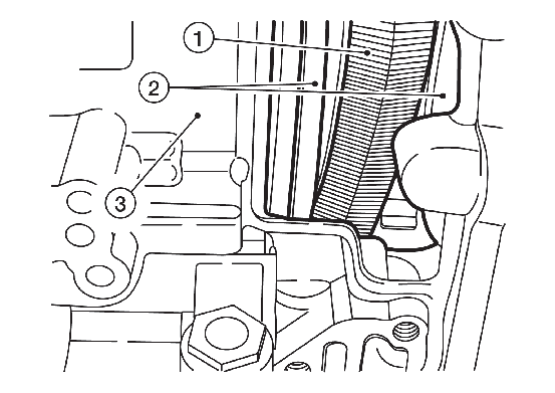
CVT case 
Inspect these sides 
Never inspect these sides caution If the tire is rotated in the rearward rotation, the camera lens may get caught between the belt and the pulley. note - Be sure to remove the protective film from the mirror before the first use.
- Clean the camera lens and mirror before each inspection. Use 90% isopropyl alcohol, and a lens swab from Lens Swab packet J-51963.
- Before inspecting, make sure the camera handle’s AA batteries are fresh and the LCD monitor’s battery is charged.
- Point the scope up and towards the rear of the vehicle.
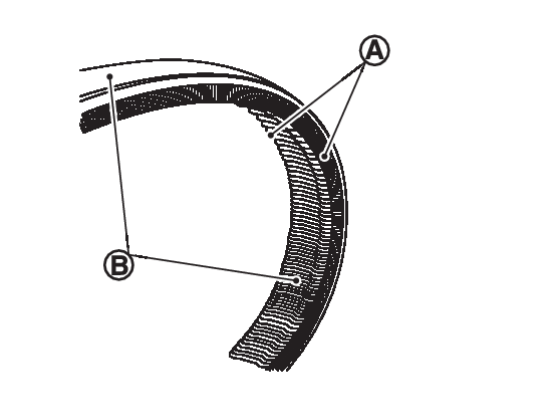
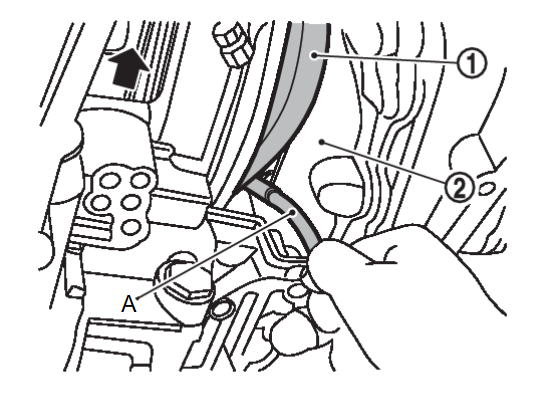
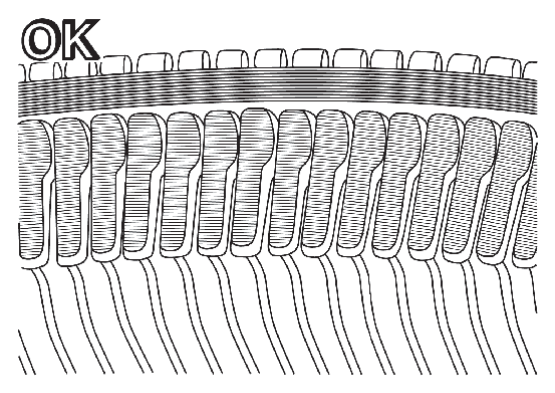
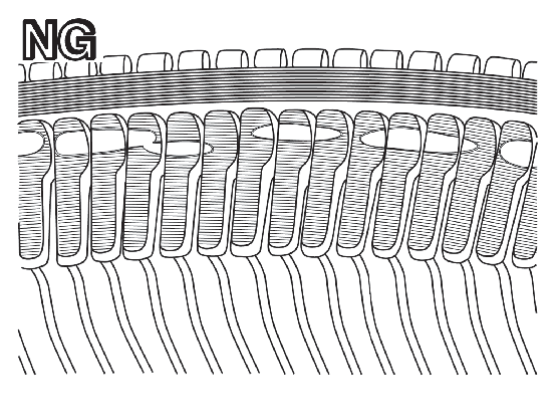
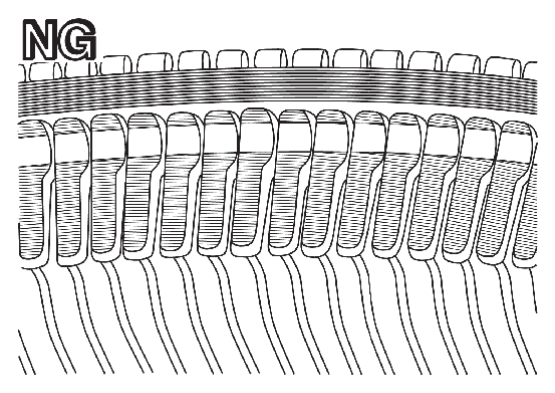
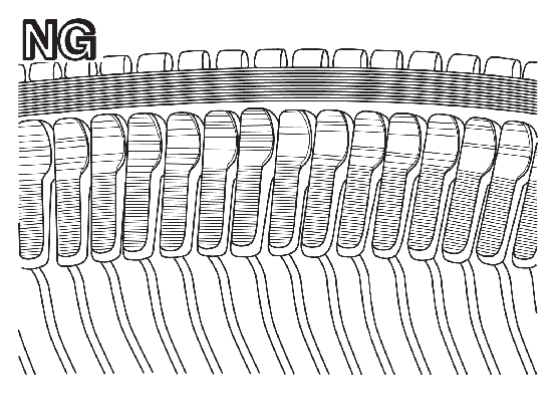
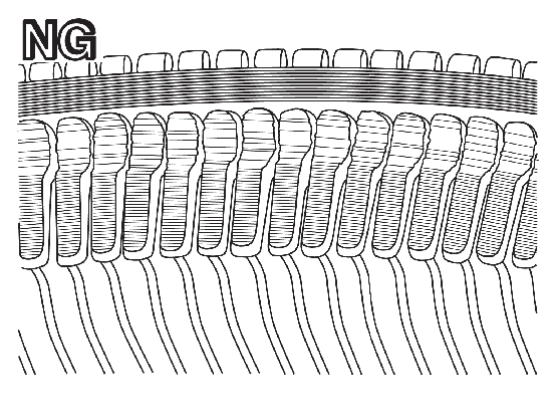
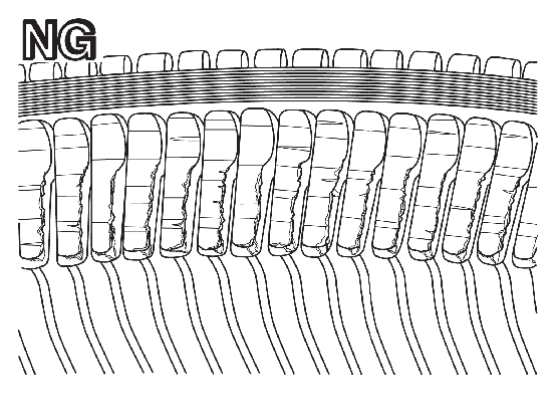
- First inspect the entire 360° of the passenger side of the belt that comes in contact with the pulley. Refer to figures below for examples of normal and excessive wear patterns.

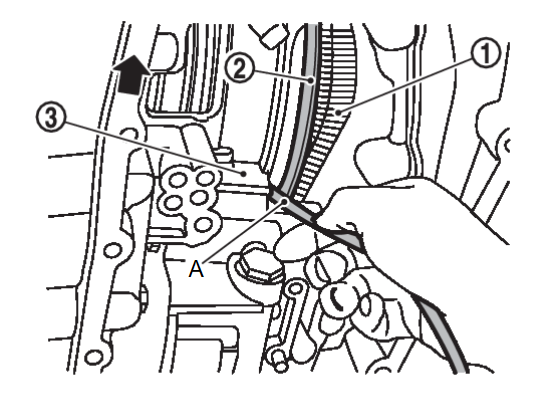
Belt 
Pulley 
Transaxle case A Camera flexible tube 
: Front note - Insert the camera lens between the CVT case and the pulley.
- Insert the lens approximately 7 inches, and then view the side of the belt that contacts the pulley.
- Holding the borescope with one hand allows for turning the tire with the other hand.
- If the inspection result is OK on all 360° of the passenger side, inspect all 360° of the driver side of the belt. Refer to figures below for examples of normal and excessive wear patterns.

Belt 
Pulley A Camera flexible tube 
: Front
![[Previous]](../../../buttons/fprev.png)
![[Next]](../../../buttons/fnext.png)
